
“Seemed like a good idea at the time” must be the common theme that links together millions of homeowners who now get to stare daily at the questionable design choices of a home’s previous occupants. Whether your walls feature wallpaper from bygone days, paneling that went out in the ’70s or mirrored tile that no one in the history of design ever thought was a good idea, there are ways to refresh and restore your vertical real estate and crush ugly walls.
If you’ve got a tricky-to-remove treatment such as paneling, tile or textured drywall, a little creativity and flexibility go a long way toward solving the problem. Before you swing into demolition mode, a little surface assessment is needed so you can determine which ugly wall treatments can go, what you can (or will have to) work around or over, and what can be transformed.
Paneling that’s Past its Prime
Old paneling is one of the trickiest ugly walls to overcome, and there’s still a heck of a lot of it around today. It’s possible to remove it, but not without a lot of effort and possible damage to the surface underneath if glue has been used in addition to easy-to-remove paneling nails.
If that falls within your adventure confidence zone, determine whether or not your paneling is glued to the wall. Remove a small piece of paneling, which may involve pulling off some molding to access an open edge, or remove an outlet or switch plate cover and see if you can determine its application there. If the wall paneling isn’t glued down, go ahead and rip it all out.
If it is glued down, know that you will probably need to replace the drywall. When you rip out the paneling, glue will peel away the papered surface of the drywall underneath. Spot-patching of damaged drywall is a major job, not always successful when the area to be repaired is extensive.
Attempts at paneling camouflage generally aren’t successful, either, as we’ve told many a caller to our Money Pit Podcast who has considered plastering the grooves in existing paneling to create a smooth surface. Instead, if you’re going to keep paneling in place, play into its texture and graphic elements by priming it and giving it a fresh coat of paint. You can either use one color for a simpler backdrop, or make the most of paneling’s built-in vertical guidelines by painting subtle stripes on the surface in contrasting tones or sheens.
Pitiful Plaster
As the owner of an old house, I’ve had my share of plaster walls and ceilings to deal with. Plaster walls were first created by nailing strips of wood (called “lath”) to the wood studs and then covering that with wet plaster. Now, over 100 years later, those original ugly walls of heavy plaster have worn out, and in some cases even become dangerous when slabs break free of ceilings and fall.
Once again, your first step in the rip-out-or-live-with-it evaluation is determining the condition of the plaster. Plaster is generally durable unless it gets wet, at which point it can lead to dangerous sags, especially if it’s of that late 1800’s to early-1900s variety that was installed over wood lath. If yours is in good shape, you’re best off leaving it as is and installing new drywall over the plaster for a super-smooth remodeling canvas. It requires re-trimming the doors and adjusting the electrical outlets, but it beats the massive amounts of dust and dirt that’ll fill the air if you attempt a time-consuming demolition.
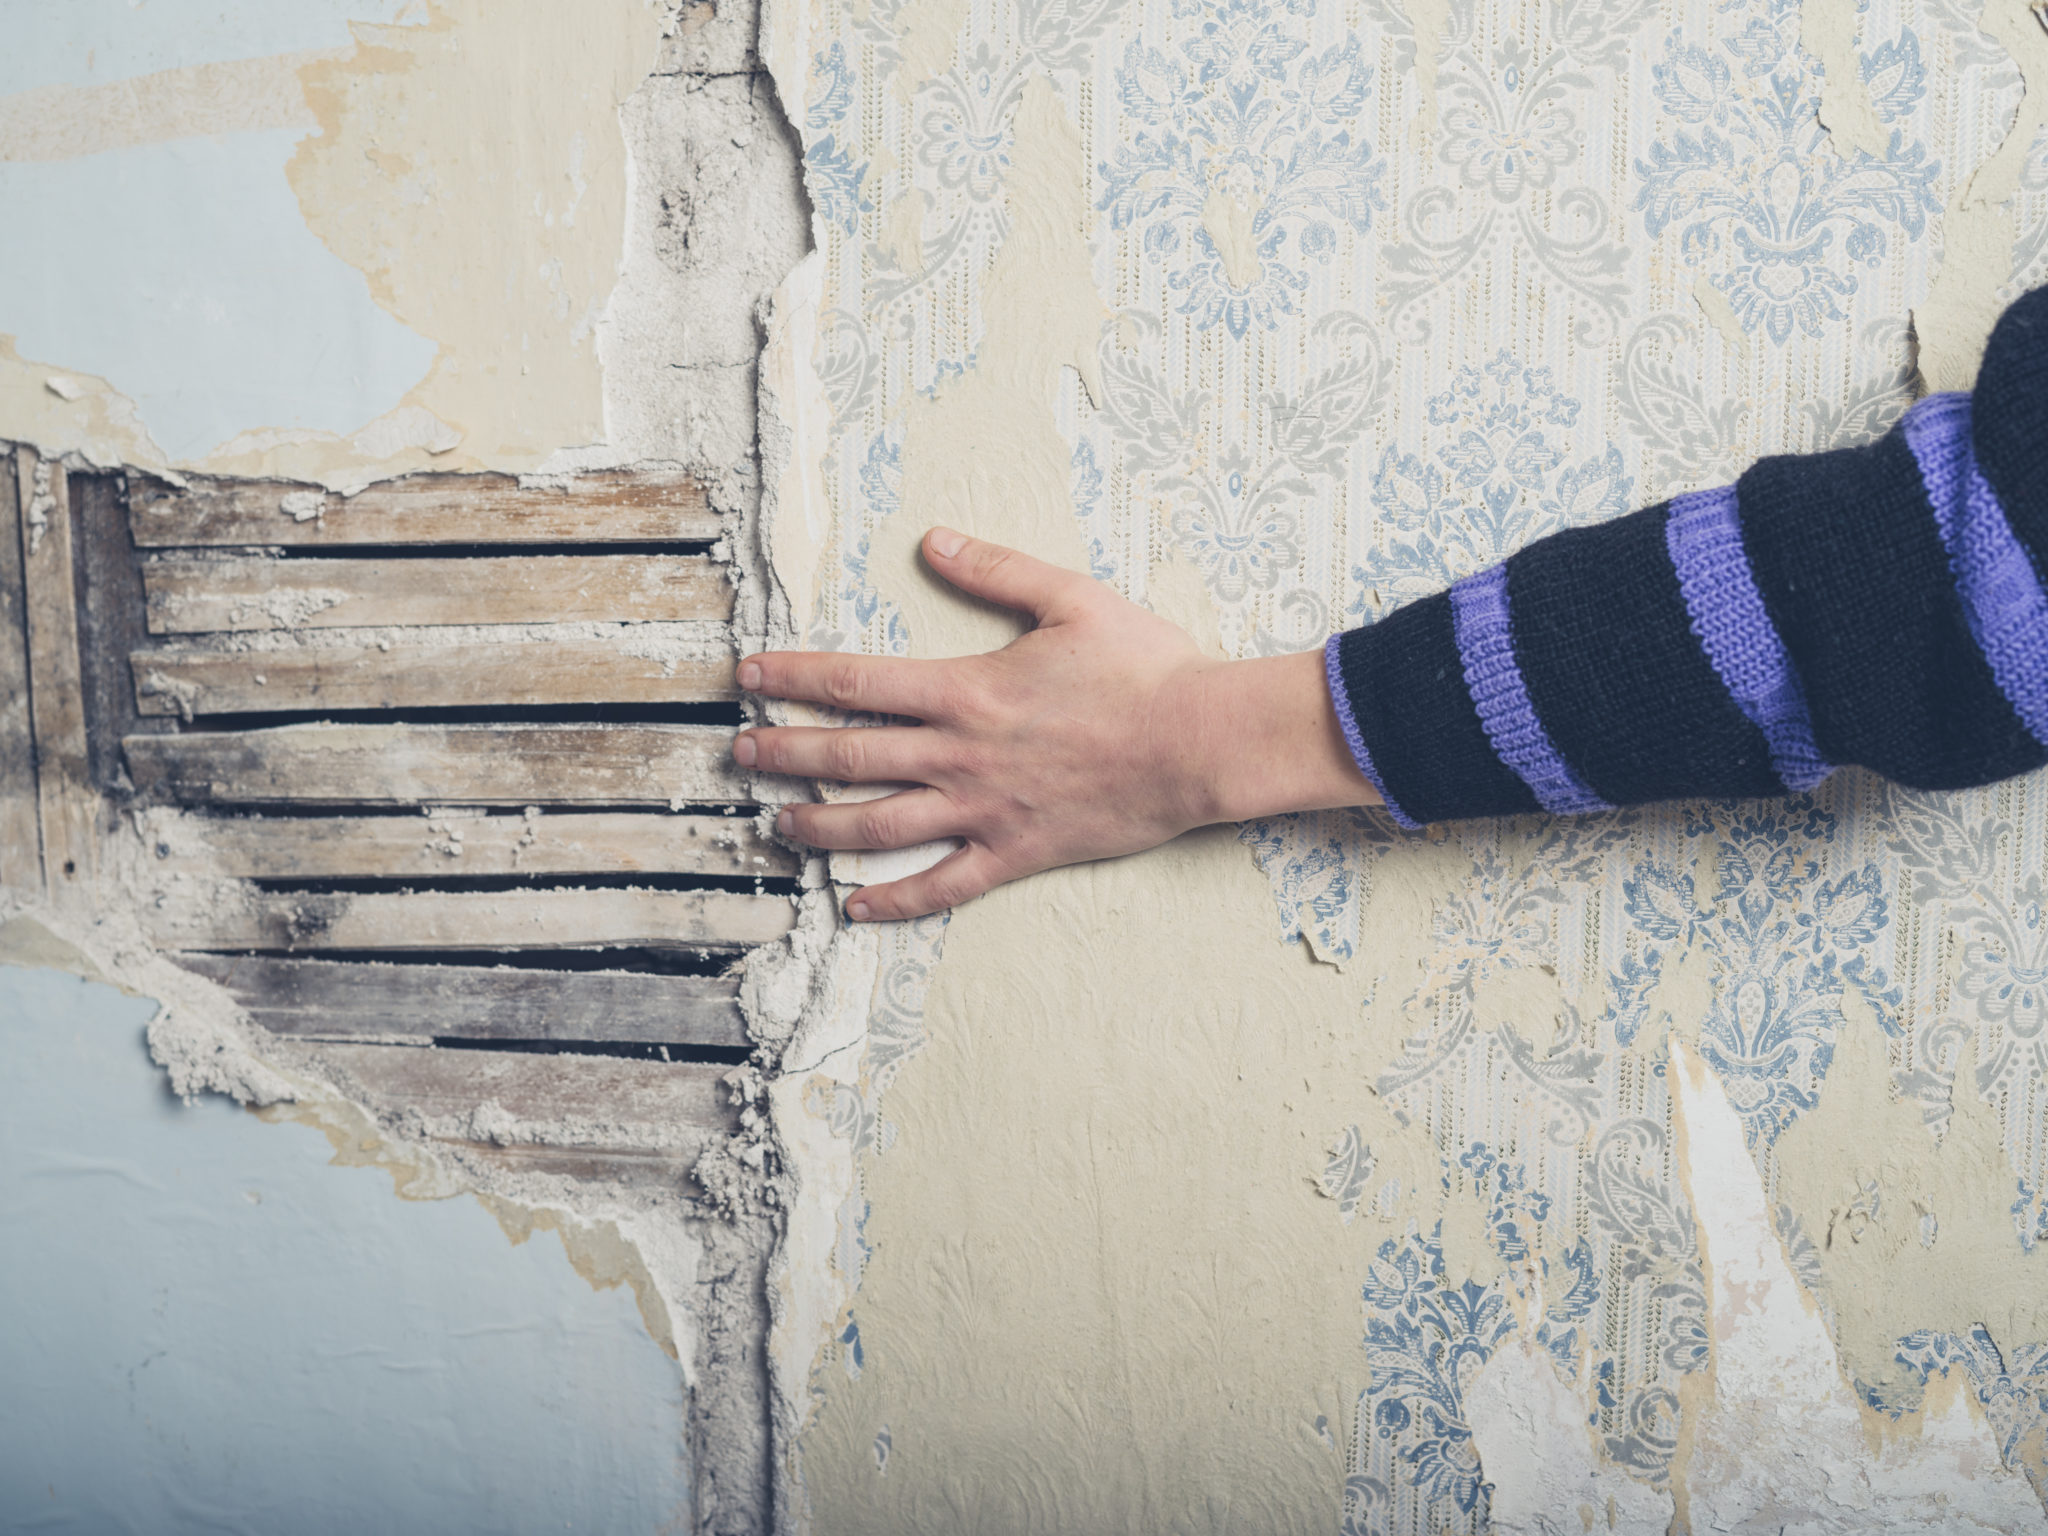
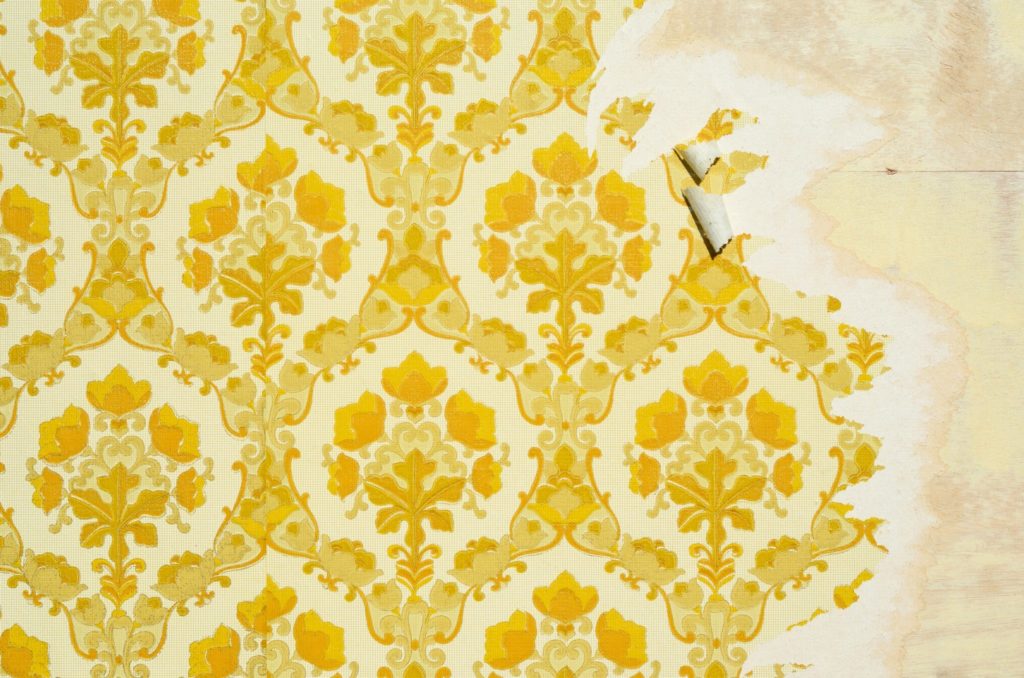
Wallpaper Woes
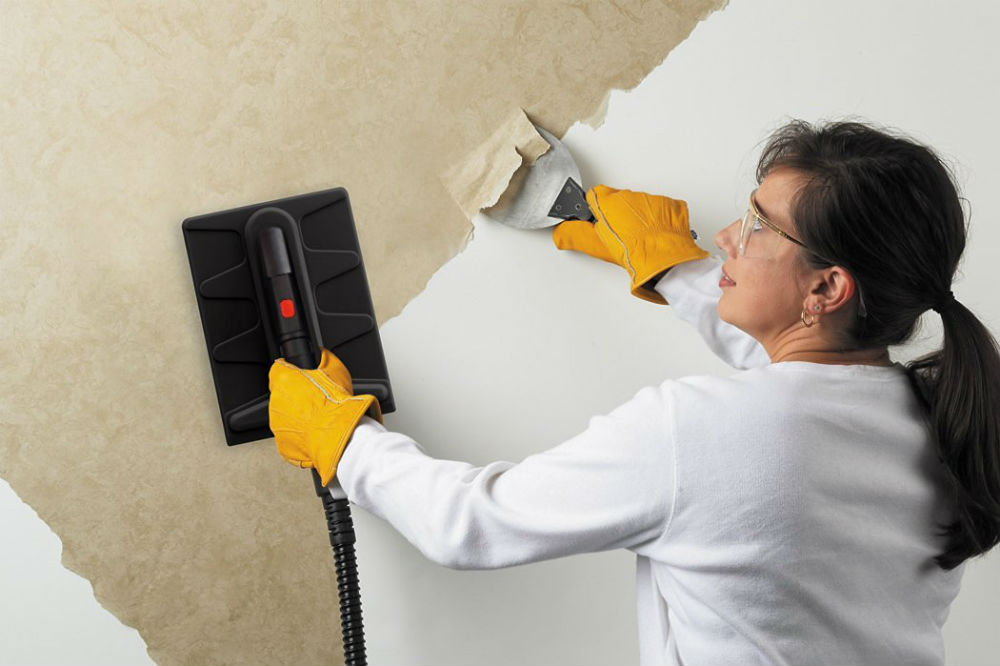
When it comes to wallpaper removal, we recommend using a rented steamer over any other gadget on the market (and believe us, there are a zillion gadgets out there). A steamer will work with either paper or vinyl-based coverings. Make the going easier with vinyl by lightly scoring it from floor to ceiling beforehand to allow the steam to get underneath the surface for a smoother liftoff.
When you’re ready to go, work one small area at a time (generally the width of one roll of the wallpaper), moving from the top down and heavily saturating the wall surface as you go. As the steam loosens the adhesive, you’ll be able to pull it back and away for easy removal. Once your walls are unpapered, use a mixture of distilled white vinegar and water to remove any remaining adhesive, and be sure to prime walls before applying a new finish.
Although this is a project you most likely can do yourself with enough time, determination and patience, you might want to consider hiring a professional to do it. It’s just not pleasant, especially when it comes to wallpaper that’s been up a long time, which is usually the most hideous and, therefore, most in need of a change. You might find it’s worth giving up a few lattes and investing in a pro who can get your wall paint-ready for you to take it from there.
Textured Walls & Ceilings
Starting back in the 1980’s, builders figured out that textured walls and popcorn ceilings led to a lot less complaints about lousy workmanship. Before globing on the textured goo, drywall contractors actually had to have a fair degree of skill to apply a smooth spackle finish – resulting in lots of complaints from customers when their walls displayed bulges and bows. Enter the textured era! Now with thick coats of textured materials, all those complainers went away, and customers seemed to like the textured look, for a while. Now, however, we’re over the textured look and for many its gotta go~
It’s possible to minimize the effects of wall texturing with a good sanding, but texture is almost always related to a stucco application that isn’t really designed to come off before the turn of the next century, so your results may be mixed. A better bet is to cover textured walls with an altogether new surfacing material, like drywall. For popcorn ceilings, yo can try dampening the popcorn materials with a light water spray and then scraping it away, but even if it comes off easily, the resulting surface will still be a bit rough. For best results, remove it as best you can and then apply a primer and flat ceiling paint. Any type of paint with a sheen will highlight the uneven surface.
Patching Textured Walls and Popcorn Ceilings
Do you have a small area of textured wall or ceiling that you need to create? DAP’s new 2 in 1 Wall & Ceiling Spray Texture is a great way to get the job done.
This innovative new product features:
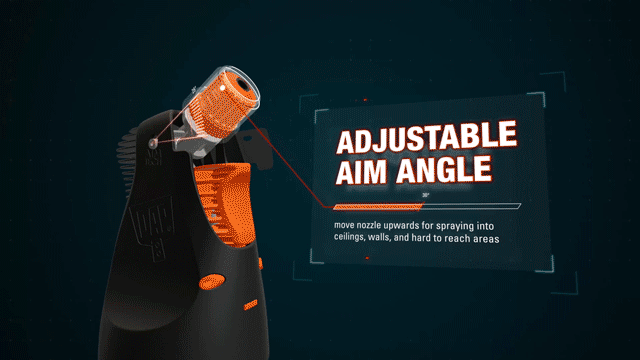
- Patented Adjustable Nozzle: Customized angle to repair vertical, overhead and hard to reach areas with one can
- Paint ready time of just 30 minutes: No priming required with water base formulations. 5 minute paint ready time for oil based formulations.
- Pro Results: Excellent texture match that delivers a fast & durable repair from the #1 brand in Wall repair
- Wide, Even Spray: Consistent pressure & even texture coverage that provides a reliable spray application
DAP 2 in 1 Wall & Ceiling Spray Texture encompasses a range of textures, including Orange Peel, Knockdown, and Popcorn, ensuring a seamless texture match and excellent results.
Tile that Needs a Tear Out
Removing tile is a tough job: difficult, involved, and like glued-down paneling, requires some wall reconstruction after it’s removed. You can replace damaged tiles on an individual basis using a tool like the Rotozip, a little wonder that looks like a drill bit but cuts sideways like a router. Otherwise, the makeover options are few. Painting or retexturing of the surface doesn’t usually make for a great result. You’ll have to look into either regrouting the tile or sprucing it up with adhesive embellishments.
The one exception here is mirrored tile, which can be removed in a few careful steps. To prevent dangerous breakage and shattering, start by covering the surface with contact paper to hold the tile together. Then use a piece of piano wire (wrapped around dowels on each end for an easy grip) to access the space between the mirrored tile and the wall, moving it like a saw to cut through the glue holding the tiles to the surface. In most cases, you’ll still wind up with some damage to the wall surface behind those groovy mirrors, but that can be remedied with an application of drywall or other surfacing. Mirrors can break during the process, so be sure to protect yourself with safety goggles, gloves and appropriate clothing.

At one point or another, most homeowners will find themselves needing or wanting to remove old or ugly wall treatments. The best way to proceed depends on the material, how it was originally applied and whether you’re willing to invest the time and sweat to get rid of it.
Nevertheless, some ugly wall treatments are best just left in place, but can be modified to be less of an eyesore. The bottom line is that no matter what’s on your walls, there are options available to make it a lot more pleasing to look at!


Leave a Reply