TOM: Coast to coast and floorboards to shingles, this is The Money Pit Home Improvement Radio Show. I’m Tom Kraeutler.
LESLIE: And I’m Leslie Segrete.
TOM: And we are here to help you with your home improvement projects. We’re going to solve those do-it-yourself dilemmas. Or if it’s a project you want to hire a pro to get done, we can give you some advice to get that started, as well. Help yourself first: post your question to The Money Pit’s Community page at MoneyPit.com or call us at 888-MONEY-PIT.
Coming up on today’s show, have you ever taken the clothes out of your washing machine only to notice that they don’t look much cleaner than when you first put them in? Well, if that sounds familiar, it might be time to actually clean your machine. We’re going to tell you how to do that. It’s pretty easy.
LESLIE: Plus, water quality might not be something you think you have much control over in your home but it turns out there are many do-it-yourself ways to improve the taste, quality and clarity. We’re going to have a review of the latest DIY solutions.
TOM: And don’t let a hard-to-reach home improvement job leave you reaching out for help from a hospital bed. We’re going to have a must-do list of ladder-safety tips that you need to know before stepping on that first rung.
LESLIE: But most importantly, we’re here to help you with the answer to any home improvement job on your to-do list. Call us with those questions at 888-MONEY-PIT or post them online to The Money Pit’s Community page at MoneyPit.com. If you do that, you’re going to get the answer you need, plus a chance to win some amazing products we’re giving away from The Home Depot.
TOM: Yep. We’ve got the Milwaukee Outdoor Power Package, which I love. It includes the M18 FUEL String Trimmer – with the best combination of power, balance and maneuverability – plus the Milwaukee FUEL Blower with batteries and charger. Get this: the package is worth over 448 bucks.
LESLIE: Plus, to help you enjoy better-tasting water all summer long, The Home Depot has hooked us up with a bunch of great water-quality solutions to give away. And this hour, we’re featuring the PUR 18-Cup Dispenser and Filter worth over 50 bucks.
TOM: If you’d like to win either the Milwaukee Outdoor Power Package or the PUR 18-Cup Dispenser and Filter, pick up the phone and give us a call, right now, at 888-MONEY-PIT, 888-666-3974 or post your question to The Money Pit’s Community section at MoneyPit.com.
Let’s get to it. Leslie, who’s first?
LESLIE: Randy in Louisiana is on the line and needs some help with a flooring project. What’s going on?
RANDY: Flooring in my manufactured house is ¾ waferboard, which is plywood. Similar to it. I want to go back with ¾ plywood and I want something that’s waterproof. In case I had a water leak again, it wouldn’t happen like that again.
TOM: So you want to replace the waferboard subfloor in your home with ¾ plywood.
RANDY: Right.
TOM: So, plywood – all plywood today has exterior glue in it, so that’s not an issue. If you were to paint the plywood properly, which basically means that you would prime it and you would paint it, it can be somewhat water-resistant. You’re talking about just the occasional spill that could happen. As long as you clean the water up relatively quickly, like within a day or so, you’re not going to get any long-term damage as a result of that.
RANDY: Field mouse gnawed a plastic pipe into – on a hot-water line. He gnawed a hole in it and it was spraying straight up on the flooring.
TOM: Yeah. And if it’s going to be an ongoing thing like that that goes on for days, you’re going to have an issue. But the good news is it’s covered by insurance.
RANDY: Well, I’ve got an insurance claim but I’m going to fix it myself.
TOM: So, yeah, so you can cut that waferboard out and install plywood in its place.
RANDY: They don’t make a plywood that’s totally waterproof?
TOM: Well, you could buy marine plywood. It’s really expensive but it’s even more waterproof. But I think it’s overkill.
RANDY: OK. I might consider that.
TOM: But heck, what’s the chance of that breaking again like that, you know?
RANDY: Well, it was six years but that one mouse got in there and did the damage.
TOM: And did the damage, huh? Yeah, well, it’s good you got it covered by insurance.
Good luck with that project. Thanks so much for calling us at 888-MONEY-PIT.
LESLIE: Donna in New York is on the line and is having an issue cleaning some showers. What’s going on, Donna?
DONNA: Well, I work at a fitness facility. And boy, do I have a problem with one out of four of the shower stalls there. That one, of course, is in the men’s room. Oh, my God, it’s so gross. It constantly cakes up this slimy, brown, gross, moldy – I don’t even know what this gunk is on the walls. And I have tried everything. I used bleach, the bathroom cleaners, antibacterial scrub brush. I’m at my wit’s end. I don’t even know what to do.
TOM: Yeah. It’s just getting away from you.
Well, first of all – and I know this is out of your control but the more humidity that builds up in that space, the worse this will continue to get. So if they don’t have good ventilation, they get dirtier and dirtier because it supports the growth of mold, mildew, algae and moss.
But one product that I’ve had great success with is called Zep – Z-e-p. It’s a shower, tub and tile cleaner. It’s a commercial cleaner. It’s not expensive. It’s about seven bucks a jug at Home Depot. And when you spray it on, it foams up and does a really good job of cutting out that nasty combination of soap scum and then everything that grows in the soap scum. Because the soap scum is like a food to a lot of those materials and that’s why it just gets so nasty. So I would try the Zep – Z-e-p – and see how you like that.
DONNA: Oh, my God. I am so glad I got through.
TOM: Alright. Good luck. Thanks so much for calling us at 888-MONEY-PIT.
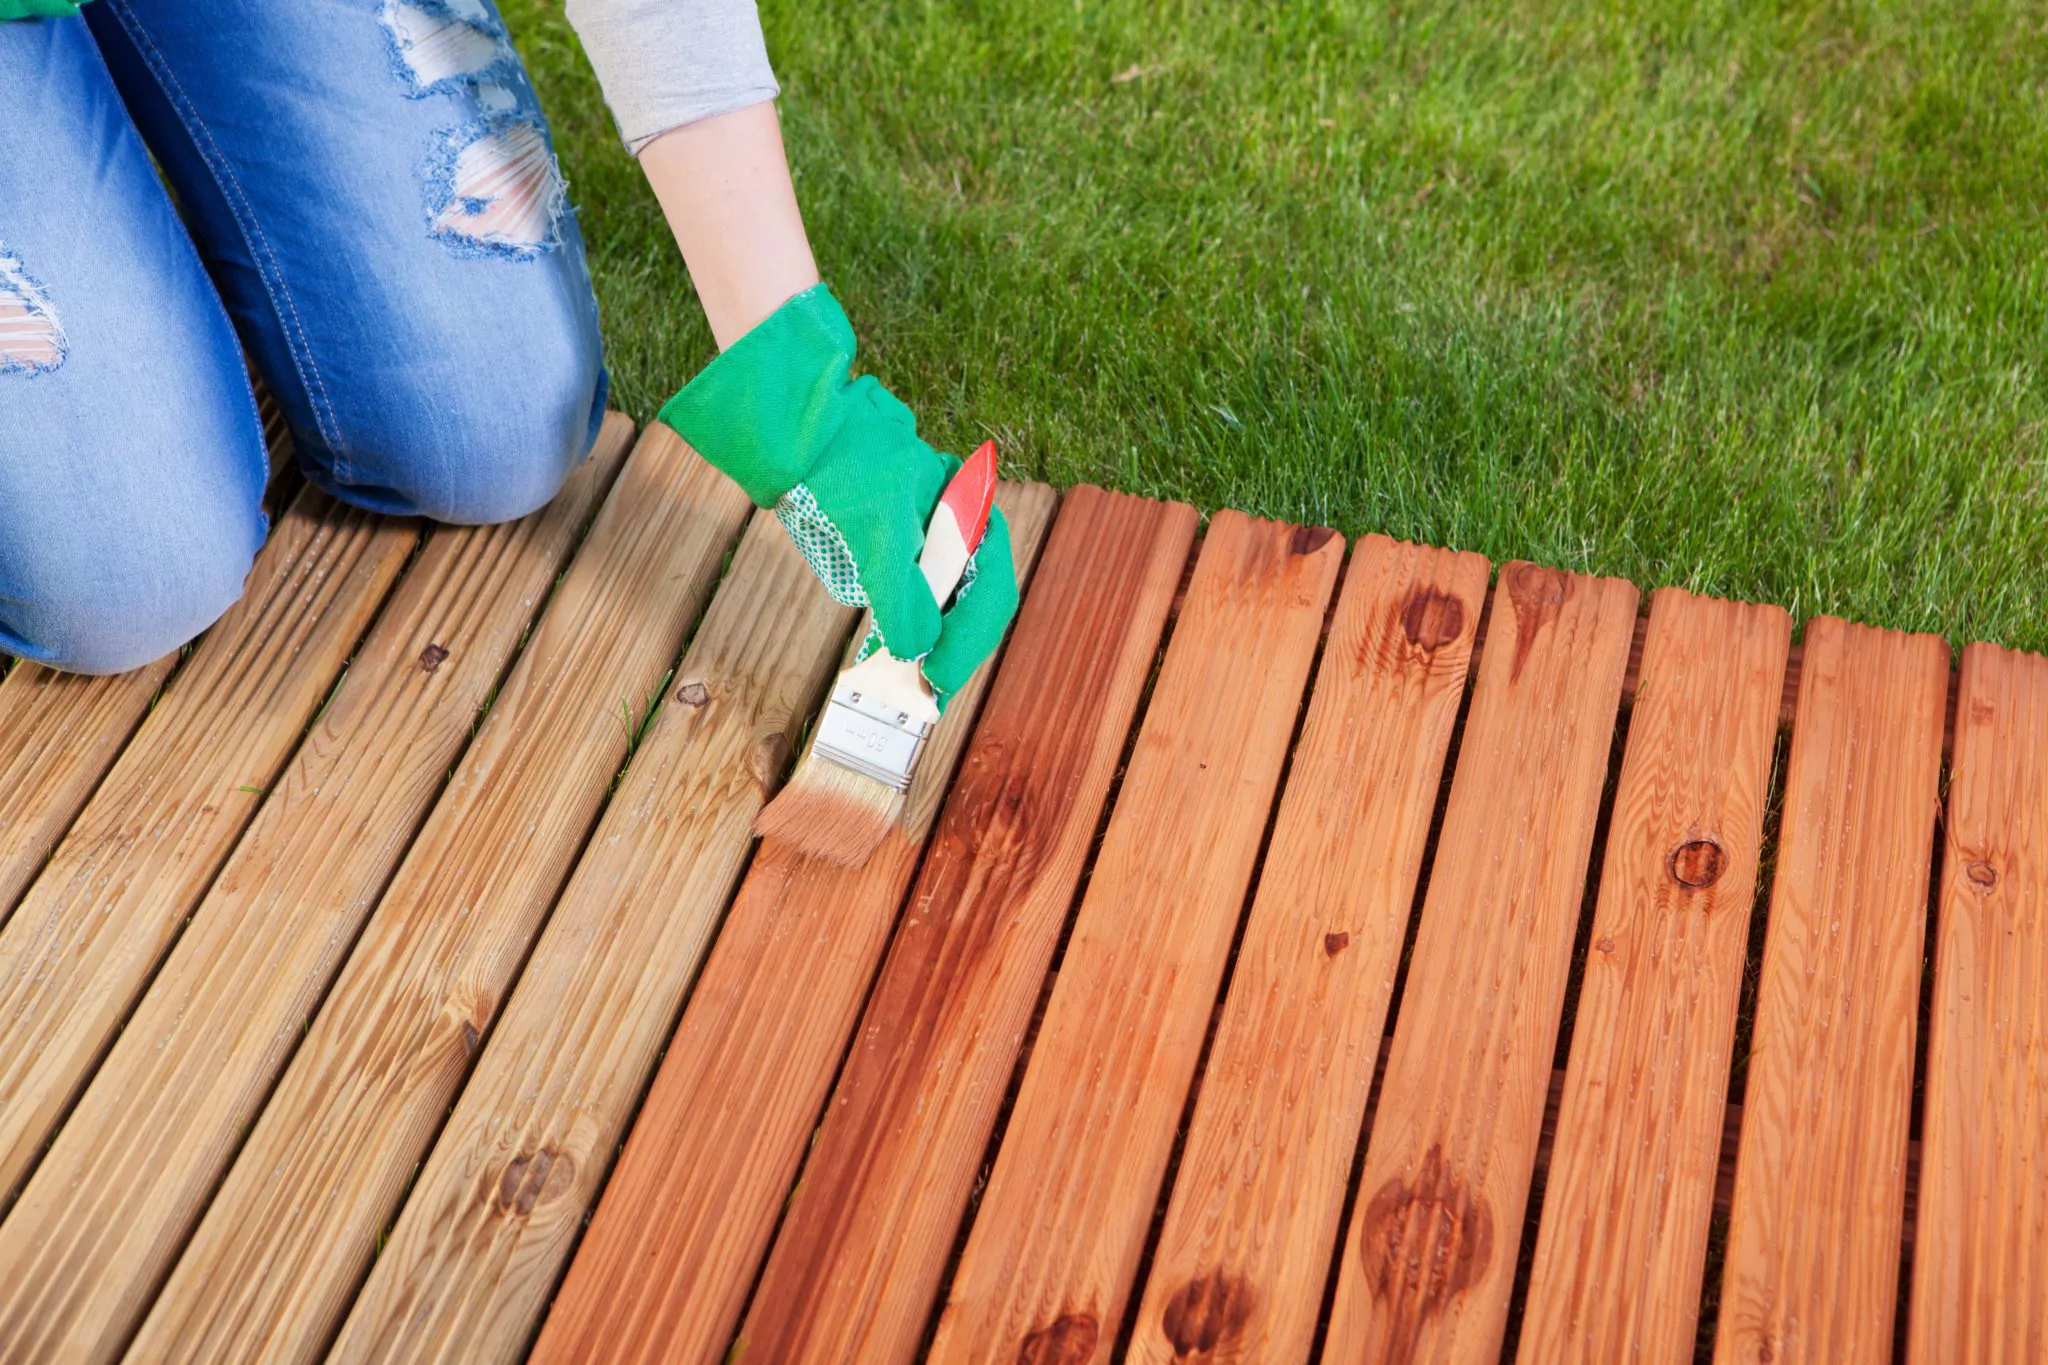
LESLIE: Alright. We’re going to talk decks and how to keep them beautiful, with John in North Carolina. What can we do for you?
JOHN: Well, we decided to take unused space and turn it into a deck, so we spent about four months. We toyed with Trex and pressure-treated and settled on cedar. And it looked absolutely gorgeous. We put a can of SPF stain on it. And that was – we finished last September.
This spring, we look out the window and it’s kind of whitish. It’s not the honey color. It’s like – a western cedar is what we have. So I got with Cabot and they were very surprised. So I guess they’re going to work something out with us. But is there something, either a stain or a – I’m thinking like a polyurethane or something that’s specific for cedar? It seems to be an unusual kind of wood.
TOM: It’s not that unusual. I mean basically, what you want to do is you’re going to want to prime it first. And then you’re going to cover it with a solid-color stain. If you use a semi-transparent stain, you’ll – you may see more of the grain. You’ll still see it through solid color but you don’t have as much pigment in it, so it doesn’t last quite as long. But if the deck is primed first – and when I prime cedar, I use an oil-based primer. And then on top of that, I’ll use a solid-color stain and it can last a really, really long time.
JOHN: Well, the only thing is we didn’t want to do the solid color because the cedar looks so beautiful.
TOM: Yeah, I get that. But the thing is you’re not going to preserve that natural color. Eventually, it’s going to fade to gray. You may not want to do it now but you will do it eventually. It’s going to happen with you or without you.
JOHN: Yeah, yeah. Yeah, we all go gray, I guess.
TOM: Exactly.
JOHN: OK. Alright. Well, I appreciate it very much.
TOM: Alright, John. Good luck with that project. Thanks so much for calling us at 888-MONEY-PIT.
LESLIE: You are tuned to The Money Pit Home Improvement Radio Show on air and online at MoneyPit.com. Now you can call in your home repair or your home improvement question 24 hours a day, 7 days a week at 1-888-MONEY-PIT. And 888-MONEY-PIT is presented by HomeAdvisor where it’s easy to find top-rated home improvement pros for any project. Go to HomeAdvisor.com.
TOM: We’re here to help you with the answer to any home improvement job on your to-do list. And we’re here to share with you the latest in battery-powered outdoor power tools with a fantastic giveaway from The Home Depot. This week, we’ve got the Milwaukee Outdoor Power Package, which includes the M18 FUEL String Trimmer plus the M18 FUEL Blower with batteries and a charger worth over 448 bucks. Going out to one listener who calls us with their home improvement question or posts it to The Money Pit’s Community page at MoneyPit.com. Make that you.
TOM: Making good homes better, this is The Money Pit Home Improvement Radio Show. I’m Tom Kraeutler.
LESLIE: And I’m Leslie Segrete.
Pick up the phone and give us a call now at 888-MONEY-PIT for help with your home improvement project. 888-MONEY-PIT is presented by HomeAdvisor. You’ll get the answer to your home improvement question. Plus, this hour, we’re giving away some really great outdoor prizes.
TOM: Yep. We’ve got the Milwaukee Outdoor Power Package, including the M18 FUEL String Trimmer, the M18 100-Mile-Per-Hour Brushless Cordless Blower plus the M18 REDLITHIUM High-Demand Battery and Rapid Charger. Both of the tools feature brushless motors that provide the best combo of power and runtime. And the trimmer has a 16-inch cutting swath. It’s going to trim more grass in a single pass.
They’re available at The Home Depot or HomeDepot.com. The package is worth 448 bucks. Going out to one lucky caller drawn at random that reaches us at 888-MONEY-PIT or posts their question to The Money Pit’s Community page at MoneyPit.com.
Now you’ve got all weekend to call us with your question or post it to the Community page. We will draw those winners on Monday and post them on our Facebook page.
LESLIE: Alright. Jim in Tennessee, you’ve got The Money Pit. How can we help you?
JIM: I have a question about cleaning a driveway. It’s probably sitting there for 20 years. House is about 20 years old. I don’t know that it’s ever been cleaned, so the dirt has just ground in. I have pressure-washed one section of it, about 12×14 section. It took me almost two hours to get it clean. My question is: is there any kind of pretreatment that I can put on that driveway that will make the pressure-washing more efficient?
TOM: Yeah, there are products that are designed specifically for cleaning concrete. For example, QUIKRETE has a product called Cleaner, Etcher & Degreaser. And it’s available in 1-gallon and 5-gallon jugs. I think it covers about 200 square feet per gallon.
And you apply that onto the concrete. You brush it in. You let it sit and it will start to really loosen up all of that deep grime. And then you could pressure-wash after that and it will, hopefully, make it a lot easier project.
If you just Google “QUIKRETE cleaner,” you’ll probably find it.
JIM: Good deal, good deal. Thank you very much. That helps a bunch.
TOM: You’re very welcome. Thanks so much for calling us at 888-MONEY-PIT.
LESLIE: Well, have you ever taken a clean load of laundry out of your machine and found it to be less clean than you expected? You might need to give your washing machine a little cleaning of its own.
TOM: Yeah. The problem is that most likely months or even years of detergent and liquid fabric softener will build up. And then there’s also, of course, the grime and dirt from all those dirty clothes.
Now, to start to spruce it up, if you’ve got an agitator, you want to check on the underside of it or you want to check along the creases in the rubber along the top of the washer basket. That’s where a lot of that gunk and grime will collect.
LESLIE: Yeah. Now, cleaning it really isn’t that difficult. First, you want to remove your agitator and rinse off the gunk before you replace it. Then go ahead and scrub all those rubber parts with a wet cloth.
TOM: Next, you want to put about a ¼-cup of bleach and then run your washer with a full hot-wash cycle and no clothes. This will sanitize it and clean any remaining gunk that’s left behind.
If you want some more tips on that project, head on over to MoneyPit.com. We’ve also got a great article there on how to do the same for your dryer, how to clean your dryer, especially how to remove all of those nasty stains that get left behind when the kids leave crayons in their pockets and stuff like that.
Never happens at your house, Leslie, right?
LESLIE: All times of day, mostly – can I tell you the funniest thing? I’ve recently been finding chewed gum in the kids’ pockets. And this was going on for a couple of days. And I was like, “Boys, why is their gum in your pocket?” And I would find it after the wash thinking that they put a piece of gum in their pocket and I didn’t check and I just washed it. Turns out they were putting the chewed gum in their pockets because I never told them that you can’t.
TOM: You never thought you had to but apparently, you do.
LESLIE: Yeah. So, moms of boys out there, you need to tell your boys that they can’t put chewed gum in their pockets.
And I mean not even in a tissue, Tom.
TOM: Yeah.
LESLIE: Just chewed gum in their pocket because that seems right.
Judy in Minnesota is on the line with a moisture issue. What’s going on?
JUDY: Our house is about 40 years old. And it has – in the room that we’re talking about, we’re painting it. We painted it once before without a primer. And it turned out really – I thought it looked really nice. But now we repainted it a different color. And on the inside, then, is that rough paneling. And it’s separated by – it’s got the insulation in there with a plastic on it. And we noticed now – and we’re going to paint it – that there’s moisture halfway down on the paneling. We think that’s caused by condensation.
TOM: It may very well be if it’s a damp space.
Now, there are some things that you can do to reduce condensation in below-grade spaces. It’s kind of the same steps that you would take if you were having an actual flood. You want to make sure that your exterior drainage is set up so that no moisture is being trapped against the outside foundation wall. And that means making sure the gutters are clean, the downspouts are extended and the soil slopes away from the walls.
If you’ve done all those things, then the next thing I would do is I would install a dehumidifier in that space. And try to find one that has a built-in condensate pump so that it collects water and pumps it out. Otherwise, you’ll be emptying buckets upon buckets of water.
And then, finally, it’s also possible to install a whole-home dehumidifier, which is an appliance that is attached to your HVAC system. These are highly effective at pulling moisture out. In fact, most of them will take 99 or 100 pints of water out a day. So, those are three different ways that you can reduce moisture in that space.
Judy, thanks so much for calling us at 888-MONEY-PIT.
LESLIE: John in Missouri, you’ve got The Money Pit. How can we help you today?
JOHN: I have a pressure-treated wood I’ve used. And I put it on – I’ve sealed it with a solid-stain paint. And it seems that within – after two years, my wood, it starts to rot. It gets soft. I wanted to know: why is this happening? It’s pressure-treated wood.
TOM: When you stained it, first of all, did you do all sides of the board, including the bottom edge of the slat? Because very often, that’s where moisture gets pulled in.
JOHN: I did the whole board and I assembled it. And it just seems like it holds the – like a moisture within it. And it was in, like I say, two years it’s – you can almost push on it. It’s soft or it starts rotting.
TOM: Yeah, I suspect that it’s – there’s different layers of pressure-treatment. But I suspect whatever was done to this was not done very well. You know, I had some landscape ties that were allegedly pressure-treated. And within a couple of years, they were rotted away. I stepped on them one day and went right through it. So, I suspect that the quality of the wood in this fencing wasn’t really what you expected it to do.
I’ve taken just plain fir fence and I’ve treated it with WOODLIFE and made sure that the bottom of the fence was up at least 2 to 3 inches over the grass, because otherwise it gets a lot of moisture that pulls up into it. And I’ve had fences like that, that I treated and then I used a solid-color stain on, last 15 years.
Just because it’s pressure-treated or not well pressure-treated doesn’t mean it can’t last. But I think it’s a combination of the installation and then the treatment of the stain that was used initially.
JOHN: OK. Because, see, I have a boat dock and it’s over the water. And I just put clear sealer over it and you know what? It lasts longer than me sealing it with solid-stain paint.
TOM: And it comes down to the quality of the wood itself. And whatever this fence is made out of just is not comparable to what your dock’s made out of, John. Sorry to tell you that but I thinks that’s what’s going on. Thanks so much for calling us at 888-MONEY-PIT.
JOHN: OK. Well, thanks, and have yourself a great day.
LESLIE: Barbara in South Dakota is on the line and having a problem with a renovated bathroom at her money pit. What’s going on?
BARBARA: We had our bathroom remodeled about three years ago. And maybe six months after, we noticed that the tiles were kind of shifting a little bit when we walk in the most prominent places. And then, pretty soon, the grout started coming out. And I was wondering, do we have to replace all of our tiles or is there something we can put in there that would move with the grout or with the tiles? It’s a [heated bore] (ph).
TOM: How is it heated, Barbara? Hydronic heat? Is it hot-water heat under the floor or is it electric heat? What kind of heat is it?
BARBARA: It’s electric heat.
TOM: I’m really sorry to hear that. You know, I mean this was a mistake that was made in the installation. Where that mistake was made, it’s hard for us to tell. But there’s no way that those tiles should be loosening up. And unfortunately, there’s no really easy fix for this. The reason the grout is breaking up is because the tiles are loose. And as the tile loosens, the grout doesn’t really have any structural integrity.
LESLIE: Right. But isn’t that the result of an uneven subfloor?
TOM: Not always. And even if it was an uneven subfloor, Leslie, if these were installed right, they would be – there would be enough adhesive or base under them to stop them from wiggling.
BARBARA: Think it’s the base underneath that’s not right.
TOM: Yeah. So I guess you have two options, Barbara, one of which is for you to go ahead and do what you may already be doing, which is repairing them as you go. If you find that you have a loose tile, if it’s loose enough to come up, you’re just simply going to add some additional floor adhesive and press it back down again. Or you have to remove the whole floor and replace them. But of course, that’s a big job because you’d have to also – you can’t really save the heating coils that are underneath. You’ll probably end up having to replace those, as well.
It’s really hard when you have a bad tile job, especially one that’s over heating coils like that, to do anything short of replacing. It does not lend itself well to repair.
BARBARA: Alright. Thank you so much.
TOM: Alright? Sorry. I wish we had better news, Barbara. But thanks so much for calling us at 888-MONEY-PIT.
And that’s why we call the show The Money Pit.
LESLIE: Well, when it comes to the water quality in your home, you might not think you can do very much about it. But it turns out that there are so many DIY solutions that you can do to improve the taste, quality and clarity. We’ll share those when we come back.
TOM: Making good homes better, this is The Money Pit Home Improvement Radio Show. I’m Tom Kraeutler.
LESLIE: And I’m Leslie Segrete.
Well, when we turn on the faucet for a glass of water, the taste and clarity of that water might be something you feel that you really have little control over. But with a filter, you can have clear, better-tasting water all the time.
TOM: And stepping up your water-quality effort is not just limited to pitchers and faucet-mount filters. Under-sink systems are available that are not that difficult to install and that can deliver clear, great-tasting water whenever you need it. With us to talk about that is Lindsay Chason. Lindsay is the water-quality expert for The Home Depot.
Welcome, Lindsay.
LINDSAY: Hi, guys.
TOM: Hey, I have to tell you I spent 20 years as a home inspector, Lindsay, and I frequently saw these small charcoal filters hanging off the end of a kitchen faucet that probably hadn’t been changed since the day they were installed. And I always think that they might even be contaminating the water at that point. So, choosing the right filtration product and knowing how to maintain it are really critical to your family’s safety, right?
LINDSAY: Absolutely. And it might have been, actually, my house that you were inspecting, because I think I had the same thing go on when I bought a house. But yeah, changing your filter is incredibly important. If you think about every year you change your clocks twice a year, so that’s a good time to remember to change your water filtration under the sink or in your whole-home system and making sure that whatever system you’ve spent a lot of time and energy and money putting into your home is actually performing at tip-top shape.
LESLIE: Now, I think a lot of people think when it comes to water purification, it’s got to be an entire house, every single faucet, all the water has got to be taken care of. And I think in some extreme cases, that could be a possibility. But there are under-sink systems that really allow you to get the purified water right where you need it, right?
LINDSAY: You bet. You can look at a number of different products. We have really basic systems that are just one stage that reduce chlorine taste and odor, to something that’s really premium like reverse osmosis that actually is purifying your water as much as something maybe more industrial might. So, a ton of different options, all of them available at The Home Depot. There are all kinds of systems, really, no matter what your preference is. And we can filter out taste, lead, cysts, mercury, pharmaceuticals. That’s something that’s coming up a lot more. And hopefully, this takeaway is The Home Depot has everything that you need to set up your home with great water-filtration options.
TOM: Now, if you’re cruising down the aisle and you’re seeing all of these options and you’re trying to decide what you really need for your house, the first step is really before you get to the store with a test, right? You need to know what actually is coming out of that tap, first.
LINDSAY: That’s right. And we have a number of different test options for our customers. We offer a free water test that you can find basically at every Home Depot. And that will tell you a lot of what’s in your water and you can schedule a consult with one of our water-filtration experts. Or you can purchase a water-test kit on our shelves at The Home Depot. It’s like a little science experiment. When you get it home, you’ll have test tube of your own water and pH strips. Then you can see when the pH strips turn color, it tells you if there are contaminants there. And then you’re a lot more informed once you start to go through the research process in figuring out what do you want to put in your home.
TOM: Who doesn’t love a science project at home? Right, Les?
LINDSAY: Exactly. A lot of fun.
LESLIE: But Lindsay, when you go to the store, you’re looking at all of these different products for water filtration and purification in your home. How do you know what’s a good one? Are there standards? Are there certain testing procedures that go on so you know what’s the best kind for your needs?
LINDSAY: That’s a great question. So you don’t want to just assume that a manufacturer has sent their products out for testing. At The Home Depot, we have a number of different options that were either certified by NSF International or the Water Quality Association. Pretty much anything that you see in our store at The Home Depot is going to have one of those two certifications. And those are established by the EPA as the best in class.
TOM: Lindsay Chason, the water-quality expert for The Home Depot, thank you so much for stopping by The Money Pit. I mean the weather’s getting warmer and we’re drinking more and more water. We want to make sure it’s the good stuff when it hits our lips, right?
LINDSAY: That’s right. Thank you, guys, for the time.
TOM: If you’d like more information, you can head on over to HomeDepot.com or call 1-800-HOME-DEPOT to schedule an appointment with a water-quality expert.
LESLIE: Alright, Lindsay. Thanks so much for stopping by The Money Pit.
Well, you are listening to The Money Pit Home Improvement Radio Show. Give us a call now with your questions at 888-MONEY-PIT. 888-MONEY-PIT is presented by HomeAdvisor. We love to help you out and talk to you about whatever is going on at your money pit right now. Plus, we’d also like to improve the quality of water you’ll be drinking all summer long. Thanks to The Home Depot, we’ve got the PUR 18-Cup Dispenser and Filter up for grabs.
TOM: Going out to one caller that reaches us with their home improvement question. Make that you. The number is 1-888-MONEY-PIT.
TOM: Where home solutions live, this is The Money Pit Home Improvement Radio Show. I’m Tom Kraeutler.
LESLIE: And I’m Leslie Segrete.
TOM: Give us a call, right now, for the answer to your home improvement question plus your chance to win a water-quality solution from The Home Depot. They pretty much have any product that you would need to improve the water in your home. And we’ve got a great one we’re giving away this hour.
LESLIE: That’s right. We’ve got up for grabs the PUR 18-Cup Dispenser and Filter. And it’s a spout dispenser that will quickly provide to you clear and better-tasting water. And it can filter up to 40 gallons of water.
It’s a prize available at The Home Depot for $52 and you can check it out at your local Home Depot or on HomeDepot.com.
TOM: We’ve got a water-quality solution just like that going out to one lucky caller drawn at random. Make that you. The number, again, is 1-888-MONEY-PIT.
LESLIE: Michael in Virginia is on the line and is working on a decking project. Tell us about it.
MICHAEL: Hey. So I’ve got a 12×12 deck that came with the house. And it’s about 20 years old. Some boards are starting to peel up. And I know I’ll be able to get a screw to stick in the sublayment (ph). Am I able to sister the underlying boards with 2x4s or something to build up the base? Or am I better off replacing all of the substructure along with the deck?
TOM: So, if it’s 20 years old – and it sounds like it’s not pressure-treated – and if the existing floor joists have decayed to the point where they won’t even hold a screw or a nail, I think it’s time to replace that deck, structure and all. Because your – the clock is ticking now and it’s going to be potentially very unsafe in a very short period of time.
So what I would tell you to do is to remove it, replace it and consider using composite for the decking surface. You can use pressure-treated for the frame but use composite for the decking surface. Between the composite and the pressure-treated, you’ll get more than another 20 years out of it.
MICHAEL: OK.
Now, I’ve looked at composites and price-wise, they’re pretty pricey. Am I going to be able to save a few bucks by going to a heavier-duty, like a 2×6 kiln-dried board and sealing all that when it goes in?
TOM: Well, the thing is you don’t – well, I wouldn’t use 2×6. What I would use it 5/4×6 if you want to go with the wood decking. But you’re going to have to seal and stain that every couple of years. The thing with composites is all you’ve got to do is clean it. If you look at a big-box store, like a Home Depot, those composites are not terribly expensive and they look really good.
MICHAEL: Alright. I’ll have to check them out.
TOM: Because remember, you’re not replacing the floor joists with it. You’re only doing the deck surface. So if it’s 12×12, it’s 144 square feet, it’s 288 lineal feet. It’s probably worth it.
MICHAEL: I see. Now, we are thinking about expanding it another few feet, too.
TOM: Yeah. Well, that will be the time to do it, you know?
MICHAEL: OK.
LESLIE: So you’re doing – the substructure is still all of the pressure-treated lumber, because you need that for the support and then all of the decking itself and the fascia boards – and you can even do the railings. All of that can be the composite. And it’s really gorgeous. I have one that’s sort of mid-range but it has an interesting grain to it and almost looks like an ipe. You can get ones that are super simple and you can get ones that really look exotic. And I think that’s where your price point is going to swing a lot.
MICHAEL: Now, how do you deal with the railings and the fencing it in?
LESLIE: So the posts would come up and that would be the basis for your supports and that would be your pressure-treated lumber. And that would be built up through from the substructure. And then there are sleeves that go over it in the composite. Now, you can get ones that match your decking or you can go with white.
MICHAEL: And then for the substructure – now, I am talking about staining this out. There are these concrete – I don’t know, they’re about a foot by a foot – blocks that you can buy that you can lay your 4×6 across for – they say it’s for decking in the yard. Am I better off doing that or poured concrete?
TOM: There are prefabricated footings for decks. They look sort of like pyramids but they’re not like 1×1. They’re like 1x1x3-feet tall and they have a place for a bracket on top. I’d use those. They work really well. They’re a little harder to install because you’ve got to be more accurate with where the hole is. But frankly, I think the easiest thing to do is just to dig it yourself – a 1-foot by 1-foot square that’s a couple of feet deep – and mix up 3 or 4 bags of QUIKRETE and make that the footing. And then you can drop the pressure-treated right into that. And then if you use the right level of pressure-treated, it can actually be in-ground.
MICHAEL: Yeah, absolutely. Thanks a lot, Tom.
TOM: You’ve got it. Thanks so much for calling us at 888-MONEY-PIT.
Well, if you’re heading outside for home repairs up high, a ladder is a help. But you need to understand how to use it properly so that you make sure gravity does not get the best of you. And as simple as it might seem, ladder falls actually send hundreds of people to emergency rooms every year. So you’ve got to be careful.
LESLIE: Yeah. I’m hearing so many things that I didn’t even realize. A girlfriend of mine mentioned that her father-in-law had been in a wheelchair since they were kids because he fell off of a ladder. My goodness, so many terrible things.
So, really the biggest mistake, guys, is that you take shortcuts. So don’t. In order to be safe, a ladder needs to remain stationary. If you’ve got an extension ladder, you need to level the feet by digging out the ground or using ladder levelers. Those things exist for a purpose.
TOM: Yeah. Now, on hard, dry ground, you want to rest the feet flat. You want to make sure you’re free of any slippery plastic tarps or construction debris. And make sure that textured rubber pads that are on the bottom of the ladder – make sure they are intact.
Now, here’s a trick, though: on grass, it is kind of slippery, right? So you want to flip the feet up and then use that spiked end and drive it right into the ground or lay the flat feet and tie them down on the side or brace them in front with stakes that are driven deep into the ground so it can’t possibly slip out.
LESLIE: Yeah. Now, this is another thing. I think people don’t think about how they position the ladder when they’re actually going up the ladder. So you want to make sure that you take your ladder and you want to have it so that the distance from its base to the wall is a quarter of the height of the ladder at its resting point. So that really creates a 75-degree angle.
So for a quick check on the angle of your ladder, you want to stand facing it with your feet touching its feet and your arms extended. Your palms should rest on a rung that’s right at your shoulder height. That’s a good trick of the trade.
TOM: Absolutely. And finally, you always want to look overhead for wires before you set up or carry a ladder. You don’t want to rest an extension ladder against a tree or a pole where it can rotate and fall. That’s another very common source of construction injuries – is people that prop stuff up that really doesn’t have to be. Always lay it down. This way, it can’t fall down and clock somebody in the head.
Hey, if you’ve got a home improvement project that needs a ladder or not, we’d love to help you get it done. Give us a call at 888-MONEY-PIT.
LESLIE: Susan in California is on the line and needs some help with a driveway makeover. What’s going on at your money pit?
SUSAN: I’m so glad you said “the money pit” because that’s exactly what it is. And now it’s the driveway, about 1,200 square feet. And it’s been – it’s about 38 years old and it needs something else done. And I really don’t want to resurface it with blacktop. What are my options?
TOM: So it’s an asphalt driveway now? That’s what you’re starting with?
SUSAN: Yes, yes.
TOM: Yeah. Listen, I’ve got news for you, Susan: a 38-year-old roadway needs to be replaced. And that’s exactly what you have. Whether it’s a road that goes down the street or a road that’s a highway, nothing lasts 38 years. And if you’ve gotten 38 years out of that driveway, it’s time for a new one. And sure, you can keep slapping sealer on it and patching the cracks and all of that but at that age, it’s got to go.
SUSAN: What’s the best way? Do they just remove the whole thing and then start from scratch? Or what’s the best way to go?
TOM: I think that’s the best way. In most cases, that’s the best way. You can resurface it. But if you want to make sure that the base is really solid, you would take off the old. They would put a new base down, they would compact it with machines so it’s really, really solid and then they would apply new asphalt on top of that.
I would make sure I got a specification as to exactly how many inches of this material they’re going to put down so that you can compare apples to apples when you’re looking at different contractors. But I think that’s going to be your best solution.
SUSAN: OK. Well, thank you so much.
TOM: You’re welcome, Susan. Good luck with that project. Thanks so much for calling us at 888-MONEY-PIT.
LESLIE: Hey, does your kitchen get hot and claustrophobic feeling during the summer months? Well, why not create an outdoor kitchen that’s going to be the talk of the neighborhood and keep you being the chef that you love to be indoors but outdoors? We’re going to tell you how to do that, after this.
TOM: Where home solutions live, this is The Money Pit Home Improvement Radio Show. I’m Tom Kraeutler.
LESLIE: And I’m Leslie Segrete.
TOM: Call us now at 888-MONEY-PIT, presented by HomeAdvisor where it’s easy to find top-rated home improvement pros for any project. Go to HomeAdvisor.com.
Now you can call us with your question at 888-MONEY-PIT or you could post it to the Community section at MoneyPit.com. And that’s what Louis did. And he’s working on his porch.
LESLIE: That’s right. Louis is from Florida and he’s written: “I had a new 6×6 post installed to support my porch roof overhang last fall. Now, there are vertical splits on one of the posts. Should I drive long screws to minimize that splitting?”
I don’t know if you want to add something to that, right?
TOM: Well, the thing is you really are not going to be able to minimize it just by driving some screws into it because, look, when the wood – especially outdoor wood if it’s pressure treated – it’s going to shrink, it’s going to dry out and you’re going to get those splits. And cracks in those wood support columns are really pretty common and they actually very, very seldom would weaken the posts to the point where a structural repair or any kind of replacement is needed.
If the post is really badly cracked and it’s deformed so that it’s not really supporting the roof, then they need to replace it. But if it’s made out of pressure-treated, you want to expect the cracks and just plan to maybe wrap the post with aluminum cladding or pine or a composite trim to make it presentable. The idea of driving a screw through the post to kind of slow down or prevent further cracking is interesting but I really doubt it would have much impact. Because let me tell you, if wood wants to crack and separate and split, it’s going to do it.
LESLIE: Yeah.
TOM: And there isn’t a single piece of hardware available that’s going to stop that from happening. It’s kind of Mother Nature doing her thing there. So, I would just say to accept it and maybe look for a nice way to wrap that post, make it look very attractive in and of itself.
LESLIE: Yeah. There’s actually post wraps. They look like architecturally structural columns but they’re composite materials that wrap around an existing post. So you can make it look like a beautifully architecturally-designed wonderful column there hiding those little splits that really don’t make a difference.
TOM: Well, if you’re trying to make the most of these summer months, why not think about moving your kitchen outside? Leslie has tips to do that, in today’s edition of Leslie’s Last Word.
Leslie?
LESLIE: Yeah. You know, I think we’ve all been checking out Pinterest. We look at those Pinterest boards with outdoor kitchens and they’re tricked out with ranges and pizza ovens and chandeliers and beautiful, flowy fabric and you’re like, “Ugh, I want that for myself.” But us average Joes, we can also have a spectacular outdoor-kitchen space, as well. All you really need is a great grill and some weatherproof décor.
Now, if you can afford it, it’s also nice to add a small workspace where you can actually prep the food outdoors, as well. If not, some simple backyard tables are going to do. You want to keep dedicated outdoor-cooking utensils handy, as well. No need to run back and forth. Keep these outside with your cooking area. Once you’ve got them clean, they’re right there so you’re ready to use them.
You can also have a fridge outside, as well. I mean that really is a great place to keep your drinks cold and leftovers from going bad during the party. It’s also a great place to keep things that you’re about to grill. An outdoor fridge would be, really, a great luxury to have.
Now, for cleanup, there are a lot of easy upgrades available, as well, like a sink station. And there’s some that you can even attach to any outdoor garden hose. So, suddenly, a kitchen outside doesn’t seem that difficult. If you follow your home’s architectural style, your outdoor kitchen can really become an extension of your indoor-living space, regardless of if your home is Victorian or Craftsman or ranch style. You can make an outdoor space look like it truly belongs there.
Finally, no matter what your style, think about a fire pit. They really add instant ambience and warmth. And then the benefit is, in addition to looking great, you can actually enjoy your outdoor space into the cooler months. So, use it longer, use it earlier than everybody else. Plus, those outdoor fire pits are great for s’mores and telling spooky stories and hanging out with family. It really is a lot of fun. It’s fun.
TOM: This is The Money Pit Home Improvement Radio Show. Coming up next time on the program, the summer grilling season has officially arrived. And whether you’ve got a full-blown outdoor kitchen or a hibachi the size of a few burgers, we’re going to have tips to help you step up your gear with a grill review, on the next edition of The Money Pit.
I’m Tom Kraeutler.
LESLIE: And I’m Leslie Segrete.
TOM: Remember, you can do it yourself …
LESLIE: But you don’t have to do it alone.
END HOUR 2 TEXT
(Copyright 2017 Squeaky Door Productions, Inc. No portion of this transcript or audio file may be reproduced in any format without the express written permission of Squeaky Door Productions, Inc.)


Leave a Reply