TOM: Coast to coast and floorboards to shingles, this is The Money Pit Home Improvement Show. I’m Tom Kraeutler.
LESLIE: And I’m Leslie Segrete.
TOM: We’re here to help you with your home improvement projects, your do-it-yourself dilemmas. What project is on your to-do list? I think spring is about, well, about three weeks away now if my calculation is correct. So, you know, that means we’re going to be moving full gear into those home improvement projects. So if you’ve got one on your mind to tackle this spring, give us a call, right now, at 1-888-MONEY-PIT, 888-666-3974. We’d love to help you get started.
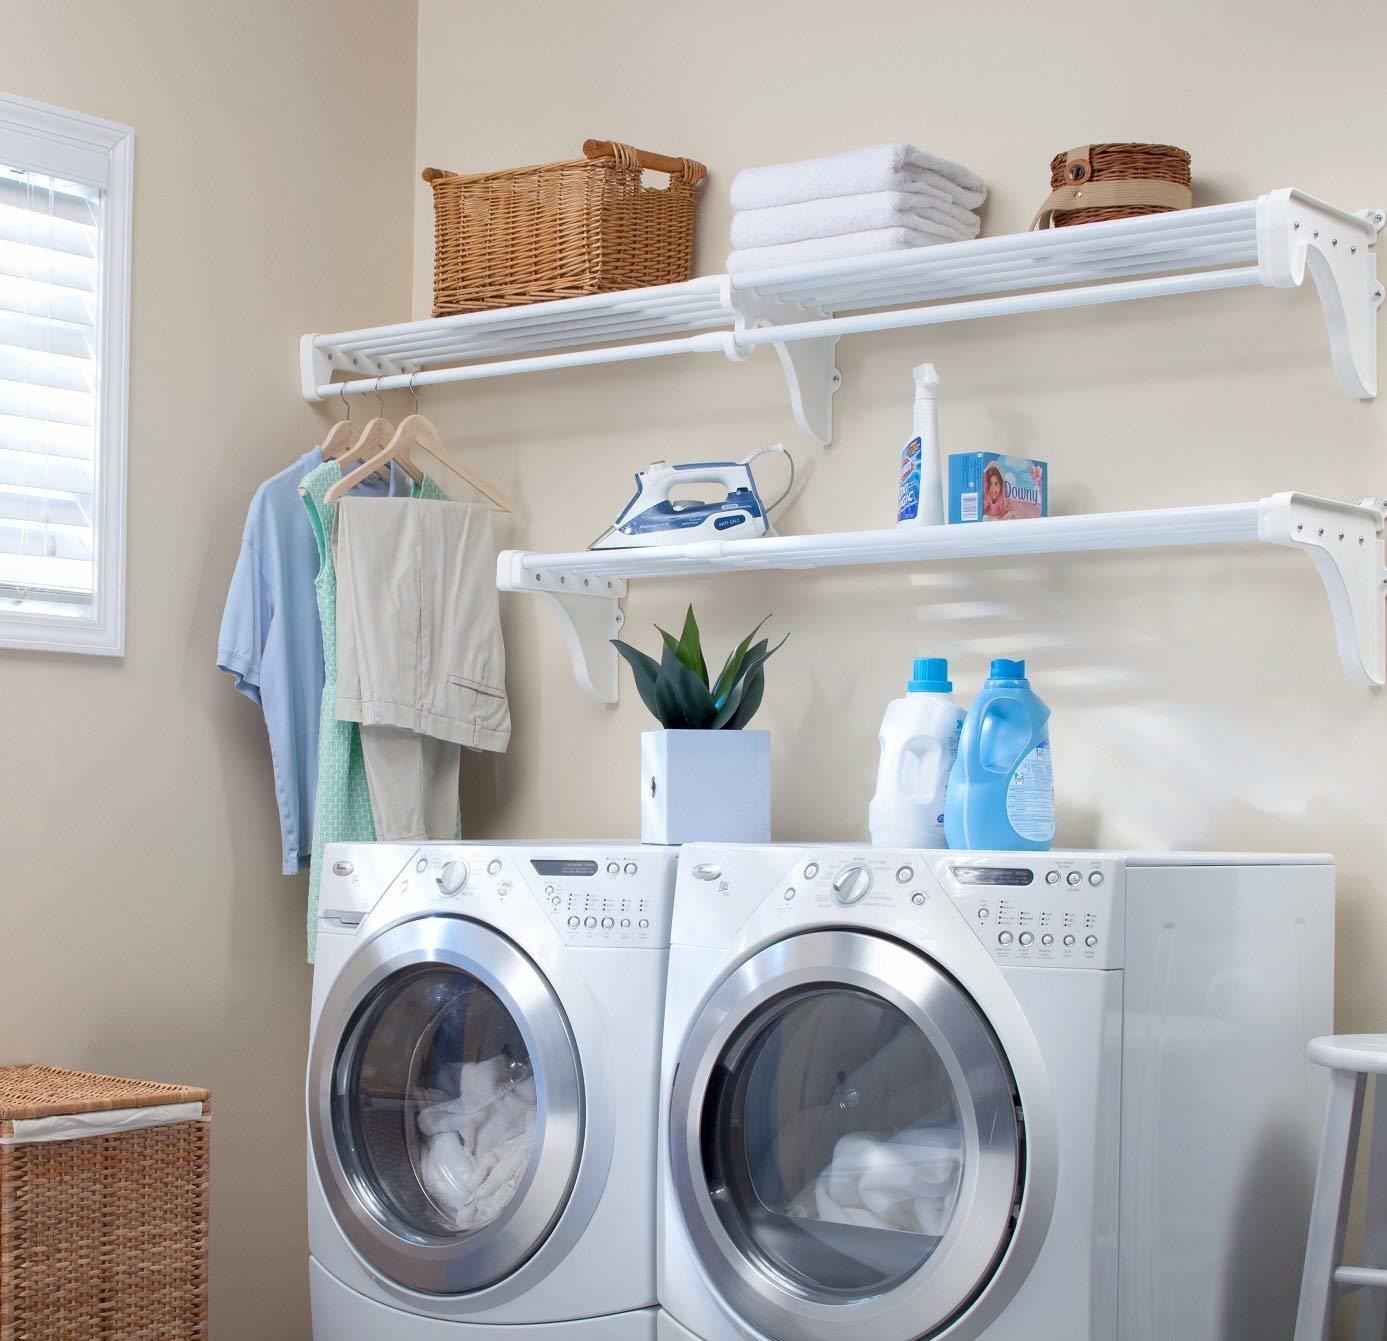
And speaking of getting started, coming up on today’s show, we’re going to talk about a project that’s very, very popular now, especially. And that is a laundry-room makeover.
But it’s kind of a unique project, Leslie, because it is a really tiny room but it needs a lot of work. And it requires a lot of pros. I mean you need to have a plumber, electrician, there’s carpentry work. It needs careful planning.
So we’re going to have some planning tips for laundry-room projects, just ahead.
LESLIE: And here’s a great spring project. Are you looking for a pop of color to greet your friends and family right at your front door? Well, you can enhance that front entrance, with the right flowers and plantings, to create a truly colorful welcome. We’re going to share some tips on how you can do it right, coming up.
TOM: Plus, are you making some dumb mistakes about charging your smart devices? We’re going to have some tips on how simple changes in that routine can save you some money.
LESLIE: But first, we want to know what you are working on getting ready for this spring season. Give us a call. Get ready. Get prepared. Maybe just talking about these spring improvements will keep the winter weather away. It’s all wishful thinking, so give us a call. We’d love to lend a hand.
TOM: I love the optimism. The number is 1-888-MONEY-PIT, 888-666-3974.
Let’s get to it. Leslie, who’s first?
LESLIE: Gail in Ontario is on the line. How can we help you today?
GAIL: We just had a high-efficiency energy furnace and central air installed in our house. And I have a ranch-style house crawlspace. It’s all insulated. And they installed the furnace in the laundry room and they’ve got the condensate pipe from the furnace and the central air dripping into a bucket into the ground of the crawlspace. And there’s limestone in the bucket. And we’re at odds whether this is a good thing or not.
TOM: So you say it’s dripping into a bucket. Is this a sump pump, like a sump pit? Or is this just a bucket on the ground in the crawlspace? Kind of describe it for me.
GAIL: Yeah, it’s just a bucket with limestone in it. They cut a hole in my plastic that’s running along the bottom of the crawlspace and they’ve got the bucket over the – where they cut it. And yeah, the pipe is just dripping into the bucket, going through the limestone and in the ground.
TOM: They’re basically just dumping the water under the – underneath the vapor barrier. No, I don’t think that’s a very god idea at all. It’s really sloppy. What you should be doing in this case is you should – or they should, more accurately, have installed a condensate pump.
Now, a condensate pump is a small pump. It sits near the furnace and near the air handler. And then the moisture goes into that pump. And once it fills up, a float starts the pump up and then pumps that condensate up through usually a clear plastic tube or a small pipe and then outside. So you basically run it outside your house the same way you might discharge your gutter. For example, in my house, I have a condensate pump that discharges into the same splash block as my gutter downspout and it takes that water outside.
I don’t like the idea at all of just dumping it into the crawlspace soil, which is essentially what they’re doing here.
GAIL: Yeah, I’ll tell them that. Yeah. Like I was – we were – it was really bothering us because we didn’t think it was a good thing, because I’m thinking all that water going under there? It’s defeating the purpose of insulating the crawlspace.
TOM: Yeah. No, your intuition is spot-on, OK? So you call that Ontario, Canada contractor back and get him to fix that, OK?
GAIL: And thank you so much for calling me.
TOM: You’re very welcome. Good luck with that project.
LESLIE: Jeff in Iowa needs some help with a low-flow showerhead. In true Seinfeld fashion, you’re just not getting a good wash going?
JEFF: No. No, I’m not. My house is a 1978 ranch. We’ve lived here about 10 years. I’ve always had good water – what I felt was reasonably good water pressure. Still has the original showers and showerheads in it, so I decided to upgrade everything to more eco-friendly stuff. Replaced the toilets, no problems. But the showerheads, I put these low-flow showerheads on and it’s like the water is just barely – I expected some decrease in performance, obviously, but the water is just like falling out of them. It’s not spraying out like I would expect.
TOM: Is this just happening at one showerhead, Jeff, or is it happening at several showerheads?
JEFF: Two showerheads.
TOM: Two showerheads, OK. So, we can rule out any kind of blockage because it wouldn’t be happening to both at the same time.
Now, what kind of showerheads did you put in there? Can you tell me the brand?
JEFF: Well, the first one was the home improvement store’s brand showerhead. The second one I’ve got is a Waterpik. It’s not the highest end of – I thought maybe I just went too cheap on the first one, so I went kind of middle-of-the-road. Made it – I didn’t know if I maybe needed to upgrade even more or just go back to the old showerheads.
TOM: So, when you install a low-flow showerhead and you didn’t have one before, you are correct in that you’re going to get a reduction in the power of the shower that perhaps you were used to.
Now, there should be an adequate amount of water. And the fact that you’re not feeling that means that maybe you don’t have the right showerhead or there’s something wrong with the installation. I’d like to, for the purpose of this conversation, rule out the installation, rule out any clogging, although that is entirely possible. And you might want to take it off to look behind it to make sure that’s the case.
But what I would recommend is that you upgrade the showerhead to a name brand, like a Moen or perhaps a Delta. Because these guys spend a lot of time and a lot of money engineering their showerheads so that they don’t decrease performance when they save you water. And the other thing to look for is a certification called WaterSense. And it’s sort of like ENERGY STAR for appliances but it’s like measuring water efficiency for faucets and showerheads.
JEFF: I will definitely give that a try because what I’ve got going on now, it takes me so long to shower and get foamy and stuff, I might as well use the high-flow and …
TOM: Not going to work, right? Yeah.
JEFF: Then in and out, you know? It takes the lumps. So, yeah, it’s not doing the trick. I will look into the more expensive one and see what that does for me.
TOM: Alright. Yeah, you can always take it back if that doesn’t work. But take a look at the installation first, just to be sure. Make sure you don’t have any plumbing tape that got jammed in there or anything of that nature, OK?
JEFF: OK. Sounds good. Thanks, guys.
TOM: Alright. Good luck with that project, Jeff. Thanks so much for calling us at 888-MONEY-PIT.
LESLIE: Lulu in Delaware, you’ve got The Money Pit. What can we do for you today?
LULU: So, I noticed this fall that my bricks in the front steps were starting to break down. And I was paying attention, finally, on a rainy day and I said, “OK, there must be water coming from the gutters.” And I thought maybe – I’ve been in my house for three years, so I thought maybe the gutters need to be reattached. I had someone come out, because I also saw some screws coming out. And so they reattached them with some new screws. And then, of course, more rain came. Still running – coming down. My bricks on my front steps are decaying very rapidly. So I thought, “OK, let me do more research.”
Then I found out about the drip edge. So I was like, “Alright. Is there a drip edge or not drip edge on this house?” This was built in the 1950s, ‘48. And so I crawled up to the – onto the roof. I’m scared of heights.
TOM: Wow.
LULU: And I went there and there is a drip edge but it was flat. So I decided to get one of those T drip edges, like those – the edges come out more – drip edge. And so I installed those underneath the edge.
TOM: So are we talking about putting in an additional piece of flashing underneath the shingles, to kind of extend the reach into the gutters?
LULU: Yes. I’m thinking that may be the problem. Still raining again. It’s still rainwater coming down onto the front of my steps a bit. It’s also well …
TOM: OK. So, first of all, what does this roof look like? Has it got a pretty steep pitch to it?
LULU: Like more than 45 degrees? Yeah.
TOM: Yes. So if you have a roof with a really steep pitch, you end up getting sort of a lot of inertia of that water sort of rolling down the roof. And it’ll tend to kind of jump across the gutters sometimes.
Are the gutters clogged and then leaking or is the water that does get in the gutter actually draining out?
LULU: It’s not. It’s not clogged. No. We cleaned it.
TOM: It’s not clogged? So it’s not – they’re not overflowing and leaking? They’re just – it’s the water just sort of missing the gutter.
LULU: Because I’ll look up and see that it’s coming through underneath the gutter. And then I’m like – I’m trying to understand how that’s possible.
TOM: The way that that’s possible is if the gutter does get clogged, it can back up and then sort of spill over the back edge of the gutter. That’s how that often happens. Now, if it’s not clogged, the water’s not getting there in the first place. And I think your approach is right but you need to make sure that the additional extension of the roof shingles into the gutters is done adequately enough. So, if the shingles are installed right, they should overlay the edge of the gutter by at least 2 inches.
LULU: I didn’t put shingles in. I just put that plastic, more like a drip edge. Like another drip edge that …
TOM: OK. Do the shingles overlay the gutter edge by a couple of inches or are they short of the gutter?
LULU: They’re short. They’re at the …
TOM: Yeah. So that’s obviously the problem then. Now, this drip edge that you put in, you said it was plastic?
LULU: Or metal? I don’t – it’s with – I got it at Home Depot.
TOM: What I would do, in a situation like this, is I would take 4-inch aluminum flashing, OK? Comes in a roll. Very inexpensive. It’s easier to work with if you cut it into maybe 4-foot-long strips. And I would work it underneath the shingles. It has to go under the shingles and then on top of the back edge of the gutter so that it truly does serve as a bridge. You need to extend the reach of that shingle into the gutter, because it sounds like the gutters are a little bit short of the edge of the shingles. And they’re never going to work well in that case. We’ve got to get the water running over the shingles, then onto the flashing and then into the gutters. You have to kind of create sort of an extension. If you do that, it should work well.
LULU: OK.
TOM: Good luck. Thanks so much for calling us at 888-MONEY-PIT.
LESLIE: You are tuned to The Money Pit Home Improvement Radio Show on air and online at MoneyPit.com. Give us a call at 888-MONEY-PIT presented by HomeAdvisor, the fast and easy way to find the best home service pros in your area. You can read reviews and book appointments all online.
TOM: Up next, adding a new, well-designed and organized laundry room is a very popular project these days that can make laundry a lot easier and less stressful to do.
LESLIE: But because laundry-room remodels involve plumbing, electrical work, carpentry, it’s really a job that’s best left to a pro. We’re going to have tips on how to get that job done, in today’s Pro Project presented by HomeAdvisor.com, next.
TOM: Making good homes better, welcome back to The Money Pit Home Improvement Show. I’m Tom Kraeutler.
LESLIE: And I’m Leslie Segrete.
TOM: Standing by to help you with your home improvement projects. Help yourself first: give us a call, right now, at 1-888-MONEY-PIT, 888-666-3974.
LESLIE: Now we’ve got Gary in Georgia on the line who wants to save the rainwater. What can we do for you?
GARY: Yes, I do. My wife and I have a lot of grass to water during the summertime. And in Georgia, it gets like drought weather all the time. And we’ve noticed that during this – these months – we actually have a lot of water running off the house. And we wanted to know if there’s a way that we could create a water reservoir to save that water that’s coming off of our house.
TOM: Yeah, you definitely can collect that rainwater. What you want is simply a rainwater harvesting collection system. And there are a lot of modern ones that are available. In fact, we wrote a story about this on MoneyPit.com. If you go to MoneyPit.com and just type in the search box “rainwater collection system,” you’ll see an article.
There are a couple of things to keep in mind when you install it but again, there’s a wide variety of collectors that are out there. There are some that look they’re traditional barrels; there’s even one that looks like a half-barrel that’s got a hose spigot on the end, on the bottom of it. So it collects water off the spouts and then you feed it from the hose.
So, it’s definitely a good system, a good idea. And there’s a lot of options out there and we encourage you to do that.
GARY: And is this an easy project that I could do probably over the weekend?
TOM: Yeah, clearly. You definitely just need to position this. Yeah, you’re going to have to – may have to rework your spouts a little bit to feed it but it’s definitely a very simple installation.
GARY: OK. Alright. Thank you very much.
TOM: You’re welcome. Good luck with that project. Thanks so much for calling us at 888-MONEY-PIT.
And that article, again, is called “Rainwater Harvesting Collection System” and it’s online, right now, at MoneyPit.com.
LESLIE: Adding a new, well-designed and organized laundry room to your home is a very popular project that can make laundry a lot easier and less stressful to do.
TOM: True. But while a laundry-room makeover may be a small-space remodeling project, it does require smart planning to get it done and the help of some very skilled pros to handle all the plumbing, electrical work and carpentry. We’ve got tips on how to get that job done, in today’s Pro Project presented by HomeAdvisor.
LESLIE: Yeah. First thing you have to think about is the location. Now, you can build a laundry room into something as small as a closet or as large as a utility room, spare bedroom or even in your basement. But as you think through the location possibilities, you want to consider things like the distance between the laundry area and your bedrooms, because this is where you’re generating all that laundry. You’re taking your clothes off, you’re putting them right in the hamper. The greater the distance, the farther you’ve got to travel back and forth to get that laundry done.
Now, here’s a biggie to consider, guys: the distance to the utilities. Does the laundry area already have access to the plumbing and electrical connections that you’re going to need? If not, how far do they need to travel to get to that space? Is there a way to run an exhaust for the dryer vent? And for gas dryers, what about that gas line? How do you get the gas line there?
Now, utility connections can be costly to run, so picking a place that’s easy to access can really impact those costs positively or negatively.
TOM: Now, the next thing to think about is the actual space. Is there going to be enough of it for folding and storing and even ironing the laundry? And what about storing all that detergent and bleach and dryer sheets and stain removers and other laundry supplies? You know, in a lot of laundry rooms they end up kind of sitting permanently on top of the machines, right? So, why not take the opportunity to find good spaces for all of those laundry-room items?
I mean the bottom line is if you spend time making those smart choices now, when you’re planning the laundry-room project, it’s going to help bring the project in on time and on budget. And it’s going to set you up with a space that can really serve your family well and make laundry a heck of a lot easier for many years to come.
LESLIE: And that’s today’s Pro Project presented by HomeAdvisor.com. With HomeAdvisor, you can get matched with top-rated home service pros in your area, read verified reviews and book appointments online, all for free.
TOM: No matter the type of job, HomeAdvisor makes it fast and easy to hire the best local pros.
LESLIE: Erica in Pennsylvania is on the line looking to renovate a kitchen. How can we help you with that project?
ERICA: Well, the kitchen is here now. When we first bought this place, I had moved the refrigerator from where it was at to a different location. And I noticed that the tile – there was no tile on the floor underneath the refrigerator. And now I’m ready to continue with the renovation – putting new cabinets in and a new floor in – but I’m thinking, “Do I want to put the floor in first or do I want to put the cabinets in first?”
TOM: That’s a good question. So, I – what kind of floor, first of all. What kind of floor are you putting in?
ERICA: Well, what’s down there now is a tile – a linoleum-type tile. What we’re …
TOM: Right. And we’re talking – so were we talking about ceramic tile?
ERICA: No, we’re talking about linoleum. But what I want to replace it with is with some of that laminate …
TOM: Laminate? OK. Well, laminate isn’t terribly expensive, so I would tend to probably, if I was you, do the whole floor first.
And I mean you can save yourself a foot or two against the wall but frankly, I’d just do the entire room, throw the cabinets on top and call it a day.
ERICA: That’s what I was wondering. I thought that would make a nicer finish but I got to thinking, “Was that the way I should go?”
TOM: Yeah. I would do it first. It’s just – it’s a lot less cutting because, otherwise, you have to cut around all of those cabinets.
ERICA: You’re absolutely …
TOM: It’s easier to put the cabinets on top and just drop them down on the floor.
ERICA: OK.
TOM: Alright? Well, good luck with that project. And take a look at LumberLiquidators.com. They have great prices on that laminate floor.
ERICA: Thank you very much. I appreciate that.
LESLIE: Alright. Thanks so much for calling The Money Pit.
Hey, do you want a pop of color to greet your friends and family at the front door? Well, why not enhance your entry with the right flowers and plantings to really create a colorful welcome? Landscape pro Roger Cook from This Old House is joining us with tips to do it right, after this.
TOM: Where home solutions live, this is The Money Pit Home Improvement Show. Give us a call right now. We’d love to hear about your next home improvement or décor project. That number is 1-888-MONEY-PIT presented by HomeAdvisor. You can find top-rated home service pros and book appointments online, all for free.
LESLIE: Alright. Now we’re going to help Bud in Oregon avoid a hair-raising electrical situation.
What’s going on, Bud?
BUD: I’ve got 3 banks of the 2 bulbs each, 4-foot-long mounted up in the ceiling, built into a box directly over my cooktop. And during the summertime, when the humidity is higher, if I get any moisture up there, it can take sometimes days before those lights will come on reliably on the first flip of the switch.
Now, in the winter, when I’m burning a wood stove, which means I’ve got lower humidity inside the house, if I’m cooking on the cooktop and don’t turn the lights on before, I get the same problem. Except as soon as the moisture stops going up there and I’ve got 10, 15 minutes, then the lights will start coming back on regularly and be reliable again.
So, what I need to know from you, if you’ve got some suggestions, is before I get up there and start looking for how to do something, I want to know what I need to have in stock. Is there something – a lubricant, a cleanser or whatever – to do something with contacts or got any suggestions?
TOM: I would give up on those fixtures.
BUD: Yeah, I would, too. I think you’re right.
TOM: I would just give up on them. They don’t sound safe to me. I’m not quite sure what exactly is going wrong with them but they certainly shouldn’t be behaving that way. And I would worry about them getting worse and potentially causing a fire.
The cost of a 4-foot, dual-bulb fluorescent fixture is not very much today. And so I would simply take this on as a project and replace each and every one of them. I wouldn’t try to change the ballast out, I wouldn’t try to clean it, I wouldn’t try to do anything like that. I would just replace them. It’s just not worth it.
BUD: It’s not what I wanted to hear but it’s a good thing and it’s probably cheaper in the long run to spend the $8, $10 per what you – put up 3 brand-new ones.
TOM: Exactly.
BUD: OK. I’ll just look for a good time when I can do it without breaking my neck.
TOM: That’s always important. Bud, thanks so much for calling us at 888-MONEY-PIT.
LESLIE: Well, your front yard creates a welcome entry to your home. And when it comes time to sell, it’s also your chance to make a good first impression on potential buyers.
TOM: Well, that’s right. Curb appeal is what draws people in and helps your home stand out visually from the pack. Here with tips to help make sure your home makes a grand entrance is This Old House landscaping contractor Roger Cook.
Welcome, Roger.
ROGER: Thanks for having me.
TOM: So, people can become easily overwhelmed when they’re planning any landscape project. And I think that’s especially true when you’re trying to create a design that’s going to give the home that first big impression. So, what would you say are the keys to sort of giving your house a wow factor?
ROGER: If you’re selling your house, you only get that first minute that people pull up for them to decide, “Whoa. Do I like this or do I not like that?”
TOM: Yeah. Or not, right?
ROGER: Very, very quick.
TOM: Yeah. And it’s actually even more important than that because, many times, we’re shopping for homes online. If that picture of your house doesn’t create that impression, you’ve kind of lost the battle.
ROGER: Oh, you have to remember you never get a second chance at making a good first impression. And so, what you want to do is create an environment that looks welcoming to the house.
Now, for years, we’ve been doing what’s called a “foundation planting,” because we have a foundation that sticks out of the ground. Well, nowadays, houses are sighted a little better and you don’t need to line the foundation with plants. So you want to create something that has different textures, different flowers, different colors and just invite people to go up the front walk.
LESLIE: And along those lines, is it smart to sort of line your walkway, maybe, with a low shrub or pretty plantings?
ROGER: I like having color because it just leads you up to the front door. And I’ll even take that color that you have on the edge of the walkway and combine it with some pots or hanging baskets from the house itself.
TOM: Now, creating a garden is something that people often do in the back of their house. But is there an option to create sort of an entry garden at the front of your house?
ROGER: You can do a lot of different things at the front of the house and it all depends on what you are. Right now, there’s a thing called “edible gardens” where you put in plants, like blueberries and things, that you can actually pick. You can do that in the front yard, too.
The scope is endless. You can do so much to the front of the house. It’s just picking the right blend of material.
LESLIE: And I think it’s also important to think seasonally, you know? So much of what’s on the market – with a home sale, you might list your home in the summer and then come wintertime, you’re still trying to sell it. So you’ve got to make sure that whatever you’re doing either stays looking nice or you’re refreshing it every season.
ROGER: No, you’re exactly right. You need to have some bones, some structure that’s going to be there all season long. And then, as true gardeners, transition the color so that you have different things in flower all the time.
TOM: And is it a good idea to also sort of mix up the colors and the textures so you have a really kind of carefully crafted space?
ROGER: It’s always nice to have things that complement each other. Me, I keep putting purple and yellow together, because I’m a guy and we (inaudible).
TOM: And those are your colors.
ROGER: Yeah. And again, it’s personal thing. If you’re not selling the house, then you’re doing this decorating for yourself. So use colors that you like and plants that you feel are good for your environment.
TOM: And of course, like everything in our home, maintenance is really important. So how do we set up those beds in the way to kind of reduce weeds and really minimize the maintenance?
ROGER: Well, again, weeds – by planting things that are going to grow full and keep the weeds down and mulching the beds. That helps with the weeds.
What you want to do is you want to put in plants that don’t require a lot of work. Some of the hybrid tea roses are pretty fussy. They’re beautiful but they’re fussy. You want plants that are going to grow and fill in and come back year after year after year. And there are now these things like daylilies that bloom more than once, so that’s an interesting fact. So you don’t have to replace it with another color.
TOM: So I guess, Roger, this seems like it could be an overwhelming project but it’s also important to remember this is something we can build on. We can start small and build out a small area and then complement that every season, correct?
ROGER: Right. You can graduate it in any way you want. What I tell people is to put in the basics – the bones – first and then dress down from there. Or do one side, do one bed and then next year, do another bed and another.
TOM: Roger Cook, a guy that always creates a good first impression, thank you so much for stopping by The Money Pit.
ROGER: You obviously don’t know me very well.
LESLIE: Alright. Catch the current season of This Old House and Ask This Old House on PBS. For local listings and step-by-step videos of many common home improvement projects, visit ThisOldHouse.com.
TOM: And This Old House and Ask This Old House are brought to you on PBS by GMC Trucks and SUVs.
Still to come, is all that charging of smart devices leading to a huge electric bill? We’ve got tips to help you cut the costs, when The Money Pit continues after this.
Making good homes better, this is The Money Pit Home Improvement Show. I’m Tom Kraeutler.
LESLIE: And I’m Leslie Segrete.
TOM: The number you need to know to get in touch with us – to get the answers to your home improvement questions, your remodeling inquiries, your décor dilemmas – is 1-888-MONEY-PIT presented by HomeAdvisor. They really have the best local pros for any home service.
LESLIE: That’s right. Doesn’t matter what the project is, they make it fast and easy to find top-rated pros.
TOM: And there are no membership fees. It’s 100-percent free to use. HomeAdvisor.com.
LESLIE: Laura in South Carolina, you’ve got The Money Pit. How can we help you today?
LAURA: We have a deck on the back of our house that we, about two years ago, put a product on it that makes it like an anti-slip texture? And the coating is starting to chip off in big chunks, so we were thinking about using that DECKOVER or OVERDECK, I think it’s called?
And when we were at Home Depot, we noticed that they have something else that was an option. They’re actually foot-squared tiles. They’re like a thick rubber that you actually use a glue to adhere onto the deck and then you cover your deck that way. My concern is if you apply that onto the deck, will that rot the wood?
TOM: Well, Laura, I’m not familiar with rubber tiles but there are polypropylene tiles or plastic tiles or composite tiles that are on the market that are designed to cover old decks. And the way these work is they sit on top of the deck boards and they usually lock together. And some of them are quite attractive. There’s a product called Coverdeck that comes in dozens of different colors and shapes and designs that could look really neat. And it’s not going to be slippery and it’s going to look great.
I am concerned if you’re gluing something down to the wood deck, I agree that something like rubber glued to wood is bound to let some water underneath and it’s certainly not going to evaporate. These composite tiles or the plastic tiles usually have a bit of space under them which allows the wood to breathe and dry out. And then really, that’s the issue: if you hold water against it, you will get decay.
So I would take a look at some of the tile products that allow you to cover these decks and probably avoid anything that’s rubbery that you’re going to glue down.
LAURA: OK. So the glue is OK as long as there’s a gap or some sort of gap between the wood?
TOM: It’s OK to cover it as long as there’s air space so it dries out.
LAURA: OK, perfect. Alright. Thank you.
TOM: You’re welcome. Good luck with that project. Thanks so much for calling us at 888-MONEY-PIT.
Well, we all love our smart devices, right? I mean we’re talking about phones and tablets and laptops and more. And these days, there’s pretty much one or two or sometimes three for every man, woman and child that live in the house. But what you might not love is what they’re doing to your electric bill.
LESLIE: Yeah. This is kind of amazing, guys. Believe it or not, 40 percent of the electricity that’s used to power the mobile devices and other home electronics is consumed after those devices are switched off. So, when you’ve charged up a device, don’t just unplug it from the charger; unplug the charger from the wall socket. My kids never do this; they always leave the charger still plugged in and just walk away with the iPad. And I’m like, “Guys, this is costing money.” They never believe me.
TOM: To that point, Leslie, if they’ve got a hard time remembering, there’s a little bit easier way that you could try and that’s a power strip.
Now, some of the newer ones actually will sense when power is flowing below about 30 watts and they’ll shut off the power to the whole strip automatically. So that’s kind of handy, kind of kid-proof. You don’t have to rely on them to think to turn off the switch. And that will definitely reduce the expenses associated with charging all those devices.
So, good idea to really think about that if you’ve got a lot of these devices in your house. Because they may not seem like much when you just see that one little, say, transformer block at a time. But man, all together they can add quite a bit of money to the cost of your electricity every single month.
LESLIE: Lynn in Missouri is on the line and needs some help with a handrail. How can we help you?
LYNN: I’m trying to figure out the proper procedure to align and be able to cut the proper angle for the top rail and a bottom rail between two posts.
TOM: OK. So, are the posts level? Are they straight?
LYNN: Well, no, not exactly. See, what it is is we took the old, wooden stuff off and we’re replacing it with vinyl. And so, basically, the – some of the posts are kind of warped a little here, a little there.
TOM: Alright. So, here’s the way you do this. If the posts were straight, it would be a lot easier because, essentially, what you would do is you would lay the railing on the stairs, put a level – vertical level – up against it. And once it’s absolutely straight, use that to determine the cut line. Because that will be, essentially, a vertical cut.
Now, if the posts are not level – they’re out of level – what I would do is I would take the railing and I would clamp it any way I could to the side of the posts, even if it’s a bit sloppy, just so it’s held approximately in the position that you want and against the side of the posts with some big – maybe wood Jorgensen clamps or bar clamps or something like that.
And then you can scribe, from the post to the rail, with a pencil that exact cut. You hold the pencil – say, a carpenter’s pencil – flat on the post and then you just basically drag it against the rail. And then add a little bit of extra space, maybe make it a ¼-inch bigger than that. Cut it, put it in place, see how the cut looks. You can adjust if you have to trim it a little bit – I presume you’re using a power miter box – and then you’ll kind of dial it in. But that’s the way to do it, OK?
LYNN: OK. Thank you very much.
TOM: Alright, Lynn. Happy to help. Good luck with that project. Thanks so much for calling us at 888-MONEY-PIT.
LESLIE: Hey, do you need more closet space? Who doesn’t? We’re going to have the tips for adding new closets to your space, next.
TOM: Making good homes better, welcome back to The Money Pit Home Improvement Show. I’m Tom Kraeutler.
LESLIE: And I’m Leslie Segrete.
TOM: Love to take your calls to 1-888-MONEY-PIT. You can also post your questions to The Money Pit’s Community page at MoneyPit.com. And 888-MONEY-PIT is presented by HomeAdvisor, the fast and easy way to find the right pro for any kind of home project, whether it’s a small repair or a major remodel.
LESLIE: Well, whatever it is you are working on, post your questions to The Money Pit’s Community page, just like Lindsay did. Now, Lindsay writes: “Hi. We do not have a closet in our bedroom. I want to build one but I’m wondering how large it should be. Any rule of thumb for figuring this out?”
Well, how much stuff have you got?
TOM: Yeah, really. I think your answer would be: as large as possible, right? Do you really need to sleep in that room? Because then you’d really have some room for the closet.
LESLIE: The whole room should be the closet.
TOM: I’m guessing that Lindsay has an older home, because it’s not unusual to come across bedrooms without closets. And that’s why armoires were used in eras past to store clothes and accessories: kind of a big, structural square box with fancy trim that has enough room for you to hang stuff and usually a few drawers in it, as well.
Now, it’s funny. You know, for many years, we didn’t see too many of these that weren’t antiques. But now there’s, I don’t know, a dozen different versions. In IKEA, probably even more, right? So, you’ve got some good options there if you go ahead and buy an armoire.
But if you want to build one in, closets are never a bad idea, especially from the resale standpoint. In terms of that size, though, while we’ve never heard anyone complain about a closet that’s too big, you do need to sort of balance your storage needs with the amount of square footage your bedroom is going to lose.
So, closets are going to add value but not if they reduce the bedroom to the size of the postage stamp, where you kind of have to, I don’t know, walk sideways between the closet and the bed to get in every night. So, be reasonable about it but I do think it’s probably a good idea.
LESLIE: Alright. Next up, we’ve got a post here from Vincent who writes: “I’d like to reduce dust in my home but when shopping for filters, I see so many it’s hard to tell what’s good. Is there an easy way to compare?”
TOM: Yeah, there is. And you’re right: there are dozens and dozens of different types of filters out there. And it is important to replace them. And many times, folks just don’t do it frequently enough. I mean even the inexpensive ones have to be replaced about every four weeks.
But what you want to look for is called the “MERV rating” – M-E-R-V. Now, it’s stamped on every filter and it stands for Minimum Efficiency Reporting Value. It’s a standard by which you can compare all those filters. It’s going to range from 1 up to 20. And the higher the rating, the greater the filter’s effectiveness.
Now, it usually doesn’t take more than a few dollars in filter costs to jump several grades up on that MERV spectrum. So, that’s always a pretty good investment. So I’d say as a rule of thumb, Vincent, you want to go with a micro-allergen filter, which usually has a MERV score of at least 11.
But if you want to kind of hone in on more than just ratings, there’s a whole line of filters out there that can weed out various particles, depending on your intended result, or even ones that are specifically designed to reduce odors or certain types of allergens. So it all depends on what you want to achieve. But that MERV rating is the way to figure out what one is going to be more efficient than the other.
LESLIE: Yeah. And now, I think the flip side of all this is that you think it’s just the air filter helps control the quality of air in your house. It’s also helping to control the quality of air that gets into the machinery themselves. So your heating unit, your cooling unit is getting less dust in all of the machinery itself, which will then help it operate much more efficiently and much more cleanly without the potential for problems down the road. And when you find the filter that works, buy multiple of them so you have it and you’re ready to change them as often as you’re supposed to.
TOM: This is The Money Pit Home Improvement Show on air and online at MoneyPit.com. Hey, if you didn’t have the opportunity to call in today, you can do that, 24/7, to 1-888-MONEY-PIT because we are always standing by to take those calls. And we will grab your message and call you back the next time that we are in the studio. But for now, we are pretty much out of time so thanks, again, for being with us.
I’m Tom Kraeutler.
LESLIE: And I’m Leslie Segrete.
TOM: Remember, you can do it yourself …
LESLIE: But you don’t have to do it alone.
END HOUR 1 TEXT
(Copyright 2019 Squeaky Door Productions, Inc. No portion of this transcript or audio file may be reproduced in any format without the express written permission of Squeaky Door Productions, Inc.)


Leave a Reply