In this episode…
Are you ready to do one final cleanup of your garage before the summer kicks into full swing? Tom & Leslie share simple garage organization tips, plus:
- Have you needed to crank your AC yet? If not – great because there are 3 things you should do first – to make sure it’s set to keep you cool and comfortable all Summer long.
- The pandemic has changed the way we do many things, and that is certainly true when it comes to how we find and choose contractors to take on the projects we don’t want to do ourselves. We’ll share 5 questions to ask your contractor.
- If you’d like hang some photos or shelves, but prefer to avoid creating holes in your walls – we’ll walk you through how to hang pictures without holes do just that without damaging your walls.
- Feel like your home improvement headaches are on repeat? We’ve got tips to avoid the how-to déjà vu by doing them right the first time around.
Plus, answers to your home improvement questions about , cleaning a brick fireplace wall, how to polish marble, eliminating bees, repair or replace a dishwasher, steps for eliminating paint from peeling.
Read Transcript
TOM: Coast to coast and floorboards to shingles, this is The Money Pit Home Improvement Show. I’m Tom Kraeutler.
LESLIE: And I’m Leslie Segrete.
TOM: We’re here to help you with your home improvement projects, your décor dilemmas. We are your coaches, your cheering squad, your problem solvers. Whatever you need to get done, let us give you a hand at 1-888-MONEY-PIT. 888-666-3974 is how you get in touch with us. You can also post your questions at MoneyPit.com.
Coming up on today’s show, are you ready to do one final cleanup of your garage before the summer kicks into full swing? We’re going to share some simple garage-organization tips to help, just ahead.
LESLIE: Well, the pandemic has definitely changed the way we do a lot of things. And that certainly is true when it comes to how we’re maintaining and improving our houses. And that includes, actually, how we find and choose those contractors to take on those projects that we just don’t want to do ourselves. We’re going to share five questions to ask your contractor, just ahead.
TOM: And if you’d like to do some quick redecorating that involves hanging some photos or shelves but you’d prefer to avoid creating holes in your walls, we’re going to walk you through how to do just that without causing any damage whatsoever.
LESLIE: But first, the show is about helping you with your home décor and improvement questions. So give us a call with your home improvement question now and you’ll get the answer.
Plus, today, you’re also going to get a chance to win some great tools to get the job done. We’re featuring the Jorgensen 24-Inch Bar Clamp.
TOM: Yep. We’ve got a set of four to give away and it’s going out to one listener drawn at random. Make that you. Call us now at 1-888-MONEY-PIT.
LESLIE: Debbie in Arkansas is on the line and has a question to help her daughter’s house. What can we do for you guys?
DEBBIE: Hi. My daughter recently bought a house. It’s an older house. It’s been remodeled. And she was going to renovate around her fireplace since she discovered that the large wall behind the fireplace, which is about a 20-foot-wide wall, has got – it had brick behind the plaster. And so, she took all the plaster down but it had been put up with Liquid Nails. So there’s Liquid Nails all over this brick – all over it – and it’s made a terrible mess.
TOM: Oh, boy.
DEBBIE: And she’s called in a couple of people to get bids and it was thousands of dollars to either re-brick over it or chisel it down. And they said it would probably ruin the brick if they did. And so I was just curious if you had any ideas at all. We looked up on the internet and there was one about a heat gun, possibly, but I thought maybe you might have a cheaper or easier way of doing it.
TOM: Wow. It’s quite a mess. Yeah, I mean certainly, you can use a heat gun but a heat gun is very hot and it’s going to cause all kinds of fumes. And the problem with the fact that you had this type of adhesive, it’s going to soak into the pores of the brick. So, at best, even after doing all that, you’re going to end up painting the brick, which we hate to tell anybody to do, because it’s going to – otherwise, it’s just going to look terrible. You’re never going to have that natural brick. That decision was made for you by whoever decided it was a good idea to glue the plaster right to the brick without putting up any kind of a furring strip or something of that nature.
There are, you know, various types of adhesive softeners out there but I fear that even if you went through all that trouble, you’re still going to have a very undesirable-looking surface. So, I think if – I’m sorry it’s all torn up now but I think if it was me, I would probably fur over that, attach wood strips to that brick surface and I would probably put new drywall or some other surface over it, at this point, and give up on the idea of having an exposed-brick wall unless, of course, you want to re-brick the whole thing which is a big mess and a big job.
DEBBIE: And a big expense, too.
TOM: And a big expense, yeah. Of course. Yep. Absolutely.
DEBBIE: OK. Alright. Well, thank you very much. I appreciate it.
TOM: Good luck with that project. Thanks so much for calling us at 888-MONEY-PIT.
LESLIE: Heading over to Louisiana where Ron is on the line. What’s going on at your money pit?
RON: Well, my house has marble floors in the kitchen and in both master bathrooms. And I’m trying to find what to put down to make them shine again. They’re so dull. And we had a man come out but he wants an outrageous price to shine them up, so I’m trying to figure out how to do it myself.
TOM: Well, Ron, you can do this yourself. There are two different products that I would suggest you take a look at.
The first one’s called Rejuvenate. And that is a marble, granite and stone floor cleaner and a polish. Not very expensive to get. And the other one – it’s been around for a long time and I’ve recommended it a number of times and people always get back to me and say they love it – is called Granite Gold. And again, that is a stone and tile floor cleaner that will allow you to polish and clean the floors at the same time.
Now, maybe it won’t be as good as having a pro come in there but it’s going to be a heck of a lot less expensive, even if you have to do it more frequently.
RON: Yeah. The gentleman that came out to give me a price, he said, “Oh, no. Don’t use Rejuvenate.” So, of course, he wants the job.
TOM: Well, that’s probably a great recommendation.
RON: Yeah. He wants (inaudible).
TOM: If you look at it online, it usually always has four or five stars. The people seem to love the stuff.
RON: I know we used it on the rest of our floors in the house: on the hardwood floors and the tile floor. But I never have put it down on the marble and …
TOM: Well, I think there’s a formula just for the stone products, so make sure you’re using the right one.
RON: OK. OK. Alright. I’ll check that out. Thank you so much.
TOM: Alright. Good luck, Ron. Thanks for calling us at 1-888-MONEY-PIT.
LESLIE: Hey, you working on so many projects at one time that you could actually use an extra set of hands? Well, we can help. We’ve got a great prize up for grabs this hour. We’ve got a set of 4 Jorgensen Heavy-Duty 24-Inch Steel Bar Clamps.
They’re super easy to use. They’re fast-acting with a sliding head, large hand grip. You’re going to like them. Check them out. You can actually see the whole line of Jorgensen products at their website: PonyJorgensen.com. But this prize is worth 140 bucks.
TOM: Going out to one caller drawn at random. Make that you. Call us, again, at 1-888-MONEY-PIT.
LESLIE: Helen in Arizona is on the line with a question about some bubbling paint. What is going on?
HELEN: I had my – the exterior of my home painted last summer. And the painter had power-washed it. Came back in a couple of days – a day or two – and actually did the painting. And it was about two months after that, I happened to notice little bubbles appearing under the paint. And I presume that’s because there’s water under that paint.
TOM: Not necessarily. What you have is an adhesion issue. So the paint’s not sticking to the wood siding or the substrate, whatever it is. This is a wood-sided house?
HELEN: Yeah, it’s a manufactured home, yes.
TOM: OK. Do you know if your painter applied a primer? Or did he just put the topcoat paint on?
HELEN: I’m trying to think if my paint did have primer in it.
TOM: Well, it wouldn’t have it in it; it would be a second coat. See, the right procedure would have been to scrape or pressure-wash – as he did, in this case – to get rid of the loose paint, algae or mildew and so on, let it dry and then prime it.
HELEN: Right.
TOM: Because primer is what makes the paint stick. Now, if he didn’t prime it and the paint’s separating after two months, that’s a big problem. And it’s a problem for your painter because he did something wrong. There’s no way that paint should be failing after two months.
HELEN: I had it painted the fall prior and the person did a terrible job. And so, I decided to change colors and have it done again.
TOM: The new painter – the guy who does it accepts the condition of the house. So, if the first guy made any mistakes, then the second guy’s job is to correct those mistakes so that his work looks good.
HELEN: But there was no bubbling after the first paint job.
TOM: OK. I heard you on that. But OK, no matter what was there before, you need to make sure that the house was not only cleaned and loose paint removed but primed. Because at some point, you’re going to – you can’t keep putting layers upon layers of paint and expect every one to stick to the one before it.
Primer is the glue that makes the paint stick. And if he did not prime – and I think that’s probably a good reason that this paint is failing. Two days in warm weather should probably have been enough to deal with any moisture from the pressure-washing. Heck, it’s not much more than just a heavy rainfall. So, I think what you need to do is to contact that painter and have them back and have a discussion as to why your paint’s failing after a short period of time. It absolutely should not be happening.
Thanks for calling us and wish you the best of luck with that project.
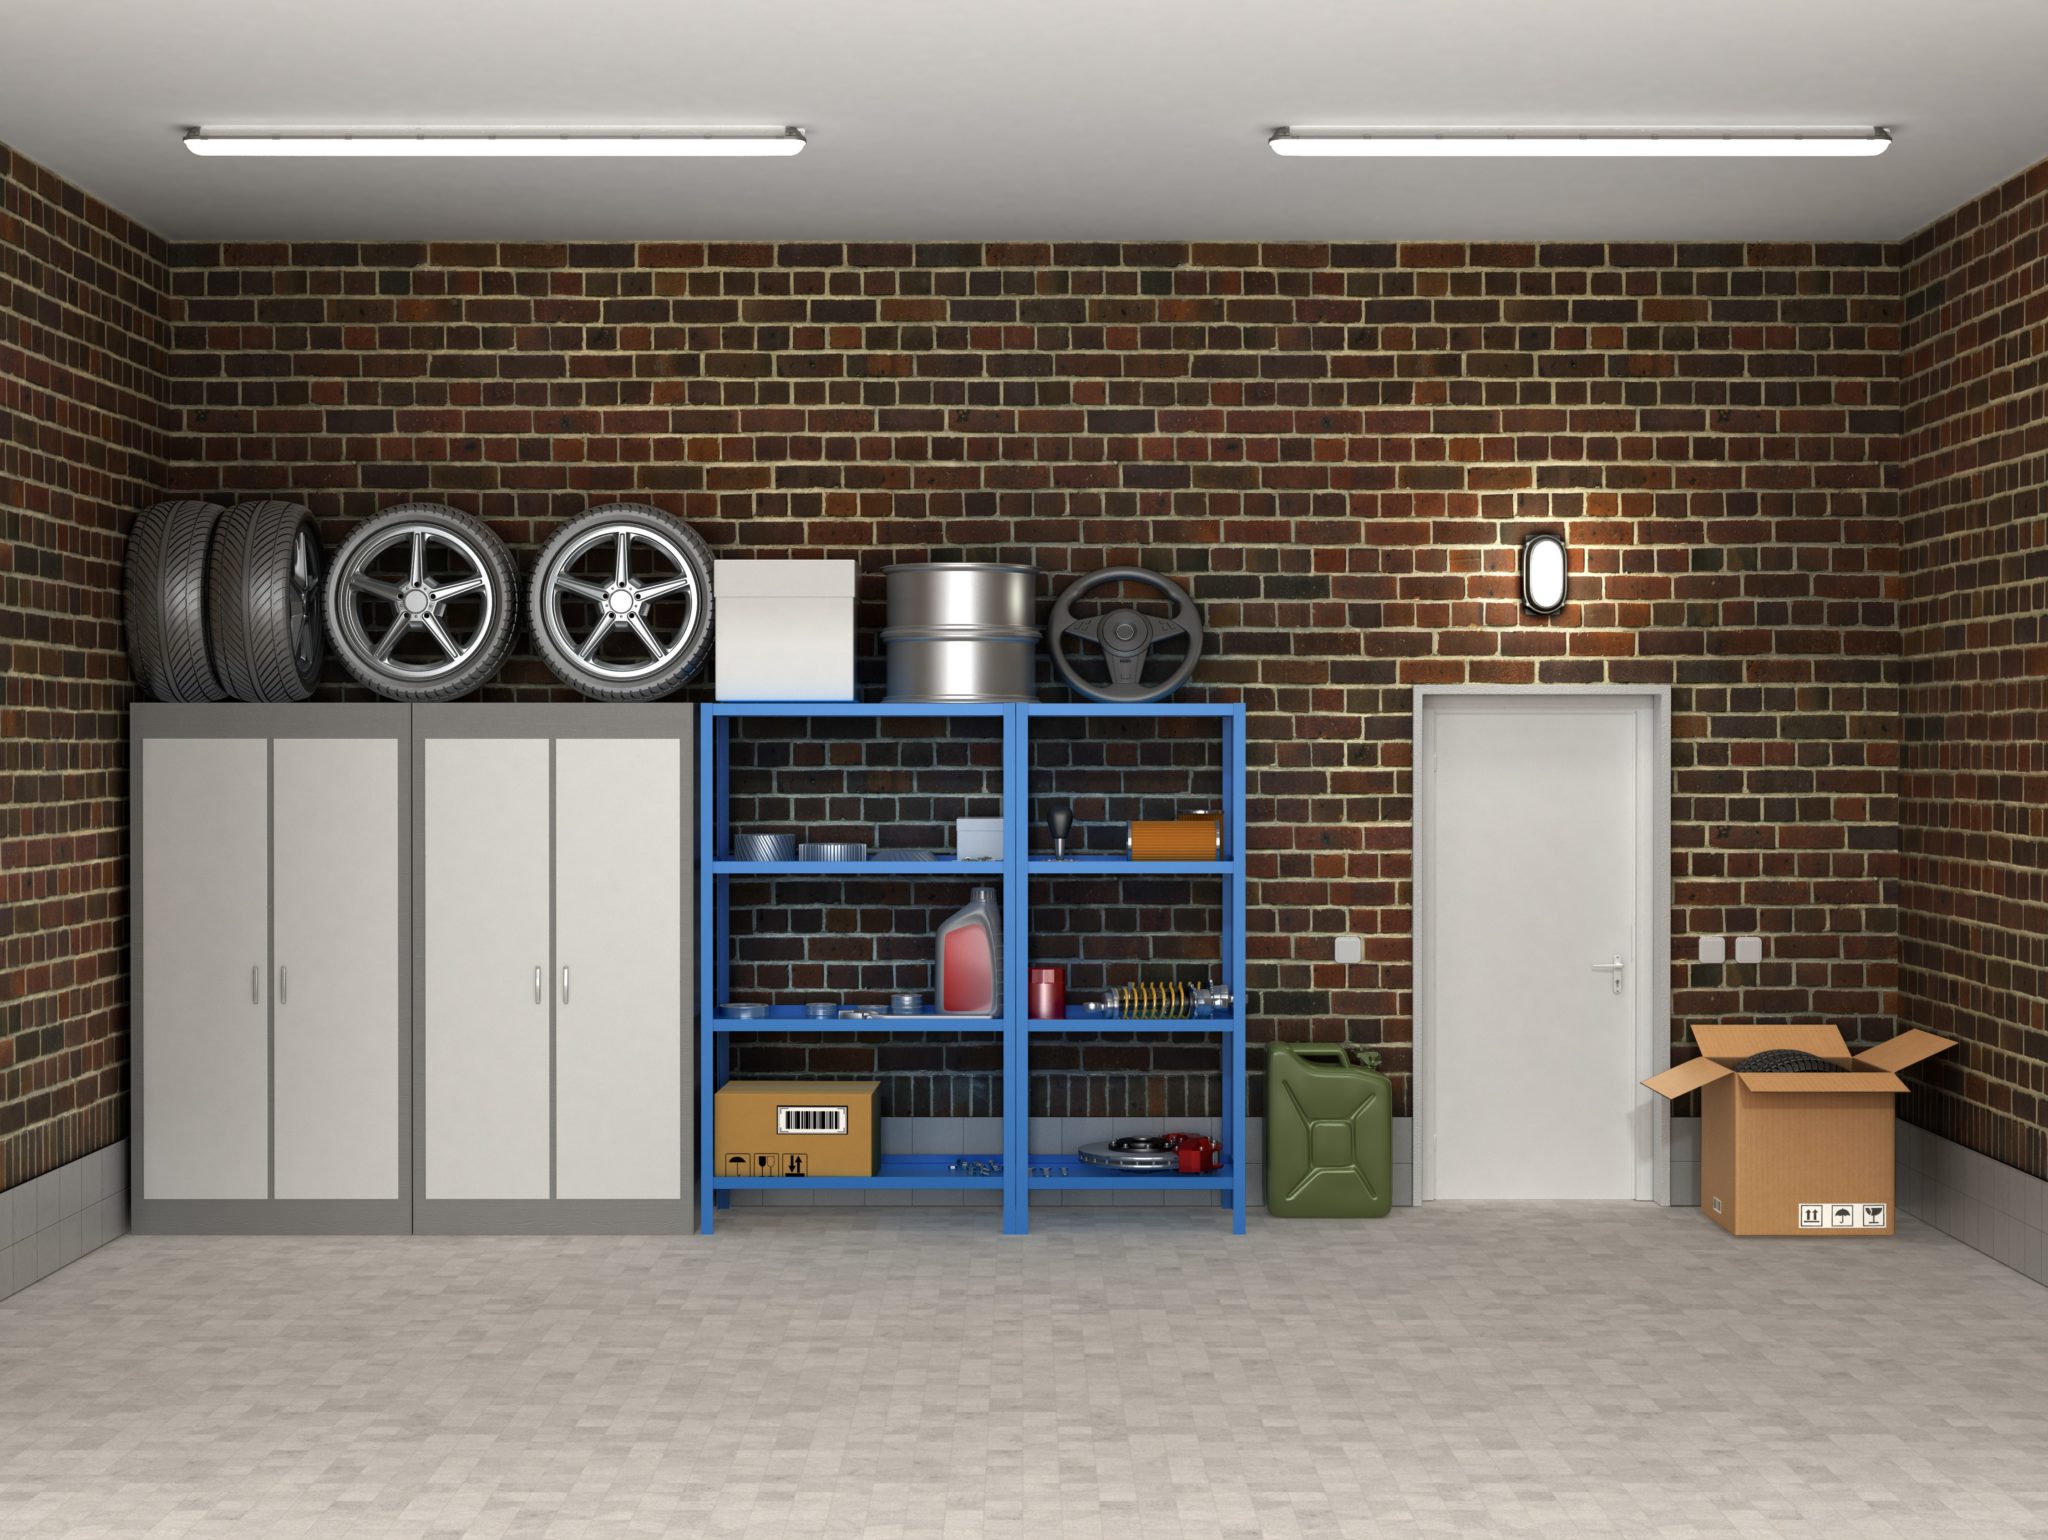
LESLIE: Alright. Let’s face it, guys: there are plenty of items in your garage, right now, that I’m going to say you’re probably never going to use again. Because I know I have the same things in my garage that I’m not ever going to use again. So let’s do it together, guys. Let’s get rid of that stuff, plus figure out a way to store things like toys and chemical cleaners right next to each other. So let’s get that garage organized.
First off, you’ve got to go into your garage and be brutal. Take three big bins: one to fill with items to donate or sell, one with items that you want to throw away and one with things that you’re like, “I really want to keep.” And if it’s like my garage, it’s not going to be a bin; you just need areas of your driveway that’s like this thing, that thing.
Now, get rid of anything that you know you’re not going to use in the future. And by future I mean if you haven’t used it, say, in the last six months, then get rid of it. Because you’re not going to use it again unless it’s a weird seasonal thing, like holiday décor. But get rid of it. If you haven’t used it in six months, gone.
Next, you want to think about your things. Can somebody else use them? Now is a great time to make a donation run to your nearest charity drop-off. Just get the stuff out of your house. Otherwise, you’re going to have the same conversation with us next year, the year after that, one more year after that.
TOM: Definitely. Now, once you’re done sorting the things out that you don’t want, you want to separate the ones that you do. So divide up the sports equipment, the home maintenance items, the holiday decorations and all those other categories into separate containers or bins or baskets or sturdy boxes. And make sure you clearly label everything. You might find it’s also useful to do sort of a color-coded system: maybe red and green for holiday, blue for outgrown clothing, black for seasonal sports and so on.
A little bit of organization now is going to make summer so much more pleasant. Because I’ve got to tell you in my house, everything gets parked in the garage and not in the right spot. So, really important to keep that space clean, neat and organized.
LESLIE: Jim in Tennessee is on the line and is dealing with some bees.
What kind of bees? Are they all over? Are you getting stung? What’s happening?
JIM: We have a log cabin, East Tennessee. And shortly after we built it, we started having a problem with boring bees.
LESLIE: Ah, carpenter bees.
JIM: So, these are giant bumblebees that so far have not stung anybody.
LESLIE: They have big, black, shiny tushies and they can drill a perfect hole in all wood surfaces, 5/8-inches around.
TOM: Yep. Yep.
JIM: They’ve decided to make our cabin their home, as well. And about this time of the year, we’re inundated with thousands of bees. We’ve had exterminators come through and nothing seems to eradicate them.
TOM: I don’t know what material they’re applying but usually, the right pesticide will prevent them from coming back. What they’re basically doing is they’re drilling holes in wood surfaces. And then they go in those holes and they lay eggs. And then they just kind of let them sit there and hatch. Now, with the right types of pesticide – usually, there’s a powdered pesticide that they actually put into the holes and around there – that will stop that.
Now, is it happening in the logs themselves or is it on the fascia and the trim?
JIM: No, it’s every – pretty much everywhere.
TOM: Wow, yeah.
JIM: It’s in the log and it’s in the fascia and trim, as well.
TOM: Yeah. Because the fascia and the trim – you know, I had some fascia and trim like that that was getting ravaged in a garage and I got tired of treating it every year, so I just replaced it with a composite material. And it was funny because the first year after that, the bees kept flying around it thinking, “Hey, looks like wood but doesn’t taste like wood.” So, they eventually gave up and didn’t come back.
But it sounds to me like you’re just not dealing with the right type of pest-control professional, because I don’t understand why if they’re applying some of the standard products that are out there – which you can’t buy, by the way, because they’re not over the counter – that these bees keep coming back.
JIM: Right. Well, we have a home contract for a pest-control company. And we’ve had them since we built the house. And they’ve applied treatments several times but it doesn’t seem to really eradicate the bees.
TOM: I can’t give you a specific pesticide but I will tell you that insecticidal dust is typically what works best. It has to be applied to the holes, even inside of those holes. And then once it’s inside of them, you do not want to seal up the holes; you want to let it sit and do its job. And then after the season, so to speak, then you should seal up the holes. Because if you don’t, they’ll come back. But you want to make sure that all the bees have been killed. Because if you don’t make sure they’re all killed, they’ll just keep drilling to find new spaces, because you sealed off the ones that they had. But if you apply the insecticidal dust, that will do it.
And then after you have it all sealed up, then you might want to think about staining or refinishing those outside surfaces, because that will also discourage bee infestation. It’s typically paints or stains with any kind of a varnish. They’re not going to like the taste of that stuff.
JIM: OK. Alright. Great.
TOM: Alright? Yep. Good luck with that project and thank you, again, for calling us at 888-MONEY-PIT.
LESLIE: Jackie in Florida is on the line with a dishwasher question. Tell us what’s going on.
JACKIE: Here’s my thing. It’s a Whirlpool dishwasher. It’s only four years old. And all of a sudden, just one day a few weeks ago, it just – I noticed all the dishes just stopped drying. And so I did some looking up and just sort of troubleshooting. It could be this, it could be that. And now, they seem to be washing but just not drying. But now there’s mold building up in it, as well.
TOM: Mm-hmm. Yeah.
JACKIE: And I’ve even noticed – like it’s still hot if I pull it right after the cycle’s done (inaudible). You could still feel the warmness of it but …
TOM: But you’ve got to – but you have to hand-dry them, in other words.
JACKIE: Right.
TOM: Well, usually, if the dishwasher is not drying, the problem is in the heating element. The fact that they’re warm is probably just the hot water that you’re using to wash it with, because dishwashers are hooked up to the hot-water side. But the heating element is that electric coil that’s in the bottom of the dishwasher and it may have failed. But you’ve got a decision to make because you just mentioned you have a four-year-old dishwasher. And having somebody come out and diagnose it and repair it is probably going to cost you 200 or 250 bucks.
JACKIE: Right.
TOM: So, what you’ve got to figure out is whether or not you want to risk that or just go ahead and scrap it and go – and order yourself a new one.
JACKIE: Right.
TOM: When it gets to be middle-aged like that, it doesn’t always make sense to repair it.
JACKIE: Right. And here’s the thing. I’ve tried to even look up online to see if I could buy the heating element myself and then replace it myself but …
TOM: Yep. Well, you certainly can do that.
JACKIE: But the part number doesn’t come up. I can’t find a matching part to it. And so then I talked to Whirlpool and of course, they want to send someone out and …
TOM: Did you try Sears? Because I think Sears has Whirlpool parts. And they’re really good about stocking a lot of parts and also taking them back if they don’t fit.
JACKIE: Do I have to pull it out of the cabinet to get to the screw to unhook it? Or does it pull right …?
TOM: I wouldn’t know without looking at it. And that’s the other thing: you’re going to be diving into something that you’re unfamiliar with and it might just be that, again, it just doesn’t work.
JACKIE: Right.
TOM: So I’m sure that somebody out here has had that problem before and has a YouTube video waiting for you to look at, to kind of figure out.
JACKIE: Yeah.
LESLIE: There’s a YouTube video for everything.
TOM: Yep, exactly.
JACKIE: Right. You can do everything on YouTube.
No. And that’s actually – what I’ve looked into is YouTube, as well. That’s how I figure out how to fix anything and everything these days is YouTube.
TOM: Well, good for you. That’s great.
JACKIE: But I didn’t know if there was a simple way. I cleaned it well. I scrubbed everything down thinking maybe that was the problem, because you know how dirty they get and clogged up.
TOM: Yeah.
JACKIE: So, I don’t know.
TOM: But like I said, I don’t think it’s a clog situation. Because if you told me your dishes weren’t coming out clean, then we’d be having a different conversation. But it sounds like they’re just not drying and that’s most likely going to be that coil.
JACKIE: OK. Alright. Well, thank you. I think you just made the – my final decision.
TOM: Alright. Well, we’re glad we could help you out. That’s what we do. Thanks so much for calling us at 888-MONEY-PIT.
Making good homes better, this is The Money Pit Home Improvement Show. I’m Tom Kraeutler.
LESLIE: And I’m Leslie Segrete.
Well, the pandemic has changed the way that we’ll do many things in the days and weeks ahead. And that’s certainly true when it comes to how we’re going to maintain and improve our homes. And that definitely includes how we find and choose contractors to take on those projects that we don’t want to do ourselves.
TOM: That’s right. But if you ask your pro the right questions, you’ll be able to identify those that will not only be able to complete your project on time and on budget but they’ll do so in a way that protects you and your family from unnecessary risks. With us to talk about that and five questions that you should ask your contractor, post-COVID, is Dan DiClerico with HomeAdvisor.com.
Welcome, Dan.
DAN: Hey. It’s good to be here.
TOM: So you guys have been on the digitalization of home improvement for a lot of years now. And this is sort of a whole new level that we’re stepping into. How is this going to change the way we find and hire pros?
DAN: Yeah, I think first and foremost, it’s increasingly important to ask that pro how comfortable they are with virtual communication. We’re seeing a real sea change in how businesses and customers interact. A lot less face-to-face interactions, especially in the early phases of the project. So, you know, getting an understanding of – for example, with video messaging. Is that something that the pro is going to be able to use with the homeowner through the early planning and contract phase of the project?
TOM: So, for example, you don’t really need to meet these guys in person. You could probably – actually, it’s more convenient, too. You could probably schedule four or five estimates, so to speak, almost back to back and do them one call at a time, with FaceTime or any other type of video-chat system, where you can walk around with a pro and say, “OK, here’s my kitchen and here’s what I’m thinking about doing,” and so on and so forth and maybe even give them some rough dimensions.
You should be able to kind of certainly explain the job and let the pro sort of explain him or herself and maybe even give you a little bit of a virtual presentation at the same time, rather than walk into your house and sit down at the kitchen table with a notebook full of pictures, right?
DAN: Exactly. Yeah. I mean during the pandemic it was a necessity. You couldn’t physically go into the home. But that’s what we’re kind of discovering here: that there’s a real efficiency, a real convenience for the professional and the homeowner to be doing some of this work, at least, virtually through video messaging or whatever other platform it may be.
LESLIE: And we can say, Dan, that this was probably inspired by the children’s online learning. Because I know every time my seven-year-old gets on his Zoom class thing, they have to run around and show each other their entire houses. “Did you see my bedroom? Did you see this?” But …
DAN: Exactly. That’s the point. We used to talk about the firm handshake, the clean shirt, the clean truck as being part of the first impression. Now, it’s how savvy is that pro on the Zoom call.
LESLIE: Which is smart. And I guess you can do a lot of other things. You can probably do payment or come up with a pay schedule or contracts. All of that can also be done virtually.
DAN: On HomeAdvisor, we’re really getting out in front of this as much as possible. We’ve launched a bunch of new tools that are going to facilitate with this kind of virtual communication. So the video messaging is built right into the app. The digital payments, which avoid the transaction of cash or checks, it’s all part of this larger digitalization of home services that’s been happening for several years, even longer. But really, in the last few months it’s really taken off.
TOM: So let’s say we are going to hire a pro to do a bigger project and they’re going to spend some time in our house, perhaps have some subcontractors involved. What kinds of questions should we be asking them, aside from are they going to be wearing face masks and such? What sort of services might we expect them to provide now when they come to work in our spaces?
DAN: Safety and cleanliness. You always wanted a contractor who’s going to keep the job site neat and tidy, now more than ever. So, certainly asking about the protective gear, the face masks. We think of – we associate it with the coronavirus but there’s no reason that pros shouldn’t be wearing masks on a regular basis given all the dust and toxicity.
So, asking up-front about that, getting a good sense of what the relationship is to the subcontractors. And again, this was always a best practice. The best GCs out there have good, long-term relationships with their subcontractors. But moving forward, it’s even more important. You want to know their – that they weren’t out sick for a few weeks before they start on your job.
TOM: Well, I think, also, we want to make sure – we’ve always expected them to clean up at the end of the day. And we were just talking about sawdust. But now we’re talking about – are they going to bring their own cleaning supplies, towels, hand sanitizers? Are they going to wear the gloves and the booties on your …?
LESLIE: Yeah. Paper towels are in demand, so you bring your own.
TOM: Yeah, that’s right. That’s right. BYOPT.
DAN: Totally. Yeah, BYO.
So, talk to the pros up-front about this. This is part of the initial vetting process. But when you’re checking those references, talk to past clients, as well. Ask them. “Hey, did this guy keep a clean, organized job site or was the place a mess?” It’s really important to ask those questions these days.
LESLIE: Do you think it’s important, Dan, when you’re having these sort of initial online meetings – and you think that maybe when you actually have decided on the pro and get them in your house that it’s sort of that idea of – “Oh, while you’re here, there’s also – blah.” Should you sort of discuss that up-front like, “I may have another thing or not”? Just because you don’t know if they have availability for those extra projects, time-wise.
DAN: Definitely, definitely. Yeah. Is it possible to bundle multiple projects into one? More important than ever. It’s not that it wasn’t a best practice before but now, more than ever, you want to try to minimize the number of times you’re having to bring professionals into the home. And bundling projects, if it’s an HVAC pro who’s coming to fix your A/C unit – “Hey, can you take a look at the humidifier or the air filters?” Whatever it may be. But trying to package those projects into one makes a lot of sense these days.
TOM: We’re talking to Dan DiClerico from HomeAdvisor about how home improvements and the hiring of pros and folks that are going to work in your house may change, in the future, in a post-COVID environment.
Dan, it occurs to me that we’ve always been conscious of the time it takes to get a job done and the scheduling related to that. And there are a lot of factors that figure into that: how long it takes to order materials and such to get the job done. And it used to be that it was OK if the guys came in the morning and they went to another job in the afternoon.
Now, I think, I want you guys in and out complete in as short a period of time. I don’t want this to go for longer than it has to, so I think that plays into this, as well. Are they going to be able to start this job from – basically, from start to finish without leaving the site to go work elsewhere?
DAN: Oh, that’s such a great point. I think we’re looking for leaner, more efficient projects. And it’s just another example of how the pandemic really is forcing the industry to modernize in a lot of positive ways. I mean I hate to say it’s been a positive; it certainly hasn’t been that. Pros are really having to get on board with the technology and with being as efficient as possible.
TOM: Yeah. I think that’s happening across a lot of industries. Look at telemedicine, right? That has been adopted with open arms, whereas before it was like, “I don’t know if I like that or not.” But now, people are like, “You know, it’s not so bad.” We’re getting information that we need, we’re getting seen by a professional. And it’s going to be similar in other industries, as well.
Now, Dan, you mentioned that there were some new technologies, either here or about to be here. You mentioned that the HomeAdvisor app has been updated to accept digital payments and do video chatting. But there are some other technologies that are going to help pros do some of this research and do some of this estimating without even setting foot in their home and particular around augmented reality.
DAN: It’s really exciting. A lot of very cool, very available – here and now – software that increases the intelligence of the smartphone. I like to say it turns sort of FaceTime on steroids, using things like spatial mapping or object recognition, artificial intelligence, these sorts of things.
So, for example, a painter. If a homeowner holds his or her phone up to a room, the painter, using all these software advancements – these tools – will be able to take measurements for that room without ever entering the house and provide that homeowner with a very accurate estimate, all in sort of virtual time.
TOM: Well, Dan, in many ways this is sort of forcing people to become more comfortable with digital tools. And I think that that’s going to be a good thing. I know there was a lot of natural sort of anxiety about going this way for pros and for homeowners, as well. If you’re a younger homeowner, then certainly you’re going to have more comfort than if you’re an older homeowner.
But I think that this move and showing that it can be done successfully and safely and efficiently for everyone, by using these digital tools, is really going to be a positive for the industry going forward.
DAN: It really addresses that perception problem, really brings the industry full on into the 21st century. So I think this is a good thing moving forward.
TOM: Dan DiClerico from HomeAdvisor.com, thank you so much for stopping by The Money Pit.
And if you’d like to get more details on these tips and ideas for how you can digitize your home improvement projects going forward, Dan’s post about this very topic will be up online, on our home page, at MoneyPit.com.
Give us a call right now. Two things will happen: you’ll get the answer to your home improvement question and a chance to win this hour’s prize. We’ve got, from our friends at Jorgensen, 4 Heavy-Duty 24-Inch Steel Bar Clamps.
Now, if you like to take on projects, you can never have too many hands. That’s how I feel when I use this set of clamps. I have the exact same set and I love it because it has a disc-clutch design that basically means you can slide the head right up to compress the wood. And then you’ve got a nice heavy-duty handle that you twist and it will apply up to 80,000 pounds of pressure, which means you can pretty much secure things while you’re working on them or when you’re gluing up some boards, whatever you need. It’s just really handy to have around.
We’ve got a set of four – they’re worth 140 bucks altogether – going out to one caller drawn at random. So, hey, why not give us a call at 888-MONEY-PIT or post your question to MoneyPit.com?
LESLIE: Well, one of the quickest ways to spruce up a space is to add a few framed photos, wall hangings or even some shelves to those blank canvas of walls. They’re surrounding you. But for millions of people who rent apartments or homes, poking holes in those otherwise perfect walls is a sure way to lose a good chunk of your security deposit.
TOM: Well, that’s right. So, to avoid that hassle, all you need is a relatively clean, smooth wall, a bit of ingenuity and a few pretty inexpensive products.
So, first up, let’s talk about mounting tape. It’s a very powerful, sticky, foam-centered tape with adhesive on both sides. But while mounting tape tends to be permanent and can damage surfaces when removed, it will also leave behind a very nasty stain.
LESLIE: Now, another type of mounting product called “mounting strips,” they’re designed to release cleanly when you pull it along the longest access. So, if it’s horizontally, vertically, you pull it in that direction and it sort of eases its way off the wall. It’s really fantastic but you want to make sure that that wall is flat. You want to make sure that it’s smooth, it’s a good surface. And that’s going to help you to get the items to secure really, really well.
And again, it’s so easy to take off. Just make sure that you buy the hook or the strip that goes to the right weight capacity, because you can reuse the hooks. You just have to replace the strips. So just make sure you’re sizing it correctly for what you’re hanging on the walls so it does not slip off.
TOM: Now, if you’re hanging framed art or photographs and unframed posters, that’s a significant part of any interior-décor project. So to work with the brackets and the holes and the hanging wires that are part of those frames, there’s also a special set of picture-hanging hooks made exactly for that purpose under the 3M Command line. But Leslie made a great point: make sure you check the weight limits. They’re pretty accurate and they do work really, really well if you have a smooth surface to work with.
LESLIE: Check out The Money Pit on Facebook at Facebook.com/TheMoneyPit. Post your questions there.
Now, Mickey in New York writes: “I’m redoing parts of my kitchen. I want to add a glass-tiled backsplash. Do I need to put anything on the wall under the tile? Or can I just put an adhesive straight to the wall?”
TOM: Well, I think you’re concerned about whether or not you need to do anything about the drywall on the wall and the answer is no. You don’t have to. Of course, you’ve got to take off the plates from the electrical outlets and you’re probably going to have to deepen them. There’s extensions to those electrical boxes that can make them a little bit thicker so that they’ll stand out towards the edge of that tile that you’re going to end up with. You don’t have to change the drywall.
And you also don’t have to use adhesive. There are types of other products that are sort of sticky-backed and they’re sticky on both sides. One of them is called Bondera. There are others. And Leslie and I have used them on projects. And the cool thing about these sticky-backed products is that you can grout right away. You put them on the wall and then you peel off the other side, stick the tiles right on it and you can just grout immediately. So it does save you a bunch of time. But you certainly won’t have to do anything to the drywall underneath.
Now, if you’ve got a tile wall and you want to change it, you can forget that drywall. It’s better off just to tear the whole thing out.
Right, Leslie?
LESLIE: Yeah. I mean you can’t put tile on top of tile. And if you try to take out tile and get back down to a workable surface, you just won’t. There’s going to be all kinds of things that are stuck to it. So, definitely start over, if you can, with the tile wall or think about a way to maybe pop out one tile and add in a decorative tile. And suddenly, you might like it again.
There’s lots of ways to work around but tile on the wall already definitely makes it harder. But good luck with your project.
TOM: Well, it’s the classic Groundhog Day moment: you get out your tools, you fix a problem and a pretty short time later, it’s got to be done again. Leslie has got tips to help you stop that how-to déjà vu, on today’s edition of Leslie’s Last Word.
Leslie?
LESLIE: Yeah. You know, fixing that same problem over and over and then again and again really is a drag, guys. Let’s just do it once and not do it a hundred times.
So, the next time you see some peeling paint, don’t just slap another coat of paint right on top of it and be like, “Alright. That’s good. That’ll hold for now.” Instead, get rid of the old stuff with a paint scraper or if you have to, a chemical product. And then here’s the key: prime those surfaces before you once again apply a topcoat. That’s going to make sure that paint sticks as best as it can.
Now, if your basement seems to spring a leak every time you fix the last one, there’s probably a good chance that the real issue at your home is poor drainage. So, you want to make sure that you’re grading the soil away from your home’s foundation. Make sure those gutters release the water about 4 to 6 feet away from the exterior wall and you’ll find that you have a much drier basement space.
And here’s another one, guys: get rid of that caulking gun once and for all for the bathroom. Now, if the caulk between your shower tiles keeps cracking or breaking between the shower and the tub, you want to make sure that you fill the tub with water before you actually reapply the caulk line. So fill the water in the tub. That weight is going to pull it down so when you’re adding in the caulk, it’s sort of going to the widest space. And then leave the water in. And once it’s dry, drain it and it will seal back together all nice and tight so you don’t have to worry about any spaces or anything getting behind it.
Do these this way and I promise you won’t be asking us how to do it again.
TOM: Do it once, do it right, you want have to do it again.
This is The Money Pit Home Improvement Show. Coming up next time, do you want a garden that not only looks good but also serves an important purpose? There are a lot of species out there, like bees and hummingbirds and butterflies, that play a big role in plant reproduction. They’re called “pollinators” and they are incredibly important to life here on Earth. So, it’s important we give these creatures a place to carry out their good work. We’re going to talk about how you can build your very own pollinator garden, on the very next edition of The Money Pit.
I’m Tom Kraeutler.
LESLIE: And I’m Leslie Segrete.
TOM: You can do it yourself …
LESLIE: But you don’t have to do it alone.
(Copyright 2020 Squeaky Door Productions, Inc. No portion of this transcript or audio file may be reproduced in any format without the express written permission of Squeaky Door Productions, Inc.)


Leave a Reply