Show Notes
- Stump Removal: Get to the root of the problem of stump removal with these tips.
- Squeaky Floors: Step quietly by fixing those annoying squeaky floors.
- Buying Gutters: Installing the right gutters defends your home against water damage.
Table of Contents[Hide][Show]
Plus, answers to your home improvement questions about:
- Ceiling Stains: After fixing a roof leak, Sarah has ceiling stains. Using a good primer before painting will stop the stains from coming through.
- Cement Caulk: Is there a caulk you can use to match a cement stamped patio? Tom will probably need to just use a clear caulk to seal the cracks.
- Bathroom Tile: Is there an alternative for bathroom wall tile? Janet should consider a premade bathtub surround as an inexpensive and effective option.
- Crawlspace: Bowen had better have a good reason for removing dirt from his crawlspace because exposing the footing could cause structural issues.
- Cracked Concrete Floor: Lori has cracks in her concrete flooring. We recommend using a patching compound to make it look like new.
- Uneven Floor: The uneven floor in John’s home addition is a problem. We offer suggestions for using a floor-leveling compound or a transition strip.
- Installing a Flagpole: Linda is having trouble installing a flagpole to an aluminum column and gets info on using longer screws and a block for support.
- Stained Countertops: How do you clean stains on a Corian countertop? Sharon should try making a cleaning paste and letting it sit to bleach the stains.
Podcast Transcript
Read Transcript
| 0:00:24 | TOM: Coast to coast and floorboards to shingles. This is the Money Pit Home Improvement show. I’m Tom Kraeutler. |
| 0:00:30 | LESLIE: And I’m Leslie Segrete. |
| 0:00:31 | TOM: And we think home Improvement is an adventure. And if you are on your own home improvement adventure, we hope it’s going well if it’s not. Because sometimes adventures have unusual things that happen, you know, twists and turns along the way. Well, that’s what we’re here for. We’re here to help you tackle those projects and get them done. Help yourself first, though, by calling us with your questions. You can do that at 1-888-Money-Pit. Or better yet, technology is your friend. When you go to moneypit.com/ask and click the blue microphone button, you can record a question and send it directly to us for the fastest possible response coming up on today’s show. With all the recent storms, have you had a tree or to fall down? Have you had to have it removed by a tree company and maybe they left the stump behind because it’s like really expensive to get rid of stumps. |
| 0:01:15 | LESLIE: That’s an extra charge. |
| 0:01:17 | TOM: It’s always an extra charge as if there was an option, right? Well, guess what? That job is about as far away from DIY as you can get. But we have got some options. You can use yourself in just a bit. |
| 0:01:28 | LESLIE: And also head squeaking floors are one of life’s little annoyances is. But do they signal a structural problem? Below, we’re going to have the answer, plus step by squeaky step tips to make them go away for good in just a bit. |
| 0:01:41 | TOM: And now that we’ve reached September, it’s a good time to take a good look at your gutters. They are key to more than just keeping water from overflowing. If yours are in bad shape, there are some serious structural problems that can result. |
| 0:01:53 | LESLIE: But first, we are here to help you tackle your to dos with confidence. You know, in the East Coast, our kids just went back to school this week, so maybe you got some extra time on your hands looking to fill a project or two in that time frame. Let us help you figure out what you can tackle in a school day. That should be a tip. School day projects. |
| 0:02:10 | TOM: Things that you can tackle inside of, say, six or seven. Our school day window, right? There you go. |
| 0:02:15 | LESLIE: Yes, I like this. |
| 0:02:16 | TOM: Give us a call with your questions because we are here to help you get those projects done. School day or not, we can help you tackle those two issues with confidence and get them done right the very first time. So call us right now at 888-Money-Pit or go to Moneypit.com/ask and click the blue microphone button. Let’s get to it. Leslie who’s first? |
| 0:02:34 | LESLIE: Sarah’s on the line with a painting question How can we help you? |
| 0:02:37 | CALLER: So we had a roof fix and in the process there was a leak and they painted the ceiling inside. But it still has like a yellow tinge. We’re just wondering how to fix that. You have any recommendations? |
| 0:02:53 | LESLIE: Oh, geez. I feel like every time there’s a roof leak, you end up with, like, some strange discoloration. So. So first of all, roof leak is fixed, so that’s good. Now, for painting, I mean, you’ve got to once that leak is fixed and everything is dry in that ceiling, you’ve got a spot prime. Otherwise, if you just were to recover with the ceiling, paint that stain is going to kind of magically seep through and find its way through that paint color. So you have to make sure that you spot prime or if you’re up to it prime the whole ceiling again let that dry well and then paint it with the ceiling paint and that’ll do the trick. But you definitely have to make sure you prime it, otherwise you’re just going to keep seeing it. All right. Now we’ve got Tom on the line. We need some help finding caulk. Tell us about it. |
| 0:03:31 | CALLER: Hi. I have a question about the cement patio that they have on the back. It’s got a pretty big crack in it, and I wanted to find the best way to go ahead and either fill that in a few years, like a special kind of cock, or if you got to get that is somehow able to be stained and a decent color and trowel it and. |
| 0:03:50 | TOM: Well, it’s nice that you have a stamped concrete patio, but unfortunately, I don’t believe you’ll be able to find anything beyond the basic caulk colors. You should seal the crack because if you don’t, water gets in there, it freezes, expands it, disturbs the dirt under the patio and cause more cracking. So you do need to get that sealed in there. But I don’t think you’ll be able to find one that matches it exactly. There is a product called eXact Color, which will allow you to tint caulk by mixing it with paint, but I’m pretty sure it’s only available as a latex, which is not as optimal for an outdoor application as the silicone would be. There are concrete products that you can mix with dyes to get a color, but the problem is that you shouldn’t really be patching those things with concrete because it’s just going to fall out. It’s not designed to actually stick. There is a product called Re-Cap made by QUICKRETE. It may be possible to stain that to match it, and that is a different configuration. So it’s designed to basically adhere very well to old concrete. But I think I would focus on just using a clear caulk. I just don’t think it’s gonna be practical. You’ll be able to mix one or find one. That’s just exactly the right color, unless it happens to be, you know, almond or white or gray or all the sort of standard colors. Good luck with that project. |
| 0:05:01 | LESLIE: Janet in South Carolina, you’ve got the Money Pit. How can we help you today? |
| 0:05:04 | CALLER: Got a question on options other than tile to put around the bathroom due to some staining. |
| 0:05:14 | TOM: So options other than tile for a bathroom wall. So I think, Leslie, first we have to consider durability here. If you don’t want to go tile, then I’m thinking probably a surround one of these premade surround is probably the way to go, right? |
| 0:05:28 | LESLIE: I mean, they’re going to be the best way to go. They’re clean, You know, they’re seamless, except at the corners. So you have a nice, smooth, solid wall that’s virtually leakproof except for the areas that you attach to floor sides. So the wall itself is going to be great. And they do come in a variety of colors. They can look like they have tile pressed into them. You know, I mean, lots of different ways to use it. |
| 0:05:50 | TOM: Yeah. And there’s a little skill required to install them because they’re not going to fit perfectly out of the box and you have to trim the width. And of course, they have to be glued in place and you have to be corked at the bottom. But I think that’s a really good, inexpensive, effective option for you if you don’t want to go with tile. |
| 0:06:06 | LESLIE: Hey, you want to make our day? Well, go ahead and leave us a five-star review on Apple Podcasts and we’ll be jumping for joy. Plus, you guys, your feedback helps us make the show even better for you. Just go to MoneyPit.com/review. |
| 0:06:19 | TOM: Hey, Leslie, remember last week when we talked about in your episode of Last Word, we talk about how to use tiki torches safely? |
| 0:06:28 | LESLIE: Yes. |
| 0:06:29 | TOM: Well, apparently we forgot to tell people that they shouldn’t be using rubbing alcohol as fuel. There’s a couple in New Jersey that use rubbing alcohol, which is insane instead of the regular standard torch fluid. And guess what? Holding exploded and they got seriously burned. |
| 0:06:46 | LESLIE: Sure did. |
| 0:06:46 | TOM: Air lifted to the hospital. So please, people don’t use anything but the fluids and the fuels that those torches are designed to do or better yet. As Leslie shared last week, use the lead. Urges are far. |
| 0:07:00 | LESLIE: Safer. And they’re so cute. |
| 0:07:02 | TOM: They are cute. Yeah, it looks like last a long time. Those LEDs. I can’t believe how long some of those LED flashlights into the lighting devices. I have one for camping and I had last taken a tent out about three years ago for the particular trip that I went on. So I dug out my old tent for this and I found I had some little camp lights inside of it. You know, the batteries were still good in those lights. |
| 0:07:24 | LESLIE: Oh, my goodness. I thought that left them on your side in all that. |
| 0:07:28 | TOM: Usually they’re still working, so. Yeah, there’s a lot of options. You had a lot safer people. |
| 0:07:33 | LESLIE: All right, now we’ve got Bowen on the line. He’s dealing with some extra dirt under the house. This strange. What’s going on? |
| 0:07:38 | CALLER: I am about to put too much dirt under my house. 1400 square feet. So about 1400 cubic feet of dirt. And I need to pull out from under my house. And it is very difficult for the small crawl space. So I’m trying to figure out the best way to do that without breaking my back. |
| 0:07:57 | TOM: Wow. That is a really weird question. So I am curious as to why you need to remove all of that dirt. One thing that comes to mind is, you know, foundations. You would like to think that the footing for your foundation was three feet below ground. But I’m concerned that if you take out a foot of soil from that crawl space, you may expose part of that footing and you can’t go deeper than the footing. So the first question is, where is the footing? Because you can’t go deeper than that. Secondly, you know, you mentioned there was a very small opening. That’s the first thing I would work on. I would enlarge the opening so that I had a comfortable place to work. And I think if it was me, Leslie and I had to do this project and they don’t know why you feel you have to do, but assuming that you do, what I would do is I would trench down the middle of the crawl space from basically from end to end. So this way I’m working to the front wall to the back wall from sort of a center trench, and that would make it a little bit easier. But boy, you know, when it comes to mine, Leslie, this is going to be, you know, like when some of those old those old Army movies where they were trying to dig a tunnel and they kept putting the dirt, you know, in the legs of their pants and walking around and dropping it all over the field. |
| 0:09:11 | LESLIE: And like shaking it out of the water. |
| 0:09:13 | TOM: Shake it out. Yeah. I mean, you’re going to you’re going to have all you’re going to have a quite a conveyor belt there getting that dirt out. It’s going to be like a bucket brigade to take it out. There is no easy way to do this. You want to do without breaking your back. I don’t have that solution for you. You can’t get equipment down there. This is all going to be done by hand and it is not going to be easy. So I hope you have a really good reason for doing this. I would definitely be curious to learn more. So reach back out to us and we can take it from there. |
| 0:09:39 | LESLIE: Head on over to Tennessee, where Lori’s on the line with a question about a concrete floor. How can we help you? |
| 0:09:44 | CALLER: Lori Flooring that we have now and it happened, correct? I want to know what I need to do to fill those cracks. |
| 0:09:51 | TOM: Well, cracks in concrete are really pretty typical, so I wouldn’t get too upset that you have a crack or two in that surface if you want to repair those cracks. If it’s something like a garage floor, for example, you can patch those. There are different products that are used specifically for repairing concrete. They’re available in a tub, they’re available in caulk, and they’re available also, as in sort of like a stucco like consistency that you can recode the surface with. So if you have a surface that’s really badly cracked or it’s deteriorated, you can use a product like recap, which is made by quick read, and you apply that to the old surface. It adheres perfectly. And when you’re done, it looks like a brand new concrete slab has been poured. |
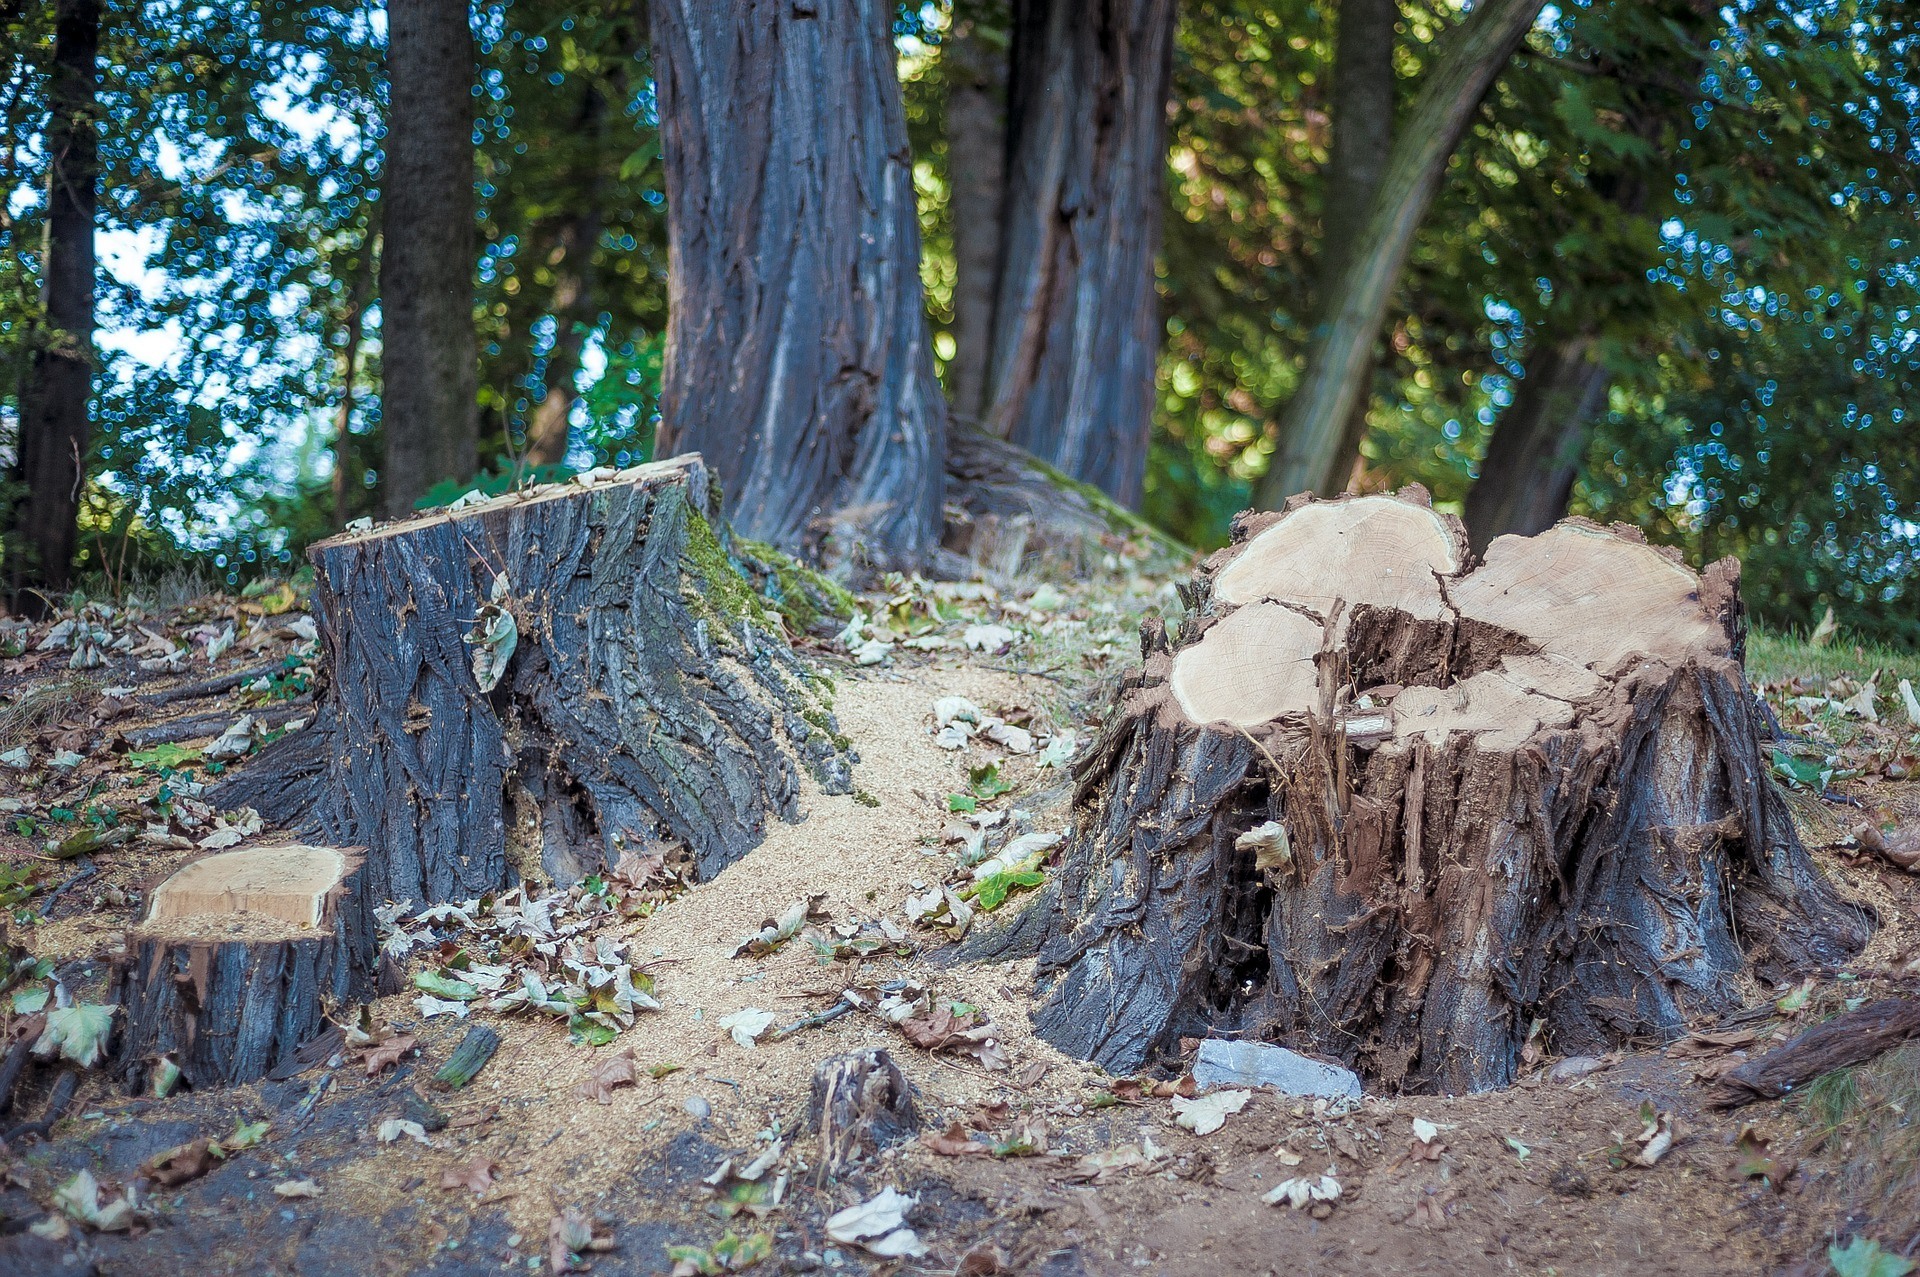
| 0:10:32 | LESLIE: Well, a tree in your landscape can be a thing of beauty, but after it’s gone, that stump is left behind and it’s not so pretty. You know, it’s a tripping hazard. It can definitely damage your lawnmower as you try to mow around it. It attracts insects and let’s face it, sawn off trunks. They really don’t look great. Now, stamp removal truly is your only option, and there’s nothing easy about removing the stump from the ground. But if you’re willing to trade off waiting time for expense, there actually are a few number of ways that you can eliminate the stumps for very little cost. So here’s a few different methods that you can try out. |
| 0:11:08 | TOM: Now. The most common method of stump removal is, of course, grinding, but that job is about as far away from DIY as you can get. You need to hire a tree service they use, especially stump grinder. The tool features like a spinning circular grinding blades plunged into the ground again and again to chew up the stump. I mean, it’s like a torture device. It absolutely is a horrific thing to watch happen, actually, I shouldn’t say horrific because it’s kind of cool to see the power, but I mean, just scary at the same time. But it’s expensive. |
| 0:11:38 | LESLIE: Yes. I mean, I feel the same when I see like when they take down a tree and they put the branches in. Anything minor like that freaks me out, even though, like you would have to physically, like, flail into it. But I’m like, Oh God, something hurt. So when I see the stump grinder, I’m like, Oh, no, like, I it’s scary, but it’s amazing. |
| 0:11:55 | TOM: And it’s expensive. It can, you know, it can add a few hundred dollars and up to the cost of removing that tree. But, you know, if you’re hard to do it yourselfer, there are other options. |
| 0:12:04 | LESLIE: Now, if you’re a hardy, do it yourself or you can dig out a medium small polish sized dump and you can do that maybe in an afternoon. And here’s the steps. If you want to give it a go, you have to dig around the stump with a pointed shovel until you expose those roots. And then extend the hole a few feet out from the stump. So that’s just giving yourself some room to kind of work there, then cut through the exposed roots and it helps to have a variety of tools on hand because you’re going through compacted soil and then through different sizes of roots. So you got to have a bunch of different things and good tools for this part of the project include a lapper, a pruning saw, an ax digging bar. I mean, you’re going to use them all, I promise. |
| 0:12:46 | TOM: Yeah. And you can also then continue to work your way through the roots and the soil. And so you can actually rock the stump back and forth. And once you can have it move from side to side, you can use a pry bar for that, cut through the rest of the exposed roots and just keep working your way around until the entire root ball is cut free. And then you remove the hole and you fill it with soil. Now, that’s not the only option, though. You can also use snot removal chemicals. They’re sold online in home improvement stores. They contain usually potassium nitrate, which speeds up that microbial process of decomposition. Now, I did something similar to this on smaller staff they had in our front yard. I drilled a bunch of holes with like a spade bit. There were like one inch in diameter. I filled the holes with Epsom salt and then just covered the top. And actually I will say that it took probably about a year before it was completely gone, but actually worked. And so we didn’t have to actually grind that away by using the salt option. So there are options. You can also burn a snot valve, but that’s a bit dangerous and I wouldn’t recommend it unless it’s something you’re really, really familiar with how to do. |
| 0:13:50 | LESLIE: One day we’ll get my Uncle Pat on the show to tell you about how he tried to do that and it. |
| 0:13:54 | TOM: Didn’t end. |
| 0:13:54 | CALLER: Well. |
| 0:13:55 | LESLIE: The hole got so well at the end. We needed a new lawn, new landscaping, a whole bunch of new stuff. |
| 0:14:01 | TOM: And a fire extinguisher. |
| 0:14:04 | LESLIE: All right, now I’ve got John from Arkansas. What’s going on? |
| 0:14:07 | CALLER: I’ve put a recent addition on the back of my house. It’s about 16 by 16 and it’s up here Foundation where it’s up to the house. The house is a slab foundation due to liveliness on level. This part of the floor is perfectly level with the slab. But at one corner of it where I’m going to try to try to tie to LVP products together, it’s about a half an inch of concrete is higher than where it’s going to tie in. Okay, I but it should do. I need to grind that down somehow. |
| 0:14:49 | TOM: Now what I would do is what’s the floor? What kind of flooring are you going to use when you’re all said and done? |
| 0:14:55 | CALLER: All VPI, laminate, rhinoplasty. So okay. |
| 0:14:59 | TOM: So what I would do is this I would use floor leveling compound and I would basically li put the floor level one compound in and bring it up to that higher half inch thick edge. And then I would feather it out over the next two or three or four feet. So it’s a very gentle transition. And if you do it that way, you should be able to go ahead floor right through it. |
| 0:15:23 | CALLER: That is a problem. The problem is that the door going to the outside is right at the point where it’s a half inch difference. Okay. |
| 0:15:33 | TOM: So as luck would have it right at the. |
| 0:15:35 | CALLER: Bottom of the sweep is right on the V. |
| 0:15:39 | TOM: Now. So in other words, if you were to add that for leveling compound, that floor would be too thick. |
| 0:15:45 | CALLER: I would build up the door. All right. Right, right. |
| 0:15:49 | TOM: Yeah. So, well, two options either cut and reframe that part of the door or maybe we just call it a day and make this a transition. Is it possible you can have a transition strip between these two sections, with the understanding being that one section of it would be a bit higher than the other. We’d so we wouldn’t really change the level of the floor, but we would make it a definite visual breaks that it didn’t look like it was weird, like it was out of whack. |
| 0:16:22 | CALLER: Well, I am going to have to different floor finishes. Mm hmm. So I was I was going to use a transition like. |
| 0:16:32 | TOM: A saddle strip that. Yeah, like a saddle. |
| 0:16:34 | CALLER: Correct. Right. But I didn’t know if that would be enough to make up the difference. |
| 0:16:40 | TOM: Well, not by itself. But what you would do is you would, you would build up the high side. When you put that transition place in, you’re going to end up with it overhanging that one high side by side. I mean where the floor is a half inch higher. And so you’re going to put like an additional piece of wood under that. It will be like a sliver that will go from nothing up to a half inch. And the longer you can make that, the better. If I was building this, I would build that. I would, you know, get it all sort of set. I would cut my little transition shrimps and I would take it apart and put some clamps on it and glued together. So it was one solid piece of sanded up so I didn’t have to do anything. Once it was put down, then I would press it in place. And this way, when you look at it with your eye, are you going to see is one big transition. There’s no way you’re going to notice that one end is higher than the other. You want to make it look so good that people think you intended to do that. |
| 0:17:30 | CALLER: That’s okay. Thank you, sir. I appreciate the call back. And you guys have a great day. I look forward to listening to your program every week. |
| 0:17:40 | TOM: Hey, so you remember last week we were talking about the review or somebody actually accused me of mansplaining. |
| 0:17:45 | LESLIE: Yes. |
| 0:17:47 | TOM: Which I deny. And I explained to you very carefully, in my view. |
| 0:17:49 | LESLIE: Mansplaining to me. Yes, Mansplaining to you? |
| 0:17:51 | TOM: Yeah. Well, we got another review, and I love this one’s Five Star, which is great Title is not bad. We’ve achieved podcasting perfection. We are now known as the not bad show. |
| 0:18:02 | LESLIE: It’s amazing. |
| 0:18:03 | TOM: It’s actually going to funny. It’s guys very, very kind. Since I’ve been listening for a couple of days, shows pretty good. I wanted to find a show that helped me learn to build DIY projects. So far it seems to help a lot and if you go to their website they have articles on it. Overall, great lesson for anyone who wants to fix up their home. So thank you very much, Chris, for sending that to us. But you know, the not bad reminds me of the very first time that we did a syndicated show. And this is before Leslie, which is a long time ago, people. And we were very nervous by doing a syndicated radio show because now we were on our at that time was probably our ten stations now were 400. And, you know, we did this one hour show that we got done and we said to the engineer, who is a seasoned professional, and we said, Hey, Eric, how do we do? To which he responded, Well, you didn’t suck too bad. So we decided that was going to be our, you know, our mark. From now on, we’re going to make sure that no shows that we do don’t suck too bad. |
| 0:18:57 | LESLIE: I’m going to take the review with the subject line. Not bad, but in my mind I’m hearing him say it not dead. Like, you know, you got to think about. It’s not Oh, not bad. Who? I like that. That’s where I’m going with this one. |
| 0:19:12 | TOM: We appreciate all your reviews. If you drop us one on Apple Podcasts, it means a lot to us and actually helps us be able to continue to do this show. So thank you very much again. And for all of you who have posted reviews on the MoneyPit podcast. |
| 0:19:24 | LESLIE: All right now we’ve got Linda from Rhode Island on the line who’s having a hard time being patriotic. What’s going on Linda. |
| 0:19:30 | CALLER: Well what I have the flagpole I have is the actual bracket that you put the aluminum pole into and I was trying to attach it to the front column which is aluminum on my porch. Okay. The column is not perfectly smooth. It’s like variegated with indents and it is right up close to the frame of the door. Okay. So I put one. I was able to put one screw in that came with it. And when I put the other screw in, it held for maybe a day. The first day the flag was up. And the next time I went to put it up, the other screw, one of the screw was pulled out. |
| 0:20:16 | TOM: Popped out? Yeah. Okay. So let me you won’t put this on the column and you see the columns next to your door that write. |
| 0:20:23 | CALLER: It right next to the doorframe. It’s a very small area, but the whole area in the front is small. |
| 0:20:29 | TOM: All right, so a couple of ideas. First of all, in a scenario like that, the hardware that comes with the bracket is probably not good enough because what you want is a screw that’s going to go deep into that column or dip through the column in in your case, the column is part of the front facade of the house. It would go into the frame. So a longer screw is going to be helpful. And the second thing is that you’re going to want to pilot hole those screws before you put them in, not just try to force them into the into the column metal. So you’re going to want to use a drill that is smaller than the screw. If you can imagine a screw has the threads and has of the solid part in the middle. You want the pilot drill to be just a little bit smaller than that solid part of metal in the middle of the screw. Now the other thing that you could possibly do if you’re having trouble, because as you described, it’s uneven and sort of variegated, I think was the word you used is you could put another block on that column first. Now you could do this with metal. You could do it with like a piece of oak, like wood that was, you know, finished. And you attach that really solidly and then you put the bracket on top of that. So this way you’ll have another piece in between, but it might make collectively for a more secure installation by not putting the bracket right on that variegated uneven column. So those are a couple of options for you, but I think you’re going to need better hardware, not just what came with the bracket, because you’re right, it has to be really secure, especially when that flag starts whipping in the wind. Those brackets take out a lot of force. And if it’s not held in, well, it’s got to pop out. |
| 0:22:02 | LESLIE: Well, squeaky floors, they’re one of life’s little annoyances, but they rarely signal a structural problem below. Now, the actual sound stems from one or a combination of two sources. Now, either loose floorboards are rubbing together or the nails that hold down that floorboard are squeaking as they move in and out of their holes. So that’s what’s making the sound. |
| 0:22:23 | TOM: That’s right. Fortunately, squeaks can be just about as easy to fix as they are to find if you guys know what to do. So the solutions in both cases is to re secure the floor to the floor joists below. Now, how you do this depends on the floor covering. |
| 0:22:38 | LESLIE: Right. So now for floor squeaks that are happening under carpet. That’s because the plywood underneath is rubbing against the joists below. So the best solution here is to remove the carpet if you can, and then used hardened drywall screws to hold that floor in place by driving one next to every nail in the floor and the screws never back out. So they’re much better than nails at stopping the squeaks. It’s really smart to do this if you’re replacing the carpet. I mean, this way you’re stopping those squeaks even before they think of happening. |
| 0:23:05 | TOM: Now, fixing squeaking hardwood floors is a little trickier than fixing a carpet and floor, but the principles remain the same. You need to find the area of the squeak and then use like a stud finder to locate the joists below the same way you use a stud finder. Like if you were hanging your picturing, you were sort of sliding against the drywall, you would slatted against the floor to find where the beam is below. Then you would screw the floor down in this area. But you can use a type of screw that’s called a trim screw. Now, you know what? If a finished nails and you have a common nails well, trim screws, kind of like the finish. Now version is a really small head and it’s hardened and it goes in kind of like a finish nail. So it’s easy to fill the hole with, like, wood putty when you’re all done. And when you secure those loose boards to the jaws below, the squeak goes away. |
| 0:23:47 | LESLIE: And, you know, squeaky floors may be one of life’s little annoyances, but there easily kept under control. If you want a complete guide on how to fix floor squeaks under carpet, hardwood tile, even vinyl search squeaky floors on money pit scum. Sharon in Georgia, You’ve got the Money Pit. What can we do for you today? |
| 0:24:05 | CALLER: I have two Korean things in my bathroom and the water is turning them. They were white and the water is turning them like yellow. And my husband heard that you could use the fine sandpaper and sandpaper around the drain where it’s really the worst, and that doesn’t seem to work. His is now gray around his drain in mine. He didn’t touch. Okay, You have any solutions? |
| 0:24:37 | LESLIE: I mean, I would try first like a couple of different like softer cleansers just to see if that does anything. I know bonhomie seems to be a good one for a surface like that. And then all. |
| 0:24:48 | CALLER: Of them you’ve tried. I’ve tried all of them. Yeah. And I even tried the little green, you know, scrubby thing that they told me to use, you know? |
| 0:24:57 | TOM: Have you ever, like with bonhomie or bar keepers, friend? I think it’s the other one when I have a Korean sink and I find that what we do is we put a lot of that on there and just sort of almost make like a paste and let it sit on the surface for a while. And then we come back and we come back, you know, 15, 20 minutes later and then start rinsing it off. But it has sort of a bleaching effect when you let it sit there. It’s not just a rub, it rinse it away, but let it sit on the stains for a while. What you’re describing is not that unusual. Unfortunately, Korean does absorb stains. It’s not as stain resistant as we’d like. It can be abraded, but that’s not really going to change anything because it’s not. The stain is on the top. It’s kind of soaked in. So you really need to kind of clean it. And that’s why those products work. Well for that. |
| 0:25:41 | CALLER: Okay, I’ll try that. You know, making the paste and putting it on there and leaving it on there for a little bit. |
| 0:25:48 | TOM: Just sprinkle it out and just then, you know, get a little bit wet until it gets kind of like pasty and then just let it sit for that. I like my make it kind of pasty and I’ll do a first sort of first scrub. Well, it’s real thick like that. And I just walk away for a while and then later on I go back and finish it off. And that works well for me. |
| 0:26:06 | CALLER: All right, well, I’ll try that. |
| 0:26:08 | TOM: Well, fall’s ahead, and now’s the time to take a good look at your gutters, because they’re actually a really important component that can prevent serious structural problems from getting started. |
| 0:26:18 | LESLIE: Yeah, no gutters perform one duty, and that’s controlling the water around your house. But if your gutters are missing or disconnected or even clogged, you could be facing major and potentially expensive home repairs. Not managing that water around your home can cause flooded basements, cracked foundations, cracked sidewalks, leaking roofs, and even lead to wood destroying insects, finding a meal and I might say a very tasty one in your home. |
| 0:26:43 | TOM: Now, when you’re selecting new gutters, the most common types are vinyl and aluminum. Now, vinyl gutters are typically the least expensive gutters, but they can be very thin, so they could sag or become brittle in extreme temperatures. They also tend to leak more frequently than aluminum gutters, so frequent repairs can be expected. The one advantage, though, of vinyl gutters is that they’re sold in smaller sections and they can be installed by a do it yourselfer over, say, a weekend. |
| 0:27:09 | LESLIE: Now, aluminum gutters tend to be much more durable and they’re installed by pros who can custom build a single gutter for each roof section. And they also plan for adequate downspouts to make sure that your gutters don’t back up during heavy rainfall. I mean, their job really is to calculate how many downspouts, how far apart all of that, to make sure that that water moves where it’s supposed to. And plus watching the machine that they use to bend these gutters is really cool. |
| 0:27:34 | TOM: Now, once the gutters are installed, they need to be kept clean. Do it yourself. Gutter cleaning is simple enough, but it can be a dangerous job for the untrained weekend warrior And the alternative. There are many, many types of gutter guard systems on the market to choose from, and all of them offer some sort of protection for your gutter at varying cost. None of them, by the way, despite their advertising, give you 100% protection. You still end up having to do some level of cleaning. But I have one better option to suggest, and it’s something that’s not actually very well known, and that is to invest in a deeper gutter. Now, gutter is a standard. Gutter is called a cage style gutter because the front kind of looks like a K that comes five inches deep. But if you go to six inch depth K gutters, you actually can process about 50% more water and the deeper gutters clog far less frequently because the leaders, the downspouts are bigger and they allow most everything that gets in that gutter to simply flow right through the drains. Isn’t it somewhat though, how it really should work, like everything in the gutters does run out. We redid our roof a few years ago. I upped all of the gutters in the house to those larger six inch gutters. I have not had to clean a single gutter, a single one in years and years by doing that, they just don’t get filled up. And you know, when what I like to do because I’m, you know, kind of a nudge about stuff like this, when it rains really hard, I will go outside and watch those roofs and see where the water’s go and see if it is backing up and make sure the gutters are flowing. And there’s nothing better in here. All that water washing down those leaders in a big rainstorm and know you’re moving in away from the house and away from the roof, of course. So I think that’s a really good option and not terribly more expensive. I think it’s probably less expensive for you to get a six inch deep gutter than to pay for five inch gutters, plus those gutter covers which these gutter companies are charging like outrageous amounts of money for right now. So think about that. If you haven’t if you have time to clean your gutters every forward and just want a better solution, think of replacing them with deeper gutters. It really does work. |
| 0:29:33 | LESLIE: Well, Margot wrote in to Tim Money Pit saying, We used a paint with primer product for our inside walls, but it just peeled right off of the wall in strips. The wallboard has a chalky, dusty feeling to the touch. What is the best painting method to have paint that will really stick? She is frustrated. |
| 0:29:51 | TOM: I got to say, I’m not a big fan of the paint primer and one finishes because they don’t seem to work as well as just using a primer followed by a tough coat of paint. They’re trying to, you know, alter the chemistry to kind of do something that it’s not really designed to do. The primer is designed to adhere, so it’s designed to stick really well to whatever surface you’re painting. And then the paint has different qualities. It has qualities. It’s designed to flow and give you good coverage and good protection. He’s clean ability, and when you mash those together, it never quite seems to work. Now, in this case, I think the other thing that was working against you here, Margaret, you mentioned that the water chalky dusty feel to it, there’s no paint that’s going to stick if you’ve got a real dust to it like that. Certainly not this particular paint. So you got to kind of go back to the beginning here and peel off all that paint and you’ve got to really clean those walls. I would recommend that use a tri-sodium phosphate solution, which you can find in home centers. And usually it’s in the painting aisle and really do a good job cleaning those walls, letting them dry thoroughly. And then they would use a good quality primer, like, for example, a bin 1-2-3 which is made by Zinsser or, you know, a Sherwin-Williams primer that’s made to adhere to walls. But if you do a good primer first and then you put the topcoat over, that, I think you’ll find will have proper adhesion and a really good looking room as a result. |
| 0:31:21 | LESLIE: All right, Margo, hope that helps you with your painting projects. All right. Now, Carol writes in saying, My roof is 19 years old in one bedroom closet, there are a total of three water spots. I’ve had contractors look at this. But no one can find out what’s going on. And their only suggestion is to replace that part of the roof. But of course, water can travel like from one side to the other, so it might not be coming from there. |
| 0:31:44 | TOM: Yeah. And the solution is just give me a bunch of money. |
| 0:31:47 | LESLIE: Proof. |
| 0:31:48 | TOM: Yeah, give me a roof. I’ll fix it. I don’t know what’s causing it, but I know if you give me a lot of money to change the whole roof, that’ll definitely fix it. |
| 0:31:55 | LESLIE: It’s like the dude that came to repair my dryer. He was like, I don’t know about this dryer, but yeah, I’ll fix it. We’re like, hmm. |
| 0:32:04 | TOM: Well, listen, Carol, the fact that you had some water spots here is not that big of a deal. It sounds like they’re not active. It probably happened because of wind driven rain. Know I got a spot in my house. I know where it’s happening. It’s because I have a void somewhere in the siding above the roof, which is adjacent to my living room. We get a little leak in there every once in a while. I don’t know much about it because it really doesn’t bother me that much. And I know it’s just happening when the rain is like traveling like sideways. So I think what I would do is I would prime the stains with a good quality primer and then paint over them. But there’s absolutely no reason to install a partial and certainly not a complete new roof until the roofing shingles really fell to the point where that’s necessary. |
| 0:32:47 | LESLIE: All right. Good luck with that. Carol asked the questions. Do the research, get the right repair, and don’t spend more than you have to. |
| 0:32:54 | TOM: This is the Money Pit Home Improvement show on a beautiful September weekend. This is what we call September hour in my part of the country, because most of the tourists have left and we have a couple of beautiful months’ worth of great weather to enjoy the Jersey Shore. We hope that you’re enjoying your part of the nation as well. And if part of that enjoyment is getting projects done that you have questions on, remember, you can always reach us 24 seven at eight date Money Pit. We’re going to Moneypit.com/ask/. Until next time I’m Tom Kraeutler. |
| LESLIE: And I’m Leslie Segrete. | |
| TOM: Remember, you can do it yourself. | |
| LESLIE: But you don’t have to do it alone. | |
| (Note: The above referenced transcript is AI-Generated, Unedited and Unproofed and as such may not accurately reflect the recorded audio. Copyright 2023 Squeaky Door Productions, Inc. No portion of this transcript or audio file may be reproduced in any format without the express written permission of Squeaky Door Productions, Inc.) |


Oh I did an excavation under a house with another fellow years ago to give 18” to the floor joists for the building inspection.
We use one of those black plastic mixing trays with a rope on each end so it could be dragged out ,emptied, and pulled back in. Worked great.