Show Notes
Lock ’em out, seal ’em in, and pave the way! Join us for tips to fortify your home against break-ins, seal drafts with spray foam wizardry, and wave goodbye to dirty, damaged driveways. Get answers to these and other callers’ home improvement questions on this week’s Money Pit podcast!
Table of Contents[Hide][Show]
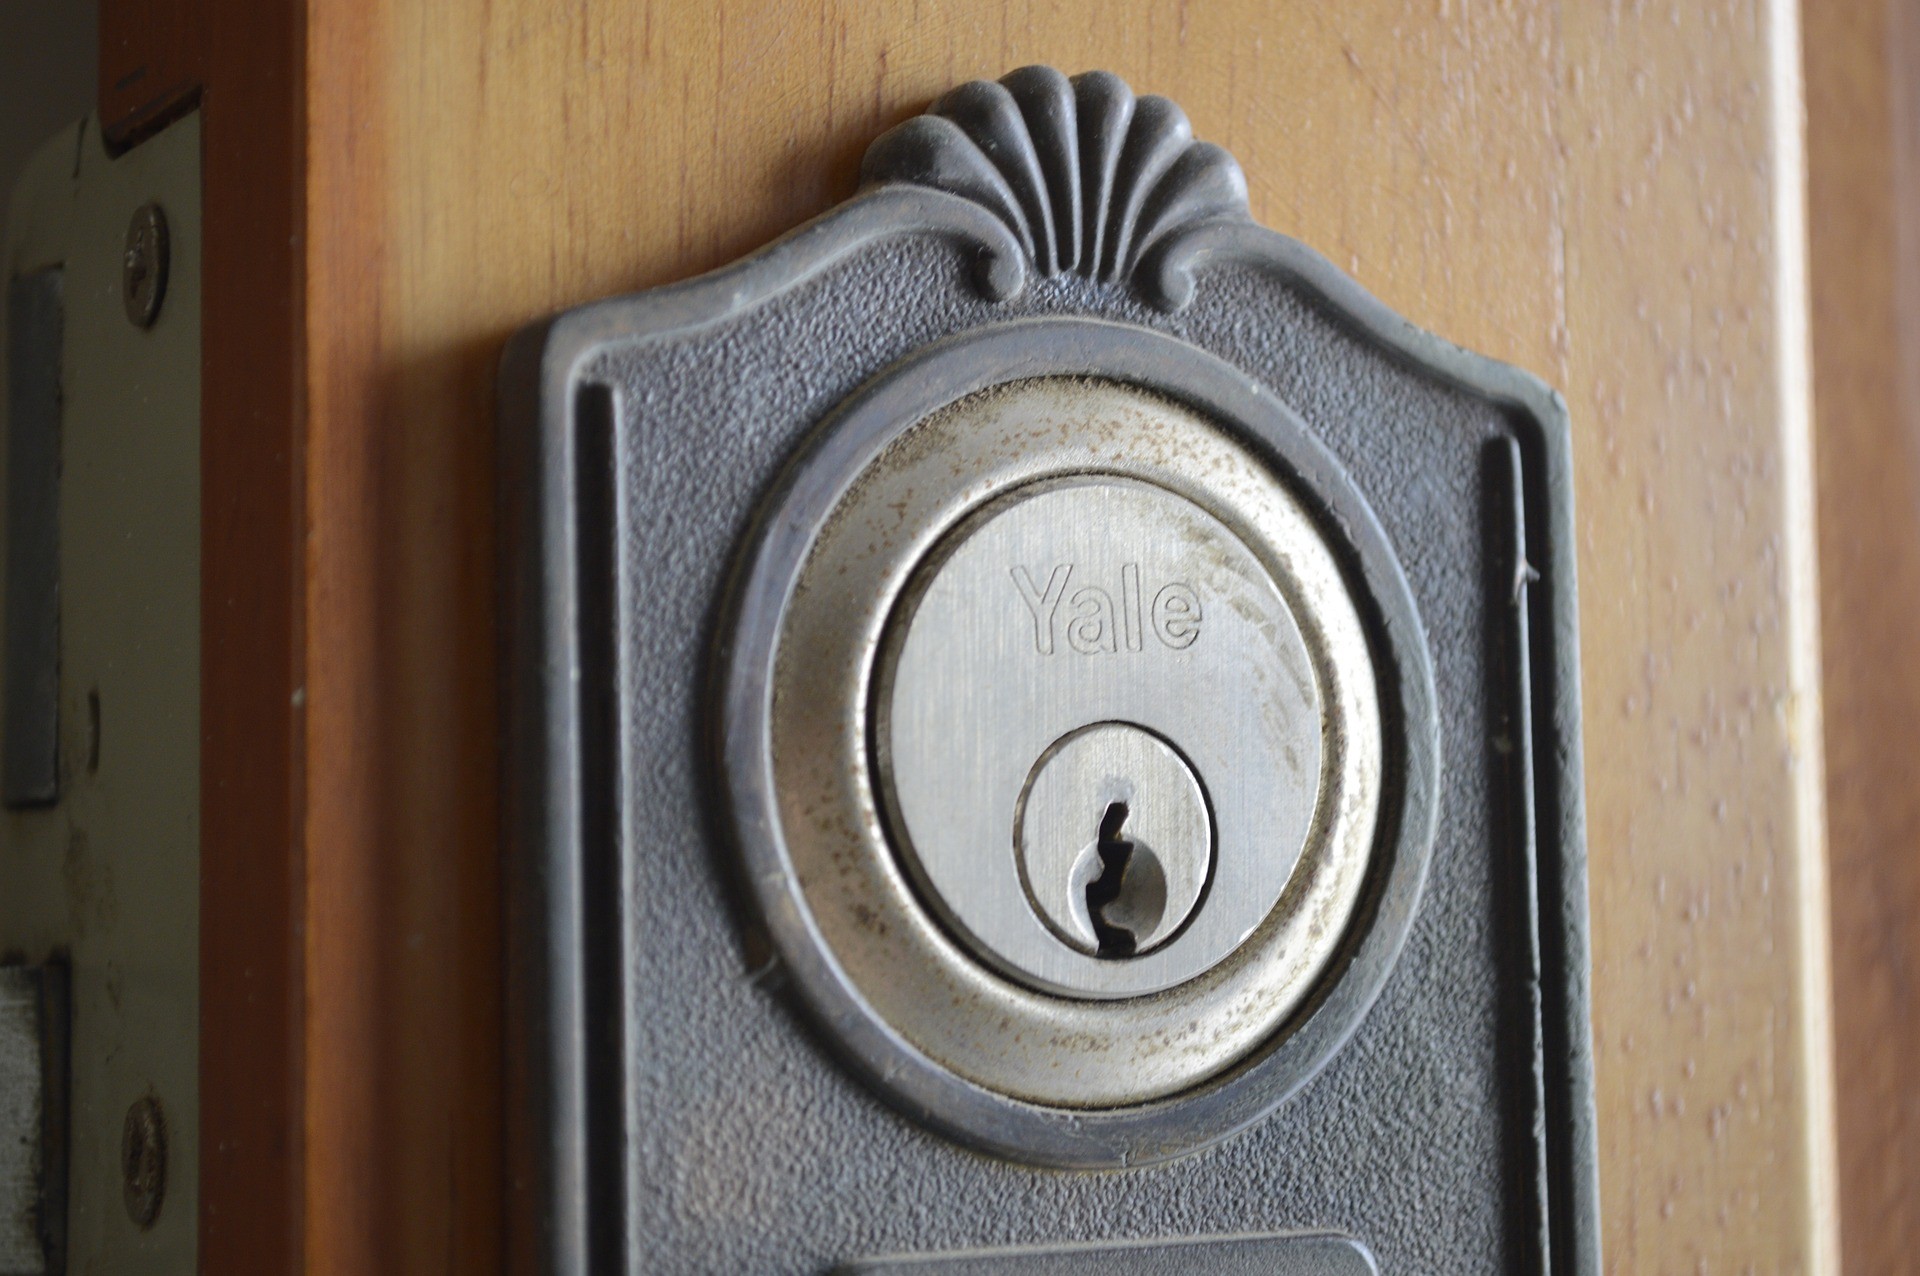
- Door Defense: Securing your doors is key to protecting your home from burglars.
- Sealing Drafts: This great DIY spray foam makes it easy to seal out drafts.
- Driveway Repair: Get tips for restoring a stained or cracked driveway.
Top Questions & Answers
- Garage Floors: Tracked-in snow is making a mess in Randy’s garage. A perforated floor tile system and epoxy floor paint can help keep things clean.
- Fireplace Drafts: Wind is blowing through a gas fireplace that was improperly installed. Susan should check for gaps and contact the manufacturer for installation instructions.
- Painting a Room: In what order should you paint a room? Jake gets tips on how to prep the space and use masking tape to paint baseboards and trim, then the walls.
- Metal Roofing: Is a metal roof worth the investment? Sally learns it’s a great but expensive option, so the ROI depends on how long she’ll be staying in the house.
- LED Lighting: Scott is converting his home to all LED lighting but can’t find LED tubes to replace the fluorescent ones. We suggest ordering them online and having them shipped.
- Paint Stains: Black spray paint leaked onto Tiffany’s laminate floor. She can try carefully rubbing the stain with some nail polish remover.
- Old Windows: Don’s old windows date back to 1746! We discuss using a heat gun or a steamer to carefully remove and replace the window glaze without damaging the wood.
- Woodpecker Damage: Woodpeckers are damaging the exterior of Denise’s house. Hanging strips of black plastic or shiny tin pie plates will help drive them away.
- Faded Wood Floors: When Ty pulls up an area rug, he sees that the wood floor around it has faded. Time will eventually even out the color, or else he must refinish the whole floor.
Podcast Transcript
Read Transcript
| 0:00:30 | TOM: Coast to coast and floorboards to shingles. This is the money Pit Home Improvement show. I’m Tom Kraeutler. |
| 0:00:36 | LESLIE: And I’m Leslie Segrete. |
| 0:00:37 | TOM: And it is officially the ho ho home improvement season. See how I did that? |
| 0:00:42 | LESLIE: I like what you did there. |
| 0:01:03 | TOM: You’ve got some projects you want to tackle around this holiday season, we’d love to help. Reach out to us with your questions at 1-888-Money-Pit, whether it’s a project for now or a project for the year ahead, we are here to help you save time, save money, and get that job done right. Coming up on today’s show, it is the most wonderful time of the year for burglars. Yep, The FBI says nearly 400,000 burglaries occur in the U.S. from now until the end of the year. So we thought it’d be good to share some tips on how to best secure your doors to stay safe. |
| 0:01:14 | LESLIE: All right. And when it comes to sealing your home from gaps that allow cold air to break through, there is no better insulation to use than spray foam. We’re going to highlight a brand new product designed for pros and serious DIYers that can be applied without mixing and seals those most common sources of drafts in a house. |
| 0:01:31 | TOM: And is your driveway cracked or warranted as it suffers from some of those nasty oil stains? Tip first fix the leak in your car. We’ve got a surefire solution that can help clean up those stains for good and restore the surface just ahead. |
| 0:01:44 | LESLIE: All right, guys, But what are you working on this holiday week? Are you getting ready, family coming or are you putting up the decorations? You’re trying to get something done quick before those family members arrive or whatever it is. We are standing by to lend a hand. So give us a call. |
| 0:01:58 | TOM: Call us right now at 1-888-Money-Pit or go to Moneypit.com/ask for the quickest possible response. Let’s get to it. Leslie who’s first? |
| 0:02:07 | LESLIE: Randy in Wisconsin is dealing with a lot of snow and the aftermath thereof. What can we help you with? |
| 0:02:13 | CALLER: We have a garage in our house. And when we bring our vehicles here in Wisconsin, we have a lot of snow. And of course, it gets stuck on any two vehicles and whatever. And we try to scrape off some of the snow, you know, but it melts and it goes all over the garage because the floor is pretty much level in a pond here and there. But it flows over to my work area and stuff and I wonder if there’s a good solution to, you know, containing that water or I’ll often need to put in a drain or what to do. |
| 0:02:38 | TOM: Well, I mean, obviously is the floor. The floor angle is the issue. Most garage floors are pitched to the door so that water will run out. If that’s not happening with you, what you might want to think about is putting in a garage flooring system. They have tiles available for a number of manufacturers that sit on top of the garage floor, but they’re perforated, so if there’s a bit of water will settle sort of below the tile surface. So even though the wet is still there, you won’t really be stepping in puddles. Now, do you have the floor painted? |
| 0:03:06 | CALLER: Oh, no, it’s not painted, no. |
| 0:03:07 | TOM: So nothing that you might want to do is epoxy paint that floor. That’s something you could do yourself for the garage floor, epoxy paint kit. Basically you mix up the epoxy and the hardware, the paint on the hardware, you apply the paint, you put a decorative chip in there, it will help hide dirt. You can even put a lacquer finish on it. And when you have a smooth, shiny finish like that, what you can do is pick up a squeegee and that makes it really quick and really easy to take those puddles and basically squeegee them right off the floor when the car when the snow melts and leaves those puddles behind. |
| 0:03:36 | CALLER: Okay. We’ll check into that. |
| 0:03:37 | TOM: Good luck, Randy. Thanks so much for calling us at 888-Money-Pit. |
| 0:03:41 | LESLIE: Susan in Missouri has a question about a fireplace. Tell us what’s going on in your Money Pit. |
| 0:03:45 | CALLER: Well, I have a gas fireplace and it’s. One of those where they seem to cut the hole in the wall and stick the fireplace in there. And now I cannot stop the wind from blowing in. I don’t know what to do. |
| 0:04:00 | TOM: Okay, So is the wind coming in the hole where the gas pipe is coming through? |
| 0:04:04 | LESLIE: It seems to be coming from all around the fireplace. |
| 0:04:08 | CALLER: You know, it’s got to and the mantle and it comes. From around the. mantle. And anywhere where there’s you know where it’s been put together, it seems to have the coming in. And of course it is coming in. It’s got the outside box, I guess, to have the exhaust. |
| 0:04:26 | TOM: Okay. So this sounds to me like it’s like it’s a manufactured fireplace as opposed to an old brick one that was converted to gas. Is that correct? |
| 0:04:33 | LESLIE: Absolutely. Absolutely. |
| 0:04:35 | CALLER: Yes. |
| 0:04:35 | TOM: It has doors on it, too. |
| 0:04:36 | CALLER: No, it does not. |
| 0:04:38 | TOM: Do you know what the brand is of the fireplace. |
| 0:04:40 | CALLER: Lenox, I believe. |
| 0:04:41 | TOM: Well, the first thing I would do is I would take a look at the installation and very often there’s probably gaps somewhere around that box that were not properly sealed. I would also consider contacting Lennox and getting the original installation instructions. You may be able to download those which would give you or your contractor a guide to determine if it was correctly installed. Then thirdly, I would find out of doors are available for that fireplace because that could solve all your problems. |
| 0:05:10 | CALLER: Well, okay. Okay. |
| 0:05:12 | TOM: Especially if it’s if it’s a gas fireplace pre-made, it has a combustion air supply. You may be able to keep that all behind the glass doors and stop all the draft from coming through. |
| 0:05:21 | CALLER: Oh, that’s a great idea. Thank you. I’ll try. |
| 0:05:23 | TOM: That. All right. Good luck with that project. Thanks so much for calling us at 888-Money-Pit. |
| 0:05:28 | LESLIE: Hey, you’re tired of living in a money pit? Well, we’re here to help. And if you want us to help out, it would be awesome if you could leave us a five-star review on Apple Podcasts. Just go to moneypit.com/review. It’s only going to take a minute and it means the world to us. Jake is calling in from Ontario, Canada with a painting question How can we help you. |
| 0:05:46 | CALLER: Today calling because I’m doing some home renovations, obviously, and I’m starting to paint a room and I’m wondering what my best option is with regards to which order I should do things. So I have baseboards on the walls. Just wondering if it’s a good idea to take the baseboards off before painting, or should I paint with the baseboards on? And what order walls first baseboards first, stuff like that. |
| 0:06:09 | TOM: There’s an amazing invention called masking tape. Jake. And it does the trick with protecting those baseboards. So, I mean, obviously you need to prep, and prep is really the hardest part of painting. So getting the drop cloths down and getting everything masked off so you can separate the colors. Now, are the baseboards painted? |
| 0:06:30 | CALLER: They are. Yeah. I just don’t like the color. |
| 0:06:32 | TOM: So what I would do is I would paint the baseboards first. I would paint all the trim first because you can be a little sloppy about that. You don’t have to pass them off because if it gets on the wall, we’re going to paint the wall anyway. So I would go ahead and paint the baseboards first and the trim, and then after it dries for a couple of days, then I would mask it off very, very carefully so that you can paint the wall colors, whatever color you want. Then, of course, the first step with wall painting is to do the we call the cut in where you paint along that masking tape line and establish that edge around that border, around the around the walls and around the floor where the baseboard is. And then you can fill the rest in with a roller. |
| 0:07:08 | CALLER: So with the masking tape, is it a good idea to remove the mattress and tape right away, or should I let the paint dry and then remove it. |
| 0:07:14 | TOM: Now let it dry first. Okay. And if it if it starts to peel a little bit of the paint off, sometimes that happens. Just take a razor blade and just slice the sort of the paint that went between the masking tape and the wall. There’s also different types of masking tape that have absorb is built into it that’s designed to specifically stop that from happening. One is frog tape a little bit more expensive, but it has an absorbent built into it. So it sort of gives you a much cleaner edge without that sort of rip drippy kind of masking tape edge. That can happen sometimes. |
| 0:07:47 | CALLER: Okay, perfect. Thanks very. |
| 0:07:48 | TOM: Much. Good luck with that project. Thanks so much for calling us at 888-Money-Pit. |
| 0:07:53 | LESLIE: We’ve got Sally on the line from Decatur, Illinois, who wants to talk metal roofing. What can we do for you today? |
| 0:07:59 | CALLER: Well, my grandkids have purchased a home and it’s going to need a new roof and they are heart set on doing a metal roof. Okay. My question is, is that a good idea or shall we go with the shingle roofs? |
| 0:08:13 | TOM: Yeah, it’s a great question. So, first of all, a metal roof is really an investment grade roofing. And what that means is when you put a metal roof on, you rarely have to replace it ever. I mean, they last like 50 to 100 years. So they also have coatings on them that help reflect the heater since they do stay cooler in the summer as well. So it’s a great roof. It really comes down to the house. Is this going to be a forever house for them or is this sort of house that’s there in, you know, for the next 5 to 10 years or so? |
| 0:08:41 | CALLER: Probably So it’s their first home. |
| 0:08:44 | TOM: Yeah. So it’ll be fairly short term then, right? |
| 0:08:46 | CALLER: Yeah. |
| 0:08:47 | TOM: Yeah. So they’re not going to get the benefit of paying for a roof that’s going to last 50 years. You know, they’re going to, they’re going to get the same benefit out of an asphalt shingle roof that might last 20 years. And if they sell the house in ten years, you know, they’ll have gotten their money’s worth out of it. So. Well, I love to recommend metal roofs. It is an economic question as well as a durability question. Now, if you’re in a house and you’re going to be there, you know, forever, you might want to get a metal roof because that is a roof as there are going to have to be replaced. Again, it’s super durable in all sorts of climates. |
| 0:09:16 | CALLER: Oh, of them being young and this are first home. I’m kind of with you. I would go with maybe a shake shingle or whatever instead of the metal roof, because I know eventually they will move. |
| 0:09:29 | TOM: The house will definitely have a better value if you put a metal roof on it. But I don’t know if you’re going to get 100% return on investment. |
| 0:09:34 | CALLER: All right. Well, thank you so much. |
| 0:09:35 | TOM: Happy to help. |
| 0:09:37 | LESLIE: Well, according to the FBI, nearly 400,000 burglaries occur in the U.S. from now through the end of the year, which is not a very long amount of time. That is a lot of activity from those burglars. And that’s why now is the perfect time to step up your home security and in particular, your doors. First of all, you want to invest in a good quality deadbolt. Now, doors with handle locks can be very easily broken into. Deadbolts, on the other hand, offer double the locking security and require hammer force to break in. Now you’re going to want to make sure that each entry door has a deadbolt. Not just the high traffic ones. And your home is only as secure as its most vulnerable entry point. So you want to make sure that you buy a deadbolt with keyed access on the outside and thumb latches on the inside and locks that require keys to be used from the inside of the home. That can be dangerous if residents need to make a quick exit in the event of an emergency like a fire. |
| 0:10:34 | TOM: Now, keep in mind that no matter which lock you choose, it’s only as strong as the door in which it’s installed. So the weakest part of the door is usually the area around the lock. You can fix that with decorative door reinforcement plates. They’re available for maybe like 20 bucks or so, and they can make that area a lot more secure. And if you’re ready for a new door, go with a fiberglass doors. These mimic the look of wood, but they are far stronger and much more energy efficient. Also, some of them have multipoint locks that are sort of like bank vault style pins that go out at the top. They go at the side, they go at the bottom, and they totally prevent the door from being able to be kicked in. |
| 0:11:11 | LESLIE: Now, you also need to make sure that you’re securing those patio doors, too, especially since they’re usually on the rear of a home and much more secluded. You can add a patio door, patio bar. Now, this keeps the door from sliding back in its tracks, even if the lock is broken into. And this is especially important if you have older patio doors, because these have the worst locks and they can be lifted right out of their tracks. I mean, seriously, just lift the door off for super easy entry. |
| 0:11:37 | TOM: And you know what else? If you don’t have time to get a patio door bar, there’s a quick fix alternative. Just cut a two by four to fit between the sliding door and the door jamb. This stops the door from being able to slide open. |
| 0:11:50 | LESLIE: It’s gotten a last bit. Need some help with energy efficient lighting? How can I help you? |
| 0:11:54 | CALLER: Yes. I’m currently changing over my house to all lead lighting and I also have I have currently a few rooms with fluorescent tube lighting and I’d like to change those over to Lady And I live up here in Alaska and I just haven’t been able to find the tubes with LED. |
| 0:12:16 | TOM: Yeah, they’re available. You can probably find them online and have them shipped to you, but they’re made in the same exact shape as the standard fluorescent bulbs. You know, they’re not inexpensive, but they do have a very long life like those are that those kinds of lights will typically last like 50000 hours or something crazy like that. I think the bulbs themselves are probably, I would guess, 20 or $30 apiece and. |
| 0:12:37 | LESLIE: The shipping’s probably going to be 100. |
| 0:12:39 | TOM: Yeah, exactly. But they’re going to last a lot longer. I mean, at this point, though, I would also price out replacement fixtures, as you might find, by the time you buy all those bulbs, it might be cheaper just to replace the fixtures. Plus, I don’t know how much energy is going to be wasted because those all those fixtures have the transformers built into them. There may be some system waste in terms of the fixture itself. |
| 0:13:02 | CALLER: Okay. I’m just looking I’m very impressed with the LED brightness and of course the energy savings over a period of time. I just want, you know, my whole house to be energy efficient and save me money in the long run. So I just can’t seem to find them up here in Alaska yet. I do like going to Home Depot, and they did have some LCD to look two fluorescent tubes, but not my size currently. |
| 0:13:29 | TOM: Yeah, I would order them online, have them ship. That would be the way to get them to your door. Okay. |
| 0:13:33 | CALLER: All right. Well, thank you very much for your time. |
| 0:13:35 | TOM: Good luck, Scott. Thanks so much for calling us at 888-Money-Pit. |
| 0:13:39 | LESLIE: Heading out to Michigan, where we’ve got Tiffany on the line, who seems to have a painting project gone wrong. What happened? A can of dark spray paint leaked on the bottom and got all over our wood laminate floor. Is there any way to remove the black paint that remaining? We tried wiping it up. Some of it was removed, but there is still a spot where the paint remains. |
| 0:14:02 | TOM: Oh, I’d love to hear the whole story behind that. Tiffany, That sounds like a real mess, but it does also sound like you’ve gotten some of this done. Leslie, you know, would be a very good paint remover for the situation, at least to try nail polish remover because it’s what, acetone. It’s acetone, right? So, I mean, you know, it takes the paint off. Your nails would probably take the paint off that floor. |
| 0:14:21 | LESLIE: Do you think it would take the finish off the floor? |
| 0:14:24 | TOM: No. And here’s why. Because if you have a laminate floor, right, the color of the floor, the pattern is underneath a protective finish and it’s pretty durable stuff. I mean, I would not like flood the floor with the stuff and you might just want to buy a small can of acetone directly, even though it’s the same as nail polish remover. But I would rub it very, very carefully over that surface to see if it starts to take it off. I mean, it wouldn’t soak it and you can kind of watch it as you go, but I bet you that will take off the rest of that paint, Tiffany. |
| 0:14:52 | LESLIE: I mean, that definitely seems like a good plan and definitely worth the try. |
| 0:14:56 | TOM: And if you’re worried about whether it’s going to take the finish off the floor, I mean, go ahead and test it out and someplace that’s not too noticeable, like inside a closet or just up really close to the kitchen cabinets where you have like that overhang for the cake board. |
| 0:15:08 | LESLIE: Under the couch. |
| 0:15:09 | TOM: If you got one before. Yeah, exactly. |
| 0:15:13 | LESLIE: Don. And Pennsylvania’s got a question about windows. What can we help you with these? |
| 0:15:16 | CALLER: These windows are mid-1700s. That’s before the revolution. The ones I’m working on there, the building actually had a date on it. 1746. |
| 0:15:26 | TOM: Wow. That’s impressive. |
| 0:15:28 | CALLER: And the glass on these was like poor glass. It wasn’t manufactured the way they make them now. And I’m trying to save the glass and I’m trying not to damage the wood at all, but I’m scraping and painting and weatherizing these, these windows. And the reason I’m doing that is because a lot of the glaze is falling out and the paint is flaking away and everything, but some of that glaze that’s on there and this this hasn’t been done, I would say, for more than 30 years because we’ve lived here 30 years and have never done it to this window. And so that some of the glaze is falling out, but others is really tenacious and stuck to that wood and that glass. And I don’t want to ruin the glass or ruin the wood. So what’s the best way to get that old glaze out of there? |
| 0:16:18 | TOM: Are you using any heat to help you here? |
| 0:16:20 | CALLER: Not yes. |
| 0:16:21 | TOM: So what you want to try to do is get a heat gun, which kind of looks like an industrial sized hairdryer. |
| 0:16:26 | CALLER: Yeah, I have an electric heat gun, and I’ve used that to help remove some of the paint. But I don’t know the temperature of that of that he’d gone, but. |
| 0:16:36 | TOM: Well, I mean you want to use it. Use it cautiously. You know, I wouldn’t lean into it with the nozzle, but I would try to warm that old putty. Generally, if you warm it, it loosens up. Now, some guys that do windows all the time will actually use steam to soften the putty. And I’ve seen guys create almost like steam chambers where they kind of build a box, fill it with warm steam, and then slide the sashes in there and then pull them out another warm and they strip them off one way that you could try to do this without sort of building that chamber might be to get a wallpaper steamer and then use some of that steam, use it against the window, warm it. That warm, moist steam may also help to loosen it up. But if you already got the heat gone, I would try trying to warm it up gently and see how the old glazing reacts to that. |
| 0:17:22 | CALLER: Oh, okay. I will. Thank you. |
| 0:17:25 | LESLIE: Well, when it comes to sealing your home from gaps that allow all that cold air to break through, there’s no better insulation to use than spray foam. But up to now, most spray foam applications required two part foam spray systems that are difficult to set up and challenging to use. |
| 0:17:41 | TOM: Well, now DAP has developed the convenient one part alternative that makes sprays on application a much simpler process for both the pro and the serious DIYer with us to explain the new DAP touch and foam professional wall and cavity foam is Jason Wirth, the senior director of product. Welcome, Jason. |
| 0:17:57 | JASON WIRTH: Thank you. |
| 0:17:58 | TOM: I got to tell you, we are big fans of spray foam insulation here. I’ve used extensively in my home and there is no better way to seal up a 1886 house than with spray foam. I can tell you that. And I’ve used it in all the places that you would think from the attic right down to the rim joists. But when I did this, we had to have some pretty serious equipment involved because the product had to be mixed on site. What you guys have developed is essentially a modular system. That’s one part. And you can basically buy it and you can apply right away. No, sorry, no fuss, no muss. Is that right? |
| 0:18:31 | JASON: That’s absolutely correct. As you’ve mentioned before, you know, both our systems today are two part. And, you know, the challenging piece of that is, you know, when you have two parts, you know, they react to temperatures differently and keeping them on ratio is tough. Right. So we saw a need for across a wide spectrum of users to make the process simpler so that everyone can enjoy and apply good energy saving foam to their basements, you know, crawl spaces. That’s what we really talked about doing here with wall cavity foam. The nice thing about the wall cavity as well, on top of the, you know, not having to worry about ratio issues or operational issues, is that a one component is much more friendly for a larger temperature range. So no need to heat up cylinders. You know, you can apply from 40 degrees Fahrenheit 220, and that’s about four times the traditional temperature range on the two components. |
| 0:19:14 | LESLIE: So for folks that are new to this product, I know this really is dedicated toward pros and advanced DIYers, but this is really a new advancement in home spray foam insulation. So what is sort of tips and guides here to help somebody who’s very new to this to start with? |
| 0:19:30 | JASON: You know, first thing is obviously understanding the goal that you would like to receive from energy savings, your r-value or putting in a basement or crawl space in your class AP rated application. All of these can be provided by the wall cavity foam. What we always recommend is utilizing the wall and cavity foam as what we call a flashing about installation, where you’re putting in a small layer of the spray foam to air seal and create a moisture barrier and then placing your bad insulation on top for optimum efficiency. |
| 0:19:56 | TOM: So you get the best of both worlds. You get the air seal from the foam and then you get the insulation, I mean, traditional insulation materials. |
| 0:20:02 | JASON: Absolutely. |
| 0:20:03 | LESLIE: It’s interesting that a lot of the challenges people have when trying to install spray foam insulation is the applicator. They’re struggling with it. But you guys have really developed something that is very user friendly and kind of intuitive. |
| 0:20:15 | JASON: Now, you know, obviously for spray foam applications, you want a nice wide pattern that can be done either vertically or horizontally for an easy sell and a quick fill. So we’ve included a responsive flow control trigger to do that, as well as some replacement models, both vertical and horizontal applications. Nice ergonomic handle and of course, a good long eight foot hose to help get around obstacles and get access without having to move the cylinder around too much. |
| 0:20:38 | LESLIE: Jason This all sounds great. Where can people go to get their hands on this? |
| 0:20:42 | JASON: If you can find the seminars and select Home Depots? And we’re also have a presence on the industrial side as well for professional contractors, the best place to go is on ABC.com and also utilize our work by function. |
| 0:20:52 | TOM: The product is called the DAP wall and cavity foam with wide spray applicator, a one component spray foam system that makes it possible to seal gaps and cracks with very, very little effort throughout your entire house. Jason Werth from DAP, thank you so much for stopping by The Money Pit. |
| 0:21:09 | JASON: Thank you. |
| 0:21:10 | LESLIE: All right. We’ve got Dennis on the line. What’s going on? You’ve got Woody woodpeckers pecking away at your house. |
| 0:21:15 | CALLER: Sure do. |
| 0:21:17 | TOM: All right. So what kind of damage is this little guy causing? |
| 0:21:19 | CALLER: Well, I don’t live in that home. I’m in another state. My son’s there, and he’s hit like two or three sides at the house. So my son has put little pieces of wood up there. It’s a manufactured home. So don’t ask me what it is. The siding is. I don’t know. I’m sure you do, but they just make new holes. |
| 0:21:43 | CALLER: So he was thinking he we investigated products and the manufacturer actually says, no, it won’t work. And so we’ve come down to some kind of a stone basing. And I don’t know anything about that. You know, I don’t know. |
| 0:22:00 | TOM: Well, first of all, we’re talking about replacing siding. Then you’re probably talking about a product like Hardy Plank, which is a great product mean it’s basically a cementitious board that can look like wood. Frankly, I’ve got it on my garage. It looks great. But you know, you can’t get birds like woodpeckers or bugs that can destroy it. But before we go there, let’s let me give you some really simple things to try, which I’ve had very good success with over the years. So you want to dissuade this woodpecker or packer woodpeckers from working on that side of your house? It’s just a matter of habit. You know, the reason they pack the water is because they’re looking for worms and they have no idea that there’s no worms inside the wood that’s being used to save your house. If you were to cut strips of black plastic, like, let’s say you had a hefty bag and you cut it into like two edge strips and you would attacks in the strips in that area, The fluttering of those strips will dissuade the woodpeckers from coming back and you leave it up there for a couple of months and then take it down. It probably might go away. The other thing that works is shiny discs like ten pie plates. They’re when those sort of twist in the breeze, they also can dissuade woodpeckers. But I like the black plastic strips because they’re not quite as obvious. Right. And they’re really easy to do. So if you were to go up there with that and take them in place in that area, I think you may find that the woodpeckers are confused by that and might just go and, you know, take on somebody else’s house down the street, but at least to leave yours alone. |
| 0:23:28 | CALLER: Mm. We have tried our aluminum foil strips. Mm. And that didn’t work. |
| 0:23:34 | TOM: Yeah. I don’t know about the strips. I’ve always use paper plates, pythons, but I would try to try the black plastic strips. I think you’ll have success with that. |
| 0:23:42 | CALLER: So can you. If it’s not, what kind of sighting can he put up to dissuade these little buggers? |
| 0:23:49 | TOM: Well, if you want a sighting that they’re not going to get through, then I would suggest HardiePlank. They have clever, they have shingles. It’s really nice stuff. Take a look at the HardiePlank website and you’ll be able to see lots of lots of photos of homes that have been covered with it. |
| 0:24:05 | CALLER: Does it come in sections like four feet wide or. |
| 0:24:08 | TOM: It comes in different, different types of side of siding profile? So the clapboard or the shingle, for example, they have many different types. But you can take a look at there. Maybe you’ll find one that’s close to what you have and you can use it for a repair product, too. All right, Denise, good luck with that project. Thanks so much for calling us at 888-Money-Pit. |
| 0:24:25 | LESLIE: Well, if your driveway is stained from oil leaks or cracked or worn, now is a great time to clean it and to seal it. Now, beyond stain removal, the type of driveway maintenance you need to do is going to depend on whether you have concrete, asphalt or a paver driveway to begin with. |
| 0:24:42 | TOM: Yeah. And first, let’s talk about those nasty oil stains. You want to mix up a solution of tri sodium phosphate into a paste. Now you’ll find this at the paint aisle of any hardware store or home center. It’s often used to clean walls before you paint. That’s why it’s there. But it works really well for cleaning up oil stains. You want to apply the TSP, paste, wet the stain and let sit for an hour or more and then rinse. Now, obviously the sooner you can get to the stain, the better. But even old stains can be successfully removed with this approach. As long as you fix that car first so it doesn’t keep happening again and again. |
| 0:25:14 | LESLIE: Yeah, that’s very true. Now, for an asphalt driveway that needs to be resealed, you can use asphalt compatible products to fill those cracks, gaps and holes. And then you use a disposable squeegee to apply an airport grade latex sealer over the entire surface. You want to make sure that the forecast is clear for the applying and drying time since rain is going to cause that sealer to run. It’s going to rain on the sidewalks and the streets. And then what happens is you are left with some removable stains which look pretty gross. Now you can follow up with a generous drying period. You need to give it a couple of days, if possible. So definitely look for a good span of dry weather. If you do all that, you’re going to have an attractive automotive entrance right at your home. |
| 0:25:59 | TOM: Now, if you’ve got a concrete driveway with a worn surface, it’s best to apply a concrete resurfacing product to that entire driveway. Now, you’ve got concrete surfaces out there that are really good. The last one I used, I loved I used it on my entire basement floor is called Quick Creates Recap and it’s specially formulated to stick to old concrete that’s going to leave your driveway looking almost brand new. You want more tips? Check out our post on driveway sealing and maintenance on moneypit.com. |
| 0:26:30 | LESLIE: All right. Now we’re heading to Tennessee, where Ty is on the line. What’s going on at your Money Pit? |
| 0:26:35 | CALLER: My wife and I had an area road in our den, and it was a large area rug. We needed to replace it. So we picked it up and there’s sun damage which faded to hardwood floors. So there’s a lot of demarcation. And I was wanting to know if there was an easy way to fix that without having to sand the hardwood floors. |
| 0:26:55 | TOM: Yeah, time, time, time will fix it. You know, I have hardwood floors in my very old house, and I remember once having to do a pretty significant repair where it old floor furnace. You remember those old floor furnaces that would sit flush with the floor? So I had a big square hole in the floor and I had to take that out and put framing in and then replace the flooring. And I actually had to make some of those for his was an unusual shape. And despite my best efforts, of course, the new flooring was like it was like the difference between white and brown. It was like that distinct. It look clearly like a patch. And I had the same feeling about, wow, maybe I could stain it, but I knew that if I just let it alone, it would eventually fade. And I’ll tell you what, within a year it had faded to match the other floor perfectly. And I’m so glad that I did not try to mess with that with the with it. And I just let ultraviolet light in time do its thing the same way it protected that floor under that carpet. It will eventually fade and be the exact same color as the rest of the floor. So I wouldn’t do a thing. Leslie, what do you think? |
| 0:28:04 | LESLIE: I mean, it’s always really interesting when you have a beautiful floor and you want it to look fantastic. So I think if you give it some time and learn to live with it, you’ll enjoy it. |
| 0:28:12 | CALLER: Okay. Well, thank you, because I wasn’t sure if you could put a glaze or something on the faded part to try to match the other part. We just didn’t want to have to go through the hassle of recent in that whole room and then, you know, the dust and all that stuff that goes along. |
| 0:28:28 | LESLIE: With it is a big project. |
| 0:28:30 | TOM: It’s a very big project. Yes. So, I mean, I really think you should just give it some time and let it feedback. And you think you’re you know, you give it some time, you’ll save all that money and time and aggravation because the only way to skip the step is to basically refinish the whole floor and yeah, for that. |
| 0:28:47 | LESLIE: Or just cover it up again with another rug. |
| 0:28:49 | CALLER: Yeah, we were thinking about coming up with smaller rug, but that’s too loose line of demarcation. So just go back with a button again. |
| 0:28:57 | LESLIE: Now or a 9 by 12 until you eventually cover the whole floor. |
| 0:29:01 | CALLER: Look that for you. Okay, We may. We’ve lived without the rug on there for three or four months now, so we may just go for about a year. |
| 0:29:10 | TOM: As so you guys see what happens. All right. So good luck. Thanks so much for calling us at eight 888-Money-Pit. |
| 0:29:15 | LESLIE: John wrote into Tim Money Pit and asks, Can you offer any ideas on why all of our carpets are buckling in the center? It started happening about three or four years after install. We were thinking that it might be shoddy installation, didn’t stretch them right in the first place. We checked our crawl space, but it’s dry. |
| 0:29:33 | TOM: Yeah, you know, that happens with some carpets. I mean, it may be that you don’t have that great a carpet here, but it will stretch and basically it has to be re stretched. So you have to pull the furniture out of that room and you have to re stretch it starting in the center and working out. It’s really a job for a pro. They can do it very easily because you need a special tool called a carpet kicker, which basically grabs the carpet and moves it outward towards the tacklers, which is that would strip that goes at the perimeter of the room with little spikes in it that holds it tight and you can get away with stretching the carpet once, maybe twice. But after that, it’s going to be time for a new carpet. |
| 0:30:09 | LESLIE: All right. Audrey wrote into Team Money Pit and says, I’m getting sudden bursts of very hot water in the middle of a shower. I have a gas water heater. The pilot light is on. Any idea why this is happening? |
| 0:30:21 | TOM: Yeah. Audrey has nothing to do with your water heater. Has to do with the plumbing valve. The shower valve. You need what’s called a pressure balanced valve installed. What that does is it maintains the mix between hot water and cold water. Regardless of your water pressure. So once you have the mixture, right, you have the balance just right. If you have less hot water or more cold water or less cold water and more hot water, it’s going to keep that mix even though the amount of flow coming out will vary, the mix won’t change, and that avoids that shower shock of getting a really hot blast of water or even a really cold blast of water too easily happens because somebody flush the toilet somewhere else or the dishwasher is running or whatever. But a pressure balance shower valve will solve that once and for all. |
| 0:31:02 | LESLIE: All right, Audrey, good luck with that. And hopefully you end up with a nice, consistently warm and perfect shower. |
| 0:31:08 | TOM: Well, if you’d like to enjoy the warm glow of a fireplace this winter, you better make sure the screens are clean to start. Leslie has the tips on how to do just that in today’s edition of Leslie’s Last Word. Leslie, you’re actually expecting a new screen soon, right? |
| 0:31:22 | LESLIE: Oh, my goodness. I’m so excited for the little ski condo we have up in Vermont. It hadn’t been updated the fireplace since the eighties when the place was first built. And so there was a lot of smoke leakage and a lot of confusion into the correct operation of the fireplace. So we’re getting a new glass door and screen and everything’s going to be so beautiful and so cozy because I really do love sitting by the fire cozying up to the fireplace. But you really want to make sure that you can see it, you can enjoy it, that you’re using that fireplace properly. So first off, you’ve got a plan to clean that fireplace screen, and you really do need to be doing that once or twice a season. I mean, in addition, just from getting yucky from the fireplace, I mean, they just get dusty from like on the off season. So definitely a great time to get that job done. Now you can use a cleaning solution of one eight cup of liquid dishwashing detergent and you mix that to a quart of water. And that’s just simply going to do wonders for all that caked on dirt. You gently scrub the screen with a soft bristle brush and you follow up by wiping with a lint free cloth, because that’s going to help you avoid rusting if there’s any brass sections on it. You want to polish that with a brass cleaner and a lint free cloth. And I promise you, just that little simple cleaning project is going to make this fireplace so much more enjoyable. But always make sure you’re operating proper fireplace maintenance, get that chimney cleaned once a season. You don’t really. It depends on how much firewood you burn. So take care of it, operate it correctly, be safe, but also be cozy. It’s the holidays and joy. |
| 0:32:52 | TOM: This is the Money Pit Home Improvement Show on this. The home improvement season. We’re happy to help you take on all the projects you want to get done now or in the next year ahead. And that’s going to be the topic of the next edition of the Money Pit. We’re going to share the top five most common remodeling mistakes that people are tackling right now to keep your projects on track for the year ahead. That’s all coming up next time on the Money Pit. I’m Tom Kraeutler. |
| 0:33:17 | LESLIE: And I’m Leslie Segrete. |
| 0:33:19 | TOM: Remember, you can do it yourself. |
| 0:33:20 | LESLIE: But you don’t have to do it alone. |
| (Note: The above referenced transcript is AI-Generated, Unedited and Unproofed and as such may not accurately reflect the recorded audio. Copyright 2023 Squeaky Door Productions, Inc. No portion of this transcript or audio file may be reproduced in any format without the express written permission of Squeaky Door Productions, Inc.) |


Leave a Reply