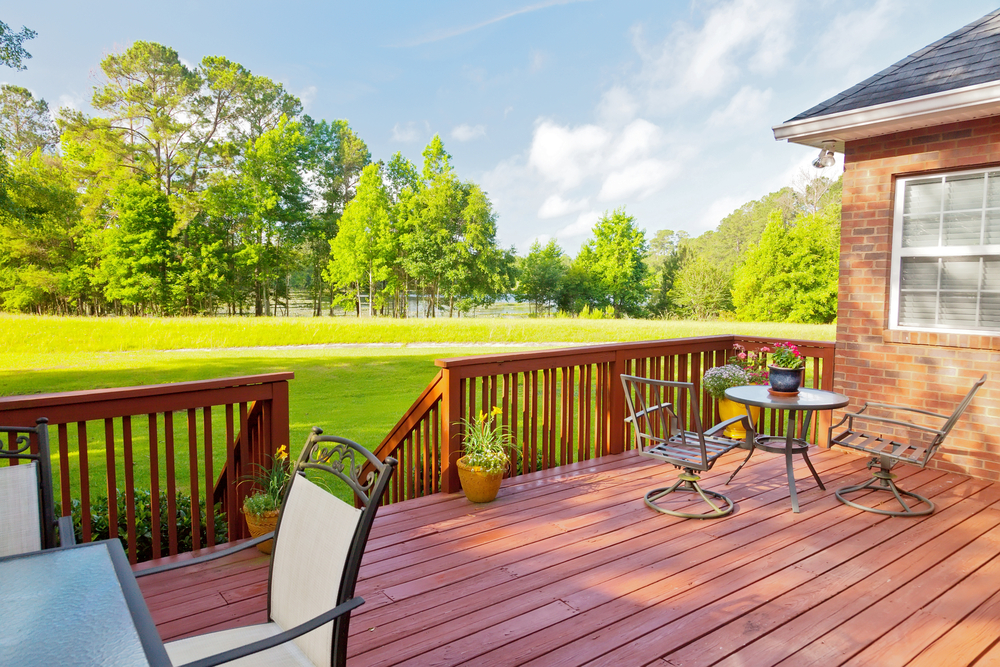
Wooden decks have been popular with homeowners for over half a century, and it’s easy to see why. Decks provide an efficient and affordable way to add outdoor living space to a home. They can be used for a wide variety of open-air activities, including sunbathing, stargazing, dining al fresco, and entertaining family and friends. That’s one reason refinishing a wood deck also adds value to your home and is an attractive feature for potential buyers when it comes time to sell.
Table of Contents[Hide][Show]
However, preserving the natural warmth and beauty of a wood deck requires a little maintenance. Decks are assaulted year-round by sun, rain, snow and ice, which cause stains to fade, fasteners to rust and wood to crack and warp.
It’s important to address such problems by annually inspecting, cleaning and refinishing your deck. If you don’t, small, quick fixes will eventually turn into large, costly repairs. The good news is that you can restore your weather-beaten, sun-scorched deck to like-new condition in four easy steps.
Step 1: Inspect the Deck
Begin by visually inspecting each component of the deck, starting at the bottom and working your way up. Record your findings in a notebook.
For an elevated deck that’s supported by tall vertical posts, check that each post is firmly attached to the footing at the bottom and the deck frame at the top. If a post shows any signs of decay or damage, it should be replaced immediately. All diagonal braces must be securely bolted in place.
On-grade decks sit close to the ground and are typically supported by a series of concrete blocks or piers. Be sure the concrete supports haven’t cracked in half or shifted out of position. Inspect the joists and beams to confirm that the deck frame doesn’t have any insect infestation, rot or damage.
If the deck is attached to the house, inspect the ledger, which is the long horizontal board that’s fastened directly to the house. The ledger supports the ends of all the joists and must be securely bolted to the house frame to prevent the deck from collapsing. It’s very important that the ledger is free of any defects, including rot and cracks. It should be bolted tight against the house along its entire length. Also, check the condition of the flashing that prevents water from seeping behind the ledger. If there is no flashing, be sure to have some installed.
Inspect each horizontal beam and floor joist for any signs of decay or damage. Pay particular attention to the ends of the joists, which have a tendency to rot and split. Make note of any joists that are sagging or badly bowed.
The ends of the joists often sit in metal saddles called joist hangers. Be sure each hanger is firmly nailed in place and free of rust. Also, check both ends of each joist to ensure they’re fully seated in the hangers and haven’t pulled away.
Next, slowly walk back and forth across the deck to inspect each decking board. Check for rot, splinters, large cracks and popped fastener heads. Make note of any boards that are badly twisted, cupped or warped.
If the deck has a perimeter railing, check to be sure the railing posts are firmly attached and not wobbly, loose or cracked. The handrail should be smooth and free of rough spots and splinters. Each of the horizontal balusters must be secured and in sound condition.
Check all steps and staircases for any structural damage, including cracked stair treads, badly split stringers and loose handrails. Look for water damage and decay, especially where the bottom step meets the ground. Be sure that the top of the staircase hasn’t pulled away from the deck frame.
Step 2: Make Repairs
Once you’ve inspected the whole deck, review your notes and decide which repairs need to be done first. It’s best to start with structural repairs and then tackle the cosmetic problems. Also, decide which repairs you feel comfortable doing yourself and which should be done by a licensed contractor.
Any problem that affects the structural integrity or safe use of the deck must be repaired first. In most instances, that means calling in a professional contractor. The average homeowner simply doesn’t have the necessary carpentry skills or the specialty tools needed to make structural repairs. Plus, the risk of personal injury is just too high if the repairs aren’t done correctly.
However, there are still plenty of repairs that are well within the capability of any DIYer. Here are just a few:
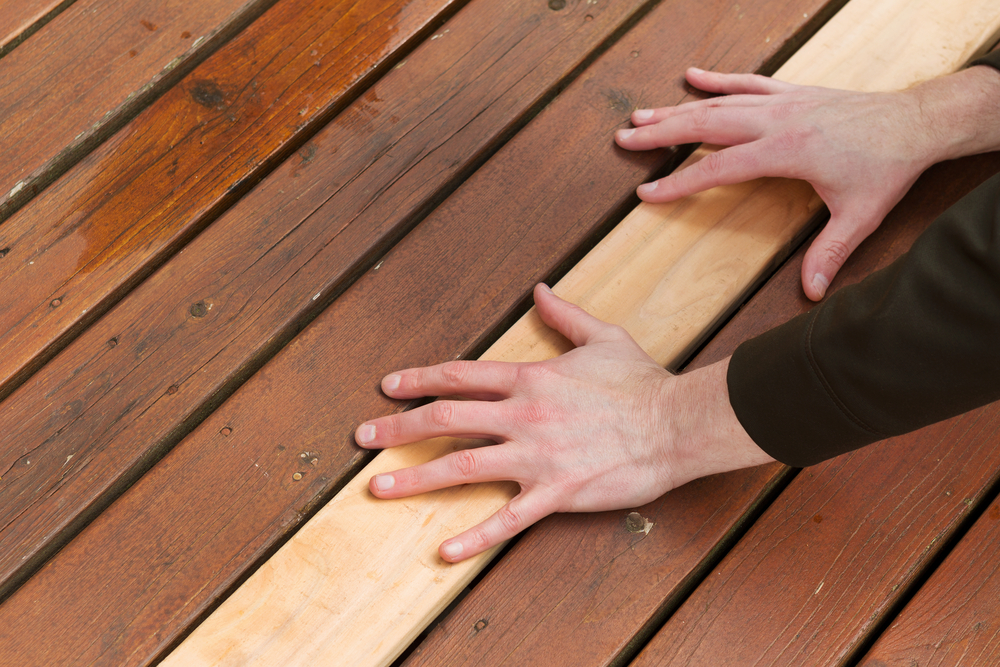
- To remove a damaged deck board that’s screwed down, use a cordless drill or cordless impact driver to back out the screws and free the board. Cut a new deck board to fit from the same material as the existing decking.
- If the damaged deck board is nailed down, try to pry it up with a steel pry bar. If the board won’t budge, use a hammer and cat’s paw to yank out the nails.
- When confronted with nail heads protruding from the deck surface, it’s best to pull the nails and then replace them with decking screws that are at least one inch longer than the old nails. Be sure to drive the screw heads at least one-eighth of an inch below the surface.
- Badly cupped deck boards collect water, which often turns slimy and very slippery. You can replace a cupped board with a new, flat board, but if the cupped board is in otherwise sound condition, simply flip it over and screw it back down.
- To install a new baluster, start by carefully removing the old, cracked baluster. Be sure you don’t damage any part of the railing, including adjacent balusters and horizontal rails. Cut a new baluster to fit from the same material. Bore screw-shank clearance holes, which will prevent the balusters from splitting, then attach the balusters with decking screws.
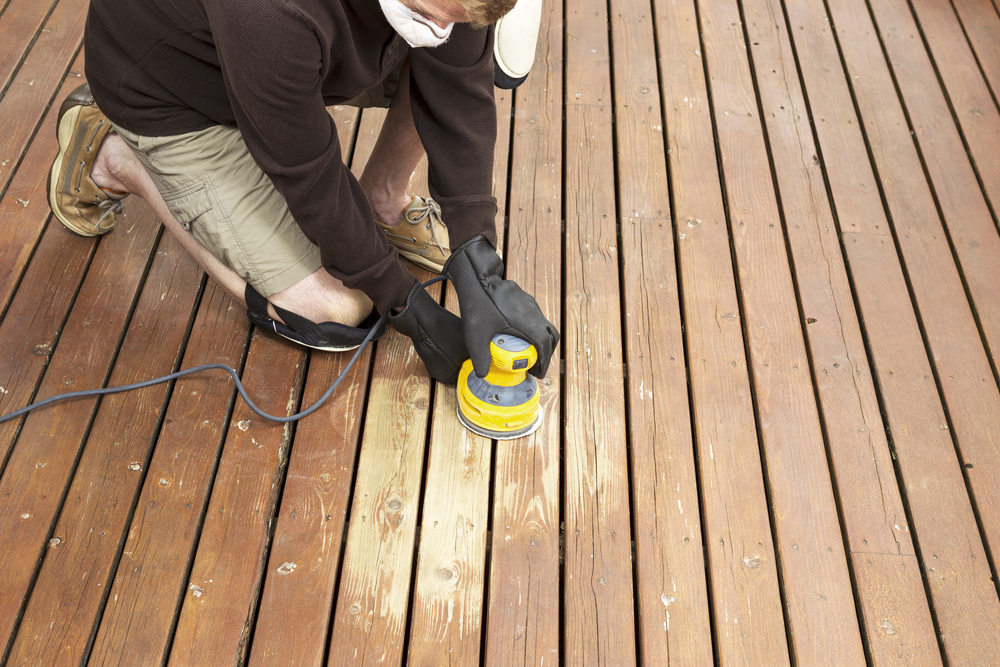
- Use a belt sander or random-orbit sander equipped with 100-grit abrasive to smooth rough spots and ease over sharp edges and corners.
- To remove a cracked concrete block from beneath an on-grade deck, start by using a hydraulic jack to raise the deck frame slightly. Stack wood planks beneath the deck, just in case the jack slips. Next, pull out the damaged block and slip into place a new solid-concrete block. Then, remove the planks and release the jack to lower the deck back into position.
- If a cracked stair tread is nailed in place, pry out the nails; if it’s screwed down, back out the screws. Remove the damaged tread and cut a new tread to match.
- Reinforce a loose railing post with zinc-galvanized carriage bolts. Bore holes completely through the post and deck frame, then secure each post with two 3/8-inch-diameter or larger carriage bolts.
- Use a putty knife or similar thin-blade tool to scrape leaves, dirt and other debris from between the deck boards. Debris traps moisture, which can eventually lead to wood rot and a build-up of mold and mildew.
Step 3: Clean the Deck
The next step is to thoroughly scrub the deck clean of all dirt, debris, mold and mildew. Note that it isn’t necessary to strip the old wood stain completely off the deck unless you’re planning to stain the deck a different color. In that case, apply a thick coat of nontoxic deck stripper, and then use a hand scraper and pressure washer to remove the old stain down to bare wood.
If you plan to re-stain the deck the same color, or if the deck is unstained, then all you need to do is scrub the surfaces clean with either a commercial deck cleanser or a homemade cleaning solution. Caution: Always wear eye goggles and rubber gloves when handling chemical strippers or deck cleansers.
Commercial cleansers are available at home centers and are often labeled as all-in-one wood cleaners, deck brighteners or fence-and-deck wash. You can also make your own deck cleanser. Get a clean five-gallon plastic bucket and add three quarts of warm water, one quart of liquid bleach and one-third cup of powdered ammonia-free laundry detergent. Gently mix to blend. Warning: Never mix ammonia with bleach. The two liquids react to form a highly poisonous gas.
Wait for a cool, cloudy day to clean the deck, as bright sunlight and hot decking make the cleanser evaporate too quickly. Cover nearby plants and grass with plastic sheeting. Then, use a long-handled, stiff-bristled brush to scrub the cleanser into the deck boards, steps and other large horizontal surfaces. Use a small scrub brush to apply cleanser to railings, balusters, posts and rim joists. Allow the cleanser to soak into the surface for at least 20 minutes.
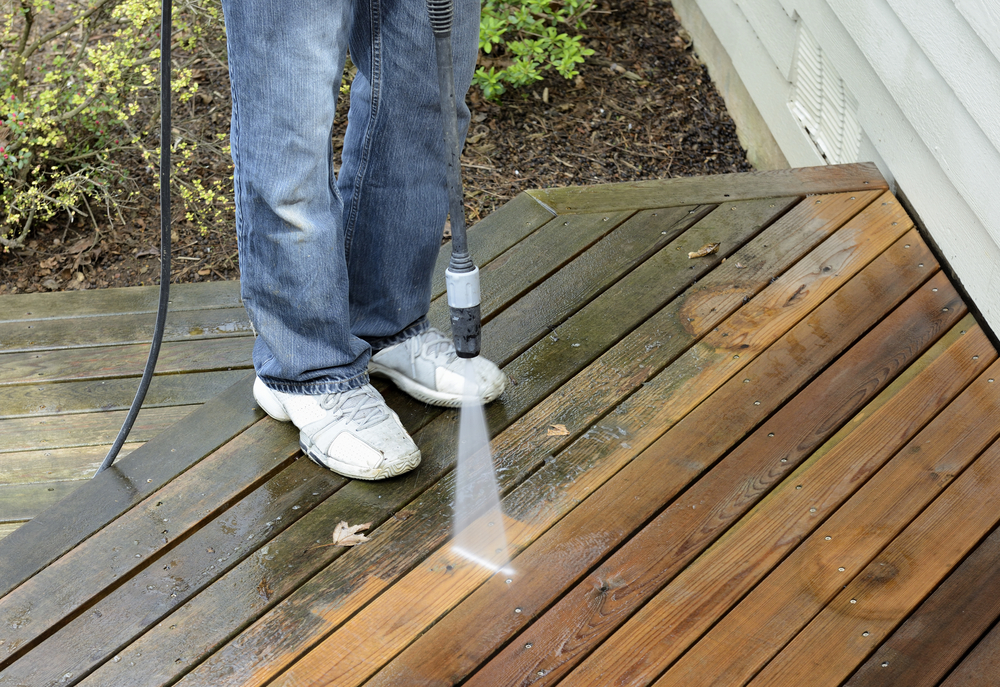
You can then rinse off the deck with a garden hose, but you’ll get much better results with a pressure washer, especially if the deck is badly stained or covered with mold and mildew. If you don’t own a pressure washer, you can rent one from your local home improvement center.
Pressure washers come with several different size nozzles that fit onto the end of the spray wand. For rinsing the deck, choose a wide fan-tip nozzle and keep the spray wand several inches above the surface to avoid damaging the wood’s surface. Hold the wand at an angle and blast away the cleanser, dirt and debris. Inspect the deck to be sure all surfaces are clean. If necessary, apply more cleanser and then scrub and rinse surfaces clean. Allow all surfaces to dry completely before proceeding.
Step 4: Apply a New Finish
The final step is to apply a fresh coat of exterior-grade decking stain to all surfaces. However, if your deck is unstained and you wish to keep it that way, that’s fine, but you must still protect it with a clear wood preservative. All wood—even pressure-treated lumber—will benefit from an annual application of a water-repellant wood preservative.

Whichever finish you choose, be sure it’s designed for the wood species used to build your deck. Some exotic decking products require a special hardwood finish.
There are two basic types of decking stains: semi-transparent and solid-color. Semi-transparent stains allow some of the wood grain to show through. Solid-color stains are thicker and completely conceal the wood’s surface. When properly applied, both types work well, but because solid-color stains are thicker, they can blister and peel.
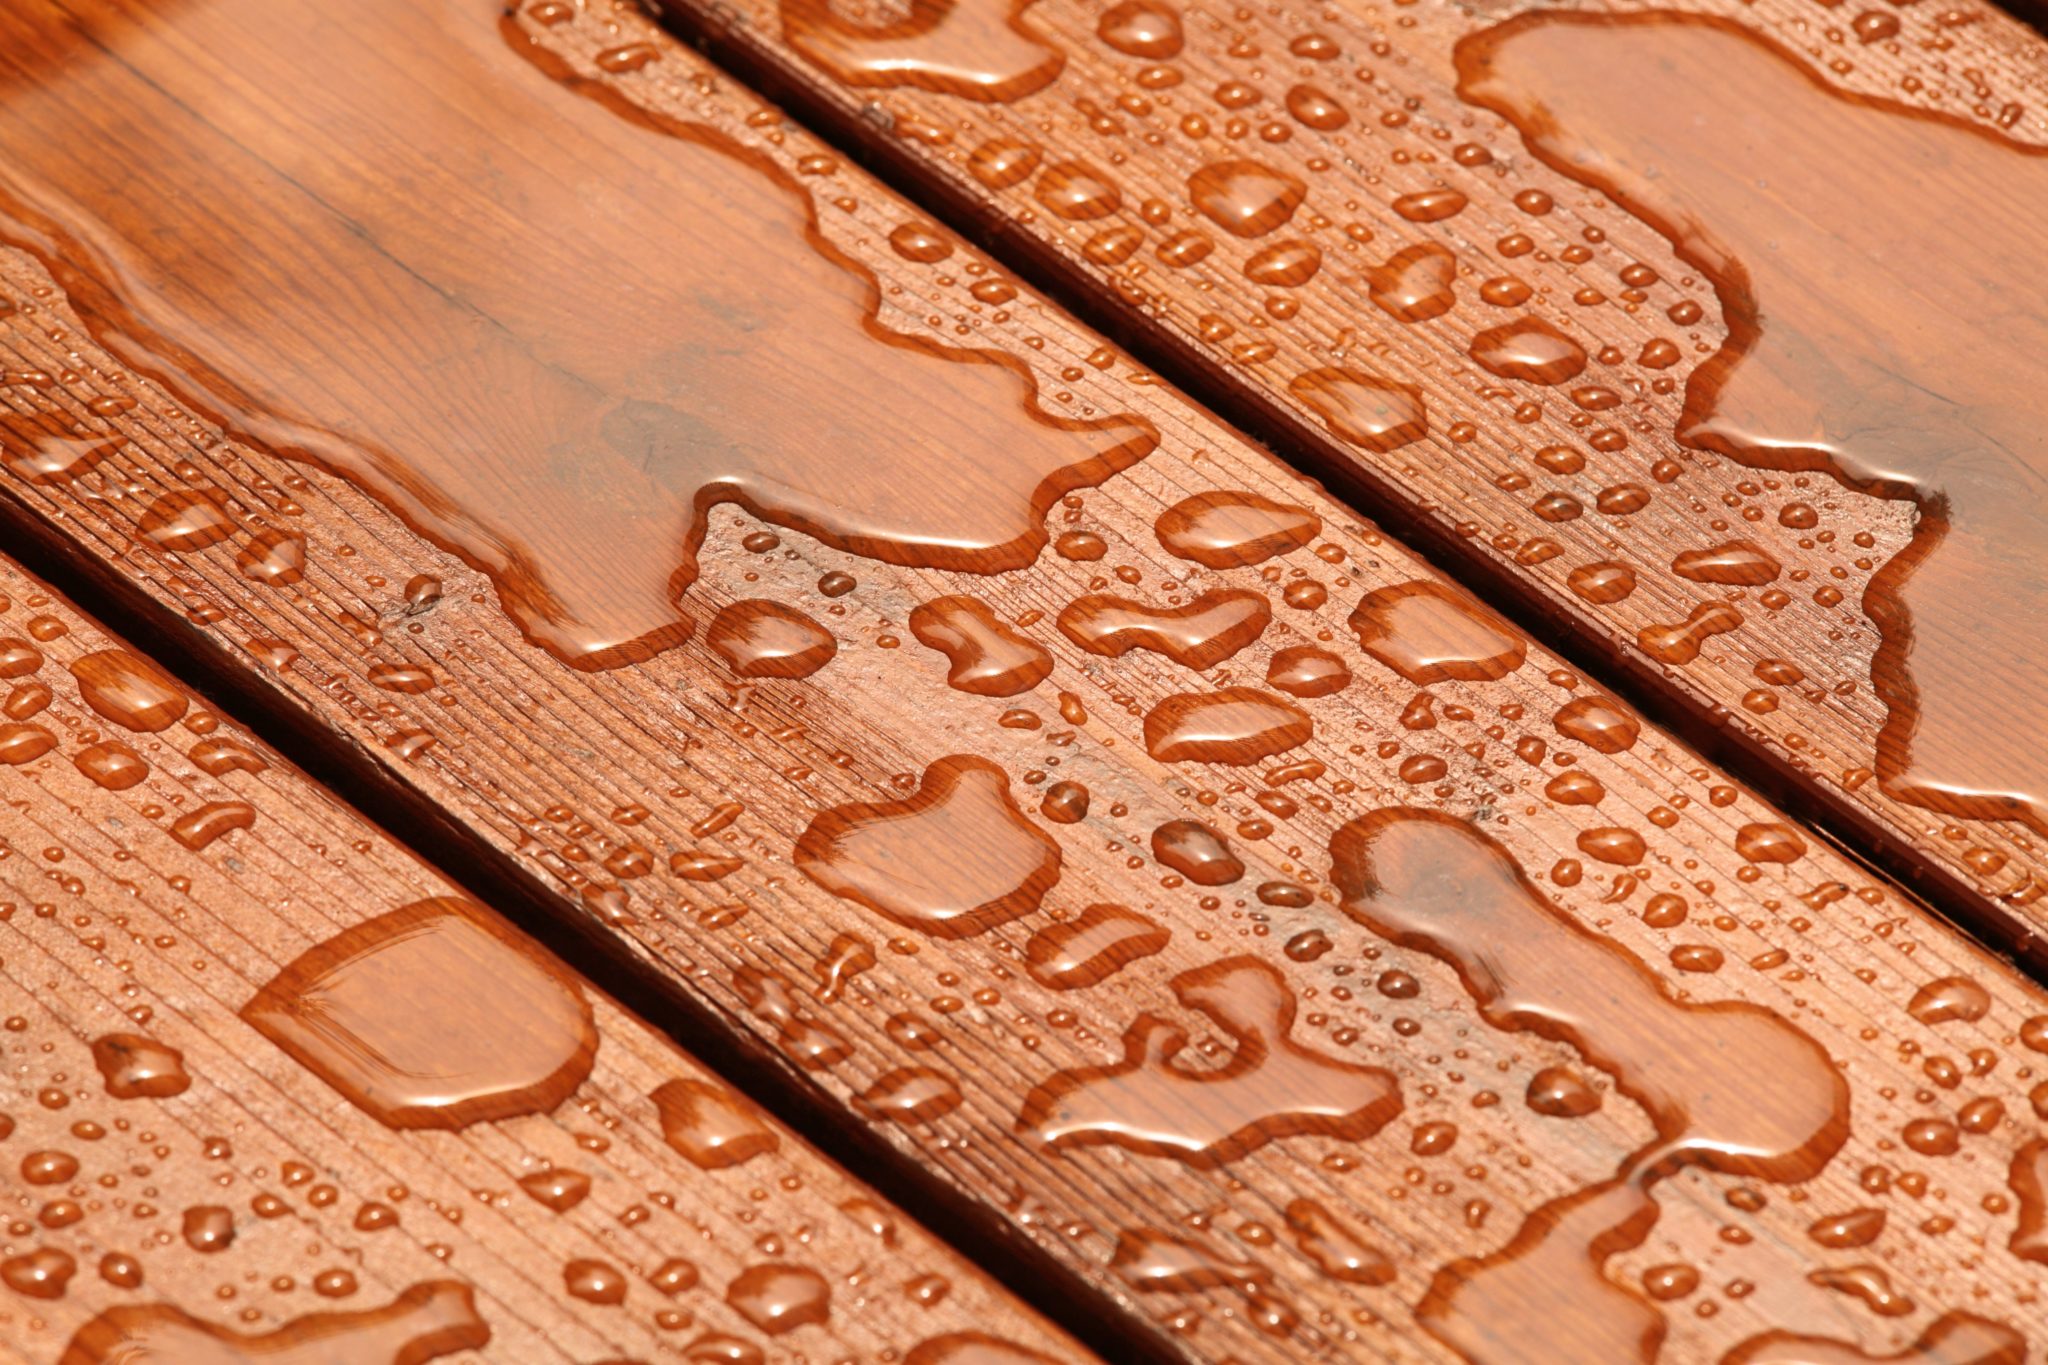
Start by testing the deck to be sure it’s ready to accept the new finish. Place a few drops of water onto the deck. If the droplets are quickly absorbed into the wood, then the deck is sufficiently dry and ready for staining. However, if the water beads up on the surface, then the wood is still too wet to absorb the stain. Wait a day or two more, then retest the surface.
Before staining your deck, check the weather. Be sure there’s no rain in the forecast on the day you plan to stain and for two days afterwards. Ideally the weather should be cool, dry and cloudy. Avoid staining in direct sunlight or on extremely hot days; the stain will dry before it has a chance to soak into the wood.
There are several tools available for applying wood stain, but the three most useful include a long-handled staining pad and a 2-inch or 4-inch paintbrush. A paint roller applies stain very quickly, but not very efficiently or economically; much of the stain drips and runs off the deck before it gets absorbed.
If you are using a stain pad, apply the stain onto the deck, then immediately back-brush the surface with a dry paintbrush. Back-brushing helps drive the stain into the wood grain and removes any excess product.
One coat of stain is usually sufficient, but if you’d like to apply a second coat to darken the color, brush it on while the first stain coat is still wet. If you wait too long and the first coat dries, then the second coat won’t be absorbed. Allow the stain to dry for at least 24 hours before walking on it.
Now that your deck looks new again, you’re probably wondering how long it’ll last. That depends on several factors, including the deck’s exposure to foot traffic, sun, rain, snow and tree litter, such as leaves, sap and seedpods. Ordinarily, decks need to be refinished once a year. However, if the stain still looks good after a year and hasn’t faded or worn off, then there’s no need to re-stain it. Just apply a clear preservative to help prevent water damage. Regular maintenance and an annual inspection will help keep your deck in great condition.
Joseph Truini is a home-improvement expert who provides how-to info for homeowners on topics like installing a deck rail and refinishing a whole deck. To see an assortment of wood decking boards like those Joseph talks about in this article, visit the Home Depot.


Leave a Reply