fbpx
  • Menu
  • Skip to left header navigation
  • Skip to right header navigation
  • Skip to primary navigation
  • Skip to main content
  • Skip to primary sidebar
  • Skip to footer

Before Header

  • Facebook
  • Instagram
  • Pinterest
  • Twitter
  • YouTube

The Money Pit house logo

Home Improvement Tips & Ideas

  • Start Here
  • Money Pit Podcast
  • Media Kit
  • Posts
  • Search
  • Start Here
  • Money Pit Podcast
  • Media Kit
  • Posts
  • Search
  • Spaces
    • Kitchens
    • Bathrooms
    • Home Exteriors
    • Garages & Sheds
    • Outdoor Living
    • Basements & Crawlspaces
  • Reno/Repair
    • Heating
    • Floors
    • Windows
    • Roofs & Gutters
    • Lighting & Wiring
  • Popular Topics
    • Storage & Organization
    • Painting & Decorating
    • Cleaning
    • Pests & Wildlife
    • Buying or Selling a Home
  • Features
    • DIY
    • Pet Friendly
    • Green Home
    • Quick Tips
  • Podcasts
    • Subscribe
    • The Money Pit Podcast
    • Your Calls, Our Answers Podcast
    • Money Pit Minute Podcast
    • Top Products Podcast
You are here: Home / How To Install A Single Pole Switch | Video
Lighting & WiringVideos

How To Install A Single Pole Switch | Video

Lisa VitaleUntitled-2 Leave a Comment

Facebook0Tweet0Pin0LinkedIn0Email0

A single pole switch is your home’s most basic electrical device. Replacing one is something anyone can do, even those who have never worked with electricity before. Here’s what you’ll need for this project:

TOOLS & MATERIALS

  • Needle-Nose Pliers
  • Non-Contact Voltage Tester
  • Flat-Head Screwdriver
  • Phillips-Head Screwdriver
  • Single-Pole Switch
  • Electrical Tape


When taking on this DIY task be sure to equip yourself with the proper safety gear.

SAFETY GEAR

  • Eye Protection

STEP ONE

  • Turn off circuit. Start by turning off the breaker that controls the switch you’ll be replacing.

STEP TWO

  • Remove switch cover. Back out the screws holding the switch cover in place and remove.

STEP THREE

  • Detach switch. Confirm the power is off by touching the voltage tester to each screw terminal, then remove the screws attaching the switch to the electrical box.

STEP FOUR

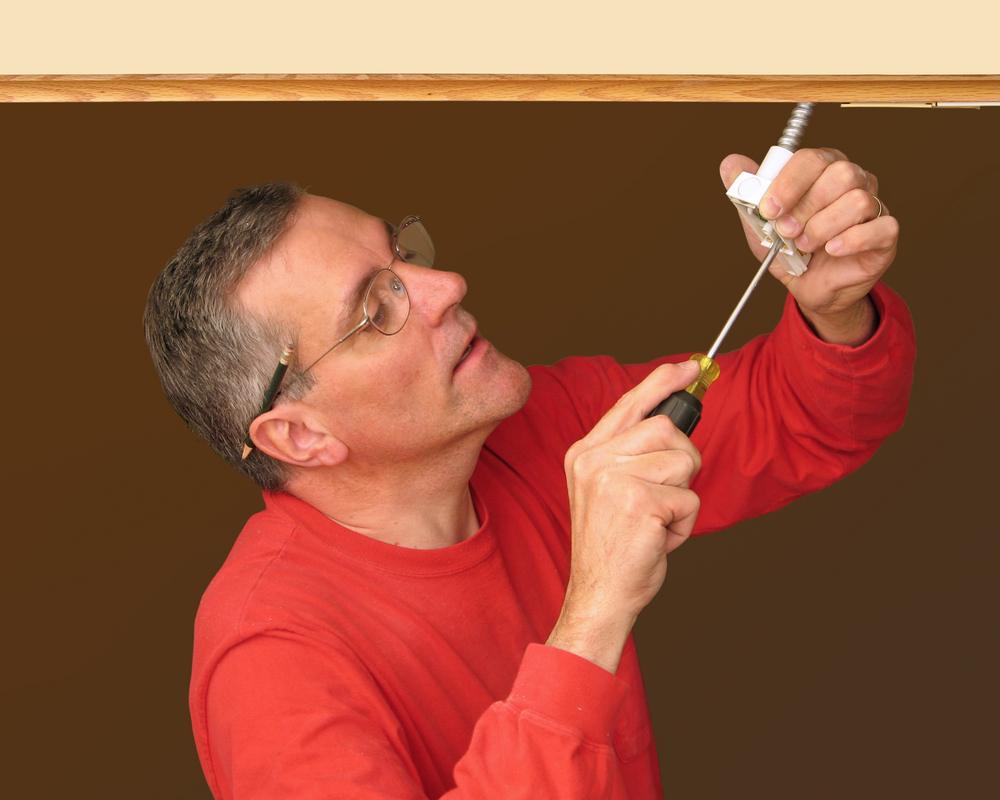
  • Disconnect wires. Unless the wiring is very old, you’ll see three wires attached to the switch, including a bare wire connected to a green grounding screw. The other two wires are hot: one will be black, and the other may be black or white. If the hot wires are connected to the screw terminals, loosen the screws and disconnect them. If they’re inserted into holes in the back of the switch, insert a small flathead screwdriver into the slot below each hole to release them.

STEP FIVE

  • Connect new switch. If the ends of the wires aren’t already bent into hooks, use needle nose pliers to create them. Hook the bare wire over the switch’s green grounding terminal, positioning the hook clockwise so it will pull against the screw as you tighten it. Attach remaining wires to the switch’s side terminals the same way. Wrap electrical tape around the sides of the switch to cover the terminals. For a smart switch, connect the white wires to the additional white wire provided using a wire nut. Connect the ground wire to the green connector on the switch. Identify your line and your load on the black wires and connect them to the appropriate line and load terminals on the switch. Finish by connecting the open end of the white wire into the neutral terminal on the switch.

STEP SIX

  • Install new switch. Confirm the “ON” designation is at the bottom of the switch lever so the switch will go on when you flip it up. Insert the switch’s installation screws into the electrical box and tighten until secure. Replace the switch cover and restore power to the circuit.
  • Your installation is complete.


Looking for great tools to help get your project done? Shop Stanley, Black & Decker and DeWALT for everything you need!


Facebook0Tweet0Pin0LinkedIn0Email0
Lighting & WiringVideos

Reader Interactions

Leave a Reply Cancel reply

Your email address will not be published. Required fields are marked *

This site uses Akismet to reduce spam. Learn how your comment data is processed.

Footer

Favorite Posts

Best Heaters for a Garage: Forced Air, Infrared or Portable?

Basement Waterproofing Tips | How to Fix a Wet Basement

How to Make Natural Wood Stain Using Coffee, Berries & More!

How to Floor Your Attic Without Wrecking Your Roof

10 Easy Recipes for Natural Cleaning Products

Popular Podcasts

Episode # 2080: Stopping Noisy Plumbing | Fast Fix for Loose Wallpaper | Solutions for Smelly Water | Your Q & A

Episode #2079: Low-Voltage Landscape Lighting | Automatic Pet Doors | Kitchen Cabinet Organization | Your Q & A

Episode #2078: Quick Ideas for Curb Appeal | Top Home Repair Mistakes | Cleanups for Driveways & Walks | Your Q & A

Episode #2077: Paint Colors that say Wow | Top 5 Projects for ROI | Easy Fix for Noisy Radiators | Best Floors for Damp Places

Episode #2076: Kitchen Spruce Ups for Renters | Secret Code for Best Air Filters | Power Plan for Black Outs | Your Q & A

Newsletter

Get weekly updates with the latest tips and tricks to save money in your home.

No spam, ever.

  • Facebook
  • Instagram
  • Pinterest
  • Twitter
  • YouTube

Site Footer

  • Media Kit
  • Partners
  • Endorsement Policy
  • Terms and Conditions
  • Privacy Policy
  • Cookie Policy and Cookie Solution
  • About
  • Affiliates
  • Cookie Policy (US)

Copyright © 1999–2021 The Money Pit · All Rights Reserved · Powered by BizBudding Inc

Share this ArticleLike this article? Email it to a friend!

Email sent!