• Skip to main content
  • Skip to header left navigation
  • Skip to header right navigation
  • Skip to after header navigation
  • Skip to site footer
  • Start Here
  • Money Pit Podcast
  • Leave a Review
The Money Pit house logo

The Money Pit

Home Improvement Tips & Podcasts

  • Media Kit
  • Affiliates
  • Ask a Question
  • Spaces
    • Outdoor Living
    • Kitchens
    • Bathrooms
    • Garages & Sheds
    • Basements & Crawlspaces
    • Home Exteriors
  • Reno/Repair
    • Air Conditioning
    • Windows
    • Floors
    • Roofs & Gutters
    • Insulation
    • Lighting & Wiring
  • Popular Topics
    • Storage & Organization
    • Painting & Decorating
    • Cleaning
    • Pests & Wildlife
    • Buying or Selling a Home
  • Features
    • Green Home
    • Pet Friendly
    • Kid Spaces
    • DIY
    • Quick Tips
  • Podcasts
    • The Money Pit Home Improvement Podcast
    • Money Pit Minute Podcast
    • Your Calls, Our Answers Podcast
    • Top Products Podcast
    • ProFiles Podcast

How to Install a USB Wall Outlet

How to Install a USB Wall Outlet

Lighting & WiringDIY
FacebookTweetPinLinkedInEmail
Leslie Segrete & Tom Kraeutler, Hosts of The Money Pit by The Hosts Leave a Comment

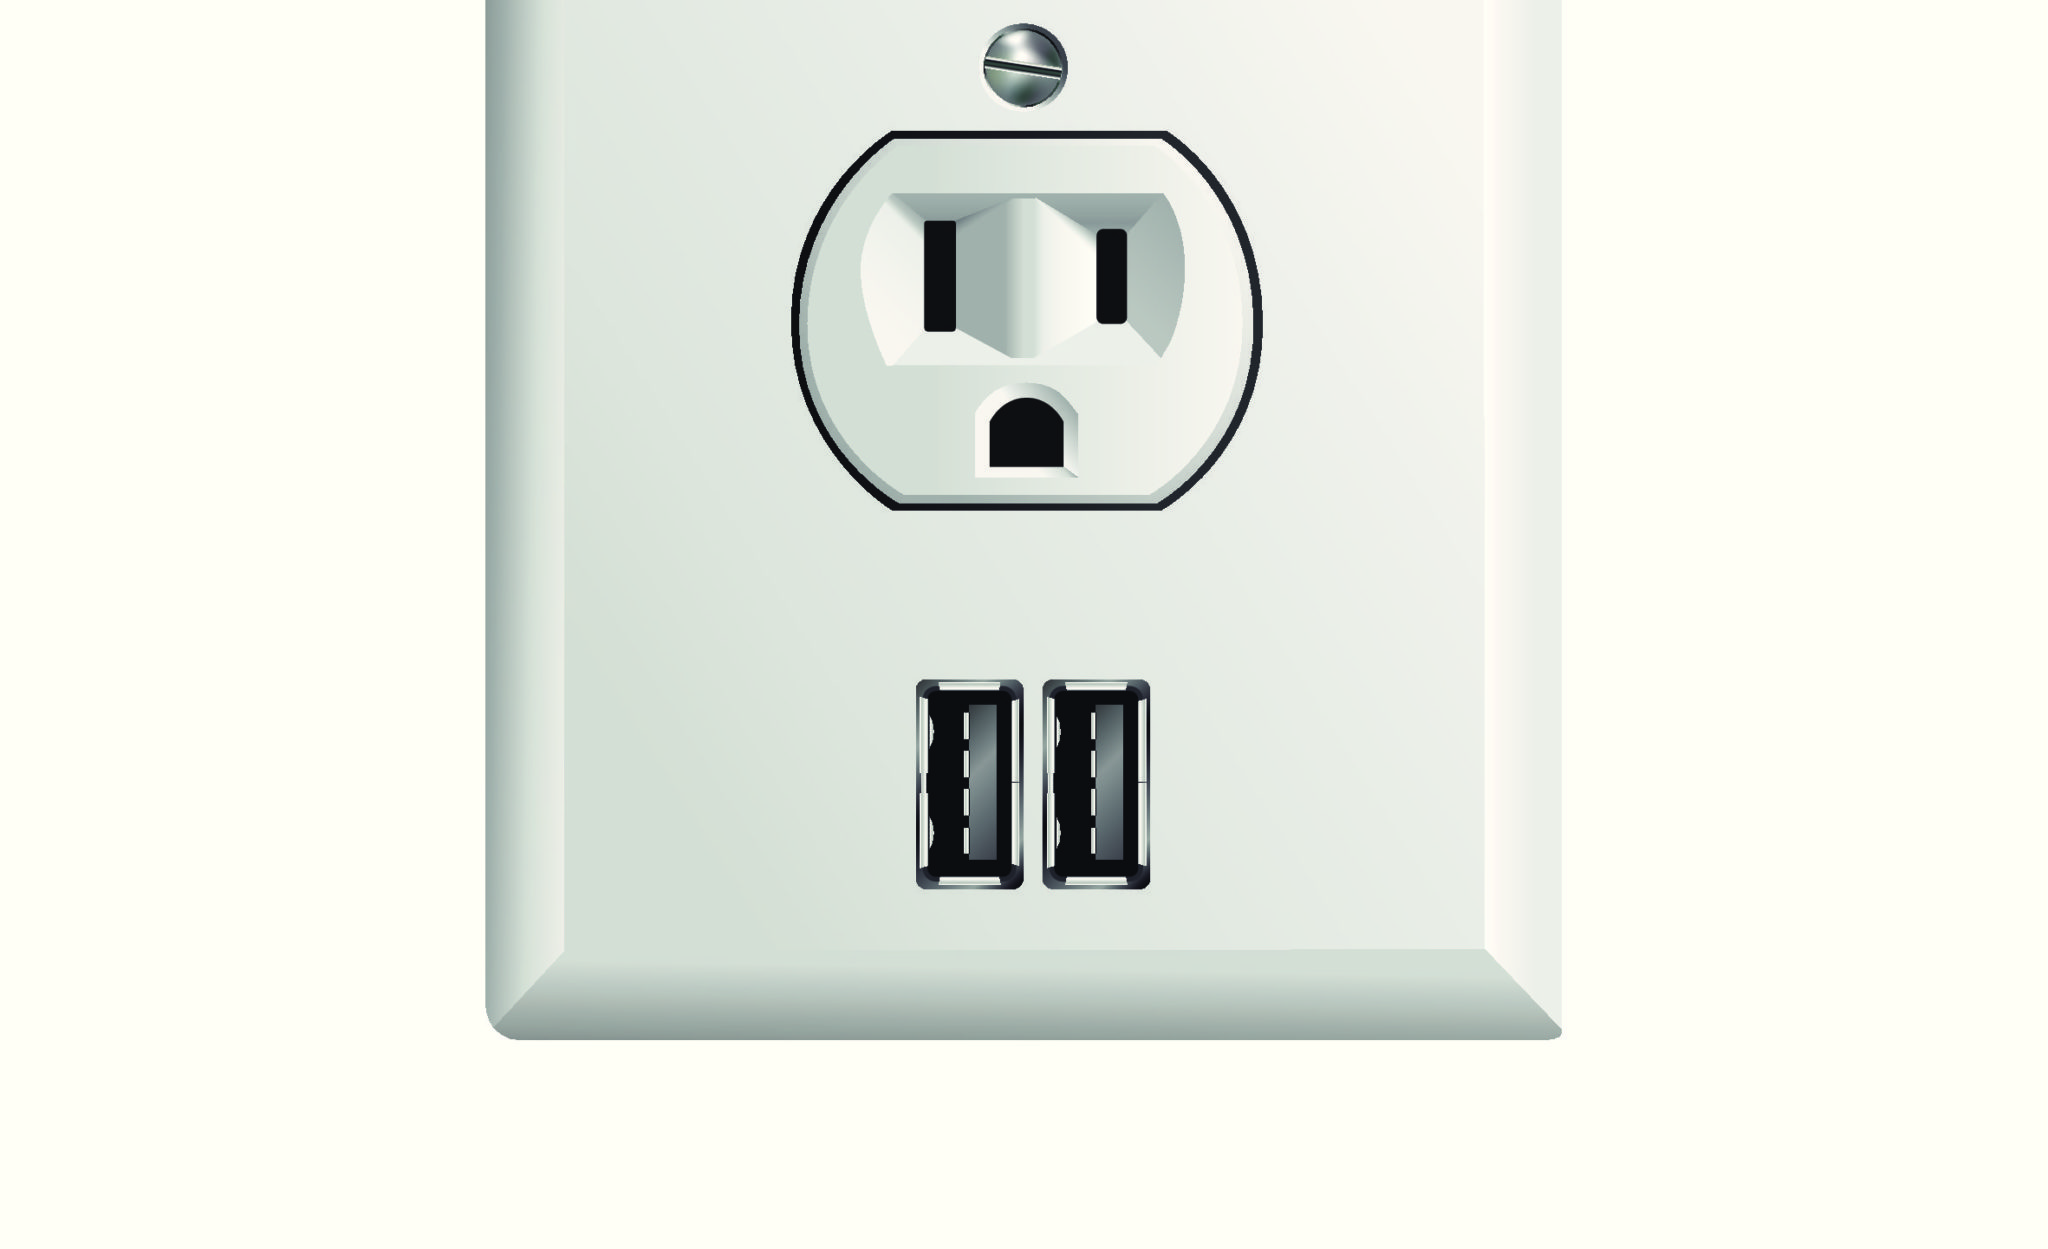
A USB wall outlet is a great way to cut down on clutter and modernize your home. You’ll be able to charge all of your USB-enabled devices from one convenient source without the hassle of searching for the right power adapter. Adding a wall outlet with USB jacks is easier than you think. We’ll walk you through this project in seven simple steps. Here’s what you’ll need to get the job done.

TOOLS & MATERIALS

  • Circuit Tester
  • Marker
  • Electrical Tape
  • Wire Strippers
  • Flat Screwdriver
  • Phillips Screwdriver

When taking on this DIY task, be sure to equip yourself with the proper safety gear. 

STEP ONE

Power off. Before starting any electrical wiring project, it’s essential that you turn off the power for the circuit you’ll be working on. You’ll do this in your home’s electrical panel box. Once you determine the circuit specific to your project, shut off the power at the circuit breaker. Then, use a plugin or proximity tester to confirm the power’s off. This is an important step for your safety.

STEP TWO

Remove old outlet. Using your screwdriver, remove the outlet cover, then remove the mounting screws and gently pull the plug receptacle from its box, making sure not to touch any wires. Confirm once again that the power’s off before touching any connecting screws or wires. Mark each individual screw and wire with tape or a marker to identify its original connection.

STEP THREE

White (neutral) wires. Release the white neutral wires by turning the silver-colored screws to the left, counterclockwise to loosen. Once you’ve disconnected them, attach the white wires to your new plug receptacle. Retighten the screw to make sure you have a secure electrical connection.

STEP FOUR

Black (hot) wires. Loosen the brass-colored screws to release the black hot wires by turning the screws counterclockwise to the left. All black wires should be considered live. As such, when removing them, carefully separate the wires and position them so the bare ends do not touch anything. Once again, retighten the screw to make sure you have a secure electrical connection.

STEP FIVE

Ground wire. Now it’s time to connect the ground wire, also known as a grounded wire, to your new outlet. This will protect electronic devices charging in your new outlet from overvoltage. The ground wire may be bare or it may be covered in green insulation. Loosen the green-colored screw to release it, then connect the wire to the new receptacle, positioning the bent loop under the screw head and tighten until the screw pulls the wire in around itself. Give the screw a final firm twist to make sure you have a secure electrical connection.

STEP SIX

Install plug. It’s finally time to install your new USB plug. Double check all the newly-connected wires to ensure they’re snug and secure, then carefully push the outlet back into the wall, making sure not to disconnect or pinch any wires. Then, use the supplied screws, or longer ones, if required, to attach your new outlet to the wall.

STEP SEVEN

Test outlet. Before you can use your new outlet, you’ll need to make sure it works. To do this, turn the circuit’s power back on, then use a plugin tester to test it. Once your reader indicates that it’s fully functioning, screw in or attach your outlet cover. Congratulations. You now have a functional USB wall outlet.

Looking for great tools to help get your project done?  Shop Stanley, Black & Decker and DeWALT for everything you need!

Lighting & WiringDIY

Related Posts

hang a flat screen tv

How to Add an Outlet for a Wall Mounted TV | Video

How To Replace An Outlet | Video

The Money Pit Tips & Tricks text logo with lightbulb

How To Install A Three-Way Switch| Video

How to Replace a Light Fixture

How To Install A Single Pole Switch | Video

How To Install A Dimmer Switch

Related Podcasts

The Money Pit Your Calls Our Answers Podcast Logo

How to Add an Electric Outlet to the Bathroom

The Money Pit Your Calls Our Answers Podcast Logo

Old Electrical Wiring: How to Use Safely

The Money Pit Your Calls Our Answers Podcast Logo

Tips for Converting to Three-Prong Outlets

The Money Pit Your Calls Our Answers Podcast Logo

Refrigerator Keeps Tripping Breaker

outlet, air leaks, power outlet, socket

One Power Outlet Isn’t Working

The Money Pit Your Calls Our Answers Podcast Logo

GFCI Outlet Keeps Popping

FacebookTweetPinLinkedInEmail

Reader Interactions

Leave a Reply Cancel reply

Your email address will not be published. Required fields are marked *

This site uses Akismet to reduce spam. Learn how your comment data is processed.

Sidebar

Trending Posts

Get Ready for the Game with The Money Pit’s $1,000 Tailgate Treasures Sweepstakes!

Attic flooring added to increase storage space

How to Floor Your Attic for Storage Without Wrecking Your Roof

Best Garage Floor: Tiles, Mat or Paint?

Garage Heater Dyna-Glo 30,000 BTU Natural Gas Blue Flame Vent Free Wall Heater, White

Best Heaters for a Garage: Forced Air, Infrared or Portable?

How to Get Rid of Thousand-Leggers Without Getting Grossed Out

Ask Us Anything

Ask A Question

Favorite Posts

Attic flooring added to increase storage space

How to Floor Your Attic for Storage Without Wrecking Your Roof

How to Get Rid of Thousand-Leggers Without Getting Grossed Out

Best Garage Floor: Tiles, Mat or Paint?

Dryer vent on outside of building

Controlling Dryer Lint Outside | Video

Popular Podcasts

Repair Crumbling Cinder Block

Electric Meter

Service Entry Cable and Electric Meter: Who is responsible for repair?

dirt to use around house foundation

Type of Dirt to Use Around House Foundation

What Smells Like Burning Rubber in My Home?

Newsletter

Get weekly updates with the latest tips and tricks to save money in your home.

As Us Anything

Ask A Question

Social Media

  • Facebook
  • Instagram
  • Twitter
  • YouTube
  • LinkedIn
  • About
  • Media Kit
  • Partners
  • Posts
  • Endorsement Policy
  • Terms & Conditions
  • Privacy Policy
  • Cookie Policy & Solution
  • Radio Stations

Copyright © 2001–2023 · The Money Pit · All Rights Reserved · Powered by Mai Theme

Ask A Question