TOM: Coast to coast and floorboards to shingles, this is The Money Pit Home Improvement Show. I’m Tom Kraeutler.
LESLIE: And I’m Leslie Segrete.
TOM: And what are you working on this fine day? If it’s your home, we are here to help. Pick up the phone and help yourself first, though, by calling us at 888-MONEY-PIT, 888-666-3974. Whether you’re working inside, working outside, getting prepared for the fall, thinking about the holidays that are going to be up here in maybe two or three months, it’s a good time to start planning those projects. We’re going to give you some help.
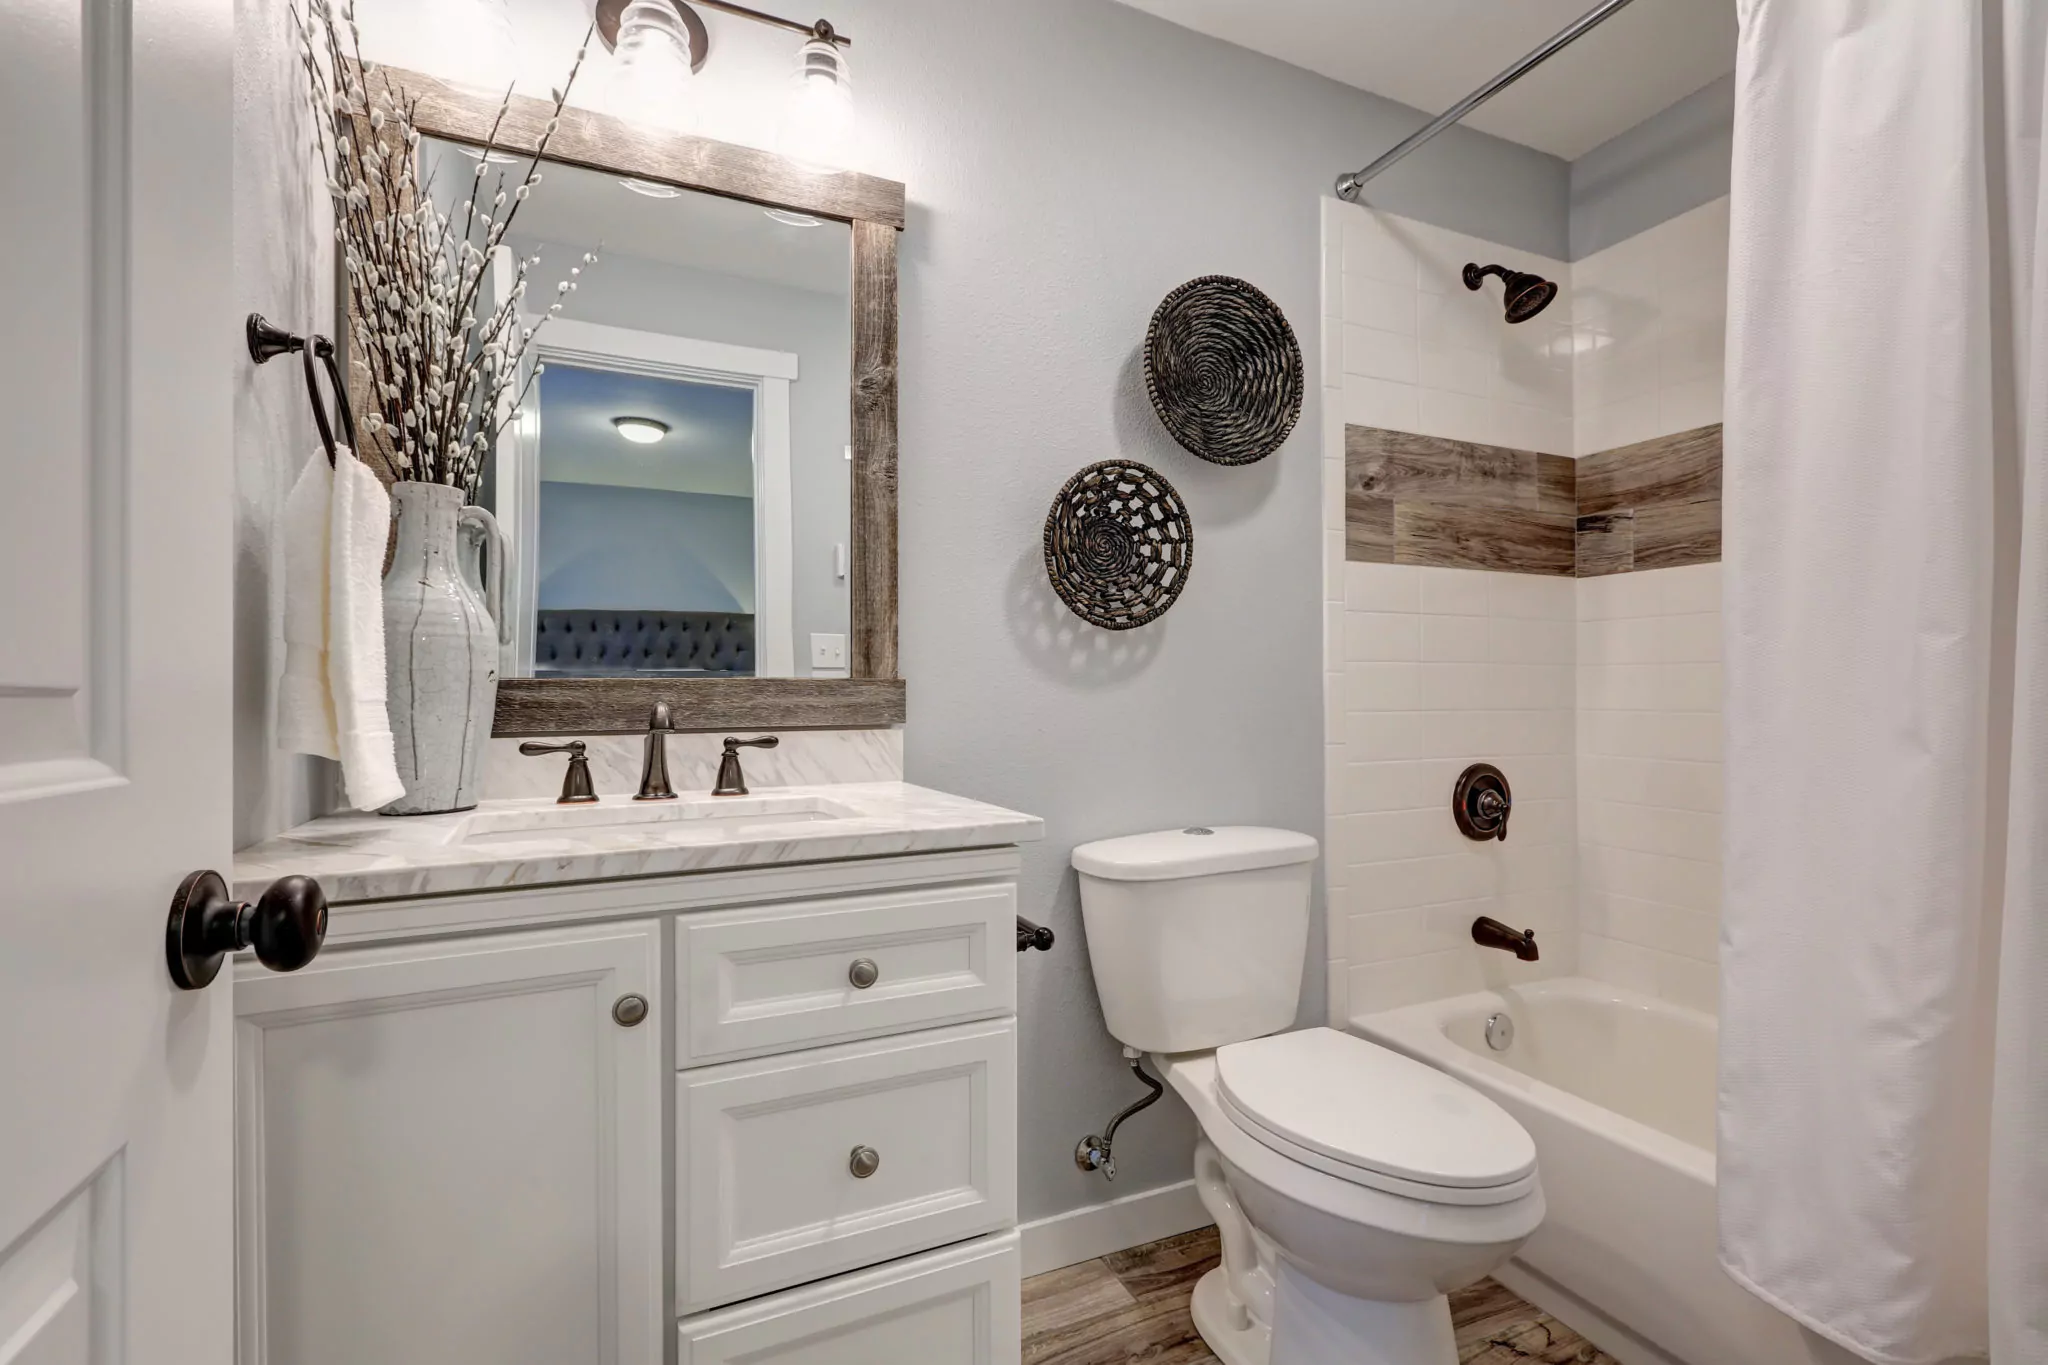
So, first up this hour, we’re going to speak about bathroom remodels. A bathroom remodel gives you about a 60- to 70-percent resale, in terms of a return on investment when you sell the house. But with this project, it’s really key to plan your remodeling ideas ahead of time. And therefore, you can keep the costs in line and keep that bathroom downtime to a minimum, which is very important especially if you’ve only got one bathroom. So we’re going to have some tips and tricks on how to do just that, in just a bit.
LESLIE: And also ahead, it’s summertime. Everybody loves to grill but perhaps your grill, at this point, has seen better days. Well, now really is a great time to replace it. We’re going to have some tips to help you take advantage of these late-summer sales and select a great grill for the years ahead.
TOM: Plus, have you ever considered using recycled or reclaimed wood for projects? It could be a very good idea, for lots of reasons, including that it’s usually heavier, stronger and has lots of character. So we’ll tell you where to look.
LESLIE: But first, what are you working on? Summer is almost over. It’s almost fall. We’re going to be cozying up inside very soon. So what is it that you are trying to get done before the summer ends or get done so you can enjoy before the weather turns cold? Well, whatever it is, we’re here to lend a hand. So give us a call.
TOM: 888-MONEY-PIT, 888-666-3974.
LESLIE: Mary in Virginia, welcome to The Money Pit. What can we do for you today?
MARY: I’m looking to purchase a home that has a slab foundation. And when I went in, I kind of smelled a musty, mildew-y odor. And I’m just wondering, how would you know that water is coming up from the ground and saturating that slab? And how do you protect a home that has just – that’s built just on a slab. There’s nothing under for water to drain under or anything.
TOM: Was this a home that was vacant or did it have a family living in it?
MARY: It has been vacant for a while.
TOM: And that makes sense. Because when you don’t run the HVAC system as frequently as you would if it was occupied, sometimes you’re going to get high humidity inside the homes. But because it’s a slab doesn’t make it any more or less susceptible to water infiltration. But of course, because it’s above grade, you don’t get floods. What you do get is the power of the – it’s the concrete basically drawing water up from the ground – it’s called “capillarity” – and then letting it evaporate into the air.
The correction for that is the same thing you would do even if you did have a basement, which is to improve your drainage on the outside: extend the downspouts, the gutters; improve the soil slope so that water is sort of shunted away from the foundation perimeter. But I think that once you move into the house and use the HVAC system, you’re going to find that that moisture is not nearly as detectable as it is right now. And if it does become more detectable, you could always add a dehumidifier.
MARY: OK. So it’s the – that smell I’m getting is not coming from the carpeting that’s on top of the – laying on top of the slab?
TOM: Ooh. Carpet on top of slab? That’s a bad thing.
MARY: Well, I mean I don’t know what’s under the carpet and I’m assuming that there’s some kind of subfloor there. But yeah, it’s wall-to-wall carpeting and I know underneath it is basically a …
TOM: Yeah. We don’t like carpet on concrete, for a whole bunch of reasons. So I would be recommending that you find another type of flooring for that. Because when you put carpet, which is largely an organic material, against those damp, moist, concrete slabs, bad things happen. You get mold and mildew growth, you get allergens that form, you’re going to get dust mites, things like that. So, we really don’t like carpet on concrete slabs. If you can choose a different type of flooring, if you’re going to do some remodeling, that would really help out a lot.
MARY: OK. Thank you so much.
TOM: You’re very welcome, Mary. Thanks so much for calling us at 888-MONEY-PIT.
LESLIE: Bill in Missouri has a new driveway and needs some help with finishing it. What can we do for you?
BILL: I had a new driveway – concrete driveway – put in.
TOM: Yep.
BILL: And I’m wondering if I need to put some kind of a sealer on that or just leave it like it is. The finish they put on it looks like they used a real stiff broom or something on it and it’s got the lines cut all the way down it on both – all over it, you know.
TOM: Yeah. And that’s designed to give you some traction in the winter so that you don’t slip on it as easily.
I don’t think it’s necessary for you to seal it. If you were to seal it, you would need to make sure you’re using a vapor-permeable sealer. Because what happens with some sealers is the moisture gets trapped underneath of them and then it can’t evaporate out. And it will cause the concrete to spall or crack.
But concrete driveways are not – it’s not necessary to seal them on a regular basis.
BILL: OK.
TOM: Just be cautious with the type of salt that you use to deice. Don’t use anything that has rock salt in it.
BILL: I’ve got a real quick question for you. I had a new deck built in the back and they used pressure-treated yellowwood on it. And I had no idea that the yellow they were talking about was going to be the sap coming out of it.
TOM: OK.
BILL: And I was wondering, is there some kind of a sealer or something that I can do about that?
TOM: Well, when you have a new pressure-treated deck, we generally suggest that you wait about a year before doing this. And then you could apply a solid-color stain to it. If you put a solid-color stain to it, it will cover some of the sap, as well. And frankly, by then, some of it will have already evaporated. You could sand those areas to try to get rid of any big deposits but I would wait about a year and then I would treat it with a good, solid-color, exterior deck stain.
BILL: Oh, OK. Well, I sure appreciate your help.
TOM: New driveway, new deck. You know what to do next. Thanks so much for calling us at 888-MONEY-PIT.
LESLIE: Alright. Now we’ve got Phyllis from the Jersey Shore calling in. What can we do for you today?
PHYLLIS: I am looking to purchase a home. And the problem is I’m looking at a very specific area because I don’t want to leave the current school district the children are in. And all the homes around here were built in the 60s. So my first question is: what should I look for in that era of home construction that might be a red flag? And also, the way the homes are all built, the bottom floor has radiant-floor heat and upstairs is hot-water baseboard. And I just – I can’t imagine that 50-year-old pipes are not going to go at some point. And I’m wondering, how do I make sure they’re OK or look for signs that they’re getting weak?
TOM: So you’re basically looking for the good, the bad and the ugly of 1960s construction.
PHYLLIS: Correct.
TOM: And the story is that it’s actually a pretty good time for home construction. You had copper plumbing, you had decent wiring. Sometimes, the services were a little small but if the homes were mostly natural gas, you really don’t need more than about 100 amps to power pretty much everything, including central air conditioning. And you’ve got hardwood floors. Very frequently, you had hardwood floors in 1960 houses. And it’s interesting because they put the hardwood floors in and they very promptly covered them with wall-to-wall carpet.
LESLIE: With shag carpeting.
TOM: Or shag, yeah. That’s right. Which actually protects them very nicely and didn’t allow them to wear. So, it’s a pretty good year for home construction.
Now, because it’s a 50-year-old house, you’re obviously going to have – how old is the furnace? How old is the water heater? Stuff like that to consider. What’s the general maintenance been? But in terms of an era of home construction, I think it’s a really strong era.
Now, if you’d asked me about the 80s, I would tell you, eh, not so much. Those houses were put together pretty fast and not always in the best possible way. But the 60s is a pretty good year for construction.
PHYLLIS: Oh, good. Because I’m moving up. I live in an 80s house now.
TOM: Oh, there you go. So you’re going to get better.
In terms of that radiant heat, that’s probably one – the one weak link that that home has. But the thing is, you can’t really determine how far along it is and whether or not it’s going to break. It probably will eventually fail and when that happens, you’re going to be faced with a pretty costly repair. You’ll have to put in some sort of alternative heat system, because it’s virtually impossible to repair those pipes in the slab.
So the first floor of your house will either be running new baseboard pipes or you’ll be running electric radiant or you’ll be adding an air-to-water heat exchanger so that you can take hot water from the boiler, run it through a heat exchanger and blow air over it through your HVAC system, the same one you use to cool the house.
But I wouldn’t obsess about that. I mean it’s probably going to happen eventually but it may not even happen in the time that you own this next house. So if you like the neighborhood, 1960s is a pretty good era for home construction.
PHYLLIS: Great. That’s great news. Thank you so much.
TOM: You’re very welcome. Thanks so much for calling us at 888-MONEY-PIT.
LESLIE: You are tuned to The Money Pit Home Improvement Radio Show on air and online at MoneyPit.com.
Just ahead, bathroom remodels provide an amazing return on your remodeling investment. But with this project, it’s essential to plan your project ideas ahead of time and pick the right pro to keep costs in line and to keep bathroom downtime to a minimum. We’re going to share tips on how you can do just that, in today’s Pro Project presented by HomeAdvisor.com, next.
TOM: Where home solutions live, welcome back to The Money Pit Home Improvement Show. I’m Tom Kraeutler.
LESLIE: And I’m Leslie Segrete.
TOM: We’d love to hear what you’re working on in your money pit. Pick up the phone and call us at 1-888-MONEY-PIT presented by HomeAdvisor. You can find out what it costs to do your home project before you hire a pro and instantly book one of HomeAdvisor’s top-rated pros for free. That number, again, is 888-MONEY-PIT, 888-666-3974.
LESLIE: Andrew in Arkansas, you’ve got The Money Pit. What’s going on?
ANDREW: A few years ago, my wife and I decided we would downgrade to a cheaper home. And the home we purchased has a basement. So we gave up a – we gave up our garage when we sold our other home and we moved to this house. And so what I would like to do is add a garage or a carport, at least.
The house sits on a slope and the one – the east wall is on the lower side of the slope. And it already has the walk-in door. And what I would like to do is remove all of the soil, all the dirt from that east wall and add concrete and either a garage or a carport in that area. But I’m not sure if I remove all that dirt from that wall if it’ll affect the stability of the wall, if that makes sense.
TOM: Yep. So, in other words, where you would have to excavate the wall in that area is a supportive wall that’s basically holding up that side of the house. Is that right?
ANDREW: That is correct, yes.
TOM: Yeah, you can’t dig it out without supporting the structure in the process. And there’s a number of ways to do that but I have to tell you straight off, Andrew, it’s not a DIY project. You know, this is a big job. But there’s a process called “needle-beaming” where, essentially, it can run steel beams through the wall, before that work is done, and then support them externally so that they run perpendicular through it in a couple of different places. And it will hold those walls up while you kind of do all the work that it would take to kind of restore that wall or beef it up.
But that’s the same thing that you would do if you were taking out a foundation. But if you’re going to dig out that dirt, you’re definitely going to disturb that wall and you definitely may have some shifting of the house. And that would not be good. And it also wouldn’t be something that you’re going to get insurance to pay for. You could make a heck of a mess out of it.
So, I think you need to get some professional help and at least for this part of the project. Maybe there’s some of the construction you could do yourself. But in terms of getting that foundation set for this addition or this carport, whatever it turns out to be, I would definitely get a pro involved. And I might even consider having an architect spec it out for me. Because if you make some errors in this space, it could definitely affect the value of your home.
ANDREW: OK, OK. So, I guess with removing all that from the wall, it could cause an unbuckling effect possibly?
TOM: Well, yeah, because the foundation is going to be resting on the soil below it. And we also don’t know – because you said it was on a sloped lot, we don’t know how deep that foundation is compared to what it needs to be for this new addition. So, it needs some – it may be that the foundation is not deep enough and you have to take it out completely and rebuild that piece of it.
So, there’s just too many unknowns for you to dig into this, no pun intended. But I would definitely get some professional help.
ANDREW: OK. Alright. Well, hey, I appreciate the advice.
TOM: Yeah, no problem. If I thought you could do it yourself, I would. But this is definitely something where it could be very unsafe and it could definitely impact the value of your home, as well as livability.
ANDREW: Yes. Thank you very much.
LESLIE: Well, bathroom renos are one of the most popular and best home projects. But when hiring a remodeling contractor for a bathroom renovation, it’s important to ask the right questions, set realistic expectations and get accurate cost estimates. We’ve got tips on how to do just that, in today’s Pro Project presented by HomeAdvisor.com.
TOM: Alright. So, first off, let’s talk about the questions to ask. This is important. This kind of remodel is unusual in that it involves several different trades. If you think about it, you’ve got construction trades, plumbing trades, electrical trades, sometimes others. So it’s important to talk to your contractor, at the start of the project, about things like references. Do they have any previous reference work that demonstrates their skill? Can they provide the contacts for those folks so you can call them and check them out?
You also want to talk about how they bid the project. Are they going to charge you by the hour, by the square foot or as a total for the entire job? And along those same lines, think about or ask about what other fees could be tacked on. Are there fees for permits, for example? If they run into mold inside walls, all sorts of things like that, get that outlined out front. As hard as you work to try to make this come out perfect, you could have some mistakes. So ask them how they handle mistakes or damage or repairs to your property. And ask them if they have a guarantee or a warranty on their work. All important things to get nailed down up front before they show up to do the first part of the project.
LESLIE: Now, when it does come to finding the right person, here’s what you’ve got to look for in that bathroom-remodeling quote and that schedule agreement. You’ve got to make sure that it includes a written schedule, not just a “we’ll get done in a few weeks, a couple of days, blah, blah, blah.” You want to schedule when things are happening and why and where and every detail.
You want an itemized list of all materials, labor, permits and any other costs. You want a list of the construction tasks that they’re going to perform and the prices for each. You want a deadline for each task and you want an agreement for penalties if the deadlines aren’t met.
Now, a good agreement is going to help prevent disputes along the way. It’s also going to give you clear expectations about how long the project should take to complete.
TOM: Now, a few other things to think about. You want to make sure you get everything in writing. This includes a payment schedule, a contract with total amounts and guarantees and warranties all in writing. And remember, don’t pay for anything up front. Only pay for work that’s complete. Often, you’ll pay at milestones, like the halfway point or perhaps when the rough-in is done, when the tile is done. Whatever points your contractor sets up, just make sure that you don’t pay them over and above those. And always check licenses and previous work. Don’t just take the contractor’s word. Look at reviews and talk to previous clients.
LESLIE: And that’s today’s Pro Project presented by HomeAdvisor.com. With HomeAdvisor, you can get matched with top-rated home service pros in your area, compare prices, read verified reviews and book appointments online, all for free.
TOM: No matter the type of job, HomeAdvisor makes it fast and easy to hire the best local pros.
LESLIE: Roger in Alabama, you’ve got The Money Pit. How can we help you today?
ROGER: I have a problem with a door. It’s a storm door. And when I originally installed it, everything looked perfect on it. And now, there is a large gap at the bottom and a small gap at the top and the latch doesn’t really want to hold anymore. And I put levels on it and everything looks like it’s supposed to be but it’s not. And I’m at a standstill trying to figure out how to fix it outside of knocking my post out of align.
TOM: OK. So it sounds like the door is out of alignment and it’s not square. Got a situation where the jamb probably has to go up or down. So, for example, if you were to take the jamb and move it down, then the outside edge of the door will move up. If you were to take the jamb and move it up, the outside edge of the door would move down. So it sounds like something is not in alignment.
Storm doors can be tricky because every side of the jamb is applied separately. But what I might do is I might leave the jamb side attached, then try to reset the other two pieces of the door.
In terms of the gap at the bottom, if you can’t close that, just add weather-strip to the outside of the door. You know, you can pick up a door sweep that has sort of a metal flange with a broom-like bristle edge at the bottom that works very well. We use it on exterior doors all the time. And that will stop drafts from coming through it.
But it sounds like the door is out of alignment. What you’ve described with uneven gaps and a latch doesn’t work means that the door is simply not square in the opening.
ROGER: OK. I think I’ve got an idea of what I can do with it now.
TOM: Alright. Great. Roger, hope that helps. Thanks so much for calling us at 888-MONEY-PIT.
LESLIE: Remember, you can call in your home repair or your home improvement question 24 hours a day, 7 days a week right here at 888-MONEY-PIT.
Well, it’s the summer season. You’ve been using your grill and maybe you love to grill but it’s not looking so great. Maybe you’ve had it a couple of years now. Well, the end-of-summer sales mean that now is a great time to replace it. We’re going to have some tips on what you should be looking for, next.
TOM: Where home solutions live, this is The Money Pit Home Improvement Show. I’m Tom Kraeutler.
LESLIE: And I’m Leslie Segrete.
TOM: What are you working on now that we are getting towards the end of summer? If you’ve got questions about your house and projects that you’d like to take on or maybe a repair that popped up, now would be a great time to pick up the phone and call us at 1-888-MONEY-PIT presented by HomeAdvisor, where it’s easy to find top-rated, local home pros for any home project. Go to HomeAdvisor.com.
LESLIE: Alright. Kay is on the line now and she needs some help painting a door.
Kay, tell us about your project.
KAY: Yeah. And I listen to you every week you’re on.
TOM: Well, thank you so much.
LESLIE: Oh, thanks, Kay.
KAY: I wanted to paint my wood door. It’s a very old wood door. And we lived here since ‘69 and I’m trying to keep it original. It’s red now.
TOM: OK.
KAY: My husband painted it only one coat and I think it was blue.
TOM: OK.
KAY: It needs another coat to make it real red but I want to paint it white.
TOM: Well, I mean the color is a personal preference. So, to paint this door, the best thing to do is to take it off of the hinges and lay it flat on a couple of sawhorses. And then you want to sand the old surface. You want to make sure you get rid of any flaking paint, any cracked paint, because you can’t put good paint over bad paint. You’ve got to get all that stuff off.
KAY: It’s not cracking or anything. It’s smooth as can be.
TOM: Alright. So then he must have done a great job when he painted it last time.
KAY: He did. He sanded it down to the wood. It was all original wood, so it’s really smooth. That’s why I wasn’t sure and I don’t know if I can get the paint off like if you – and I didn’t want to scrape it.
TOM: Well, I don’t think you have to take all the old paint off. If it’s adhering well, then you’re good to go on it. So sand it down and then I would recommend that you put a coat of primer on. Because this will make sure that the new paint adheres as well as the old paint did.
Primer is kind of the glue that makes the paint stick. So, put the primer on.
KAY: Will KILZ work? Because I’ve got a gallon of KILZ.
TOM: It’ll work fine, yep. You put the KILZ on, let it dry and then you could put your topcoat on that.
KAY: To sand it, what do I have to do? Knock the sheen off?
TOM: Yeah, knock the sheen off. Exactly right. You don’t have to sand it down to the raw wood but you have to get that sheen off. So a medium grit, like 100-grit sandpaper, would work really well, OK?
KAY: OK.
LESLIE: Well, if the grill that you’ve been using all summer long is starting to look a little worse for the wear, now is a good time to think about replacing it. We’re starting to see summer sales cropping up and it’s not hard to get a good deal.
TOM: Right. But what makes it confusing are the many options available. To help you sort out what’s best, we’ve really boiled this down to three issues.
First, you need solid hardware. So look for stainless-steel hardware and a solid-aluminum body. These grills are most durable and can take the heat very well.
LESLIE: Now, next you want to check the burner design. You really want to look for an H-style burner. Now, this is a design that provides an even distribution of heat. And you want to make sure that the burner is made from stainless steel. If it’s not, you can expect to have to replace it in a couple of years.
TOM: And last, check the warranty. You want to shop for a warranty that covers all parts of the grill, including the burner and the valves. Now, some so-called lifetime warranties are only going to cover the grill body. But let’s face it, what the heck goes wrong with the grill body aside from the grease that gets stuck to it? It’s got no moving parts and never breaks down, so that doesn’t mean much. But if it’s going to cover the valves, if it’s going to cover the burners, then you’ve really got something.
So check carefully. Select one that works good for you and you will be set, not only for the rest of the warm barbecuing season but for a great start to next year, as well.
LESLIE: Michael in North Carolina, you’ve got The Money Pit. How can we help you today?
MICHAEL: We have a hot-water heater in our garage, on an elevated plateau. And we noticed the other day, there was a slight leak underneath it but it looked like it might have been coming from a PVC-type tube coming from the top of our water heater. And it’s the length of the water heater. It’s a tube. And we’ve never seen water under that area before and we now notice some of that. So I wasn’t sure why – if it was a sweating situation or what – some type of relief valve, maybe, or something like that. But I’m not sure why water would have been there.
TOM: Yeah, that’s exactly what it is. It’s a temperature-and-pressure relief valve. It’s mounted on the side of the water heater. It’s designed to open up if the water heater develops too much pressure, as a safety mechanism.
However, they frequently wear and leak. So, I’m going to tell you what you can try to do but I’m also going to warn you. There’s a lever on the side of that and sometimes you get a little bit of a debris that’s stuck inside that temperature-and-pressure valve. When you pull the lever, it’ll shoot some water out that tube. You want to make sure you have a bucket under it. Just two or three times; it’ll kind of blast some hot water out of there.
However, the warning is that sometimes, once you do that, the valve never sits back properly and it ends up leaking worse. So it’s possible you could make it worse by doing this but that’s worth trying. If you just want to leave a bucket under it and monitor it for a little while – how old is this water heater?
MICHAEL: About 1990, 1998.
TOM: Oh. Oh, well, you know what? You’re due for a new one. So, 1998 – I wouldn’t wait too much longer before I replace that because let’s face it, it’s about, what, 15 years old now? And so, a water heater that gets past 10 is well on its way to needing – to the end of its useful life.
So, I would – you could monitor it, stick a bucket under there, keep an eye on it. But I think it’s about time to think about replacing. It’s not an emergency replacement, so you’ve got some time to shop around. One of the problems with water heaters is once they do leak, they usually have to be done immediately and people get taken advantage of because they need it today. But you’re not in that situation, Michael, so you could take some time and shop around and find the one – the contractor – that you want. But a 15-year-old water heater, you might want to think about replacing it.
MICHAEL: Alright, sir. I appreciate that very much.
LESLIE: You are tuned to The Money Pit Home Improvement Radio Show. Call in your home repair or your home improvement question 24 hours a day, 7 days a week right here at 1-888-MONEY-PIT.
Just ahead, reclaimed wood is perfect for dozens of projects around the house, from headboards to floors. We’re going to have some tips on how to work with this very green construction material, after this.
TOM: Making good homes better, this is The Money Pit Home Improvement Show. I’m Tom Kraeutler.
LESLIE: And I’m Leslie Segrete.
Give us a call anytime at 888-MONEY-PIT presented by HomeAdvisor.com. Never worry about overpaying for a job. Use the HomeAdvisor True Cost Guide to see what others have paid for similar projects. It’s all for free at HomeAdvisor.com.
TOM: The number is 1-888-MONEY-PIT, 888-666-3974.
LESLIE: Lauren in Florida is on the line with a lead-paint question. How can we help you today?
LAUREN: Hi. My husband and I are remodeling a 1907 home that’s been vacant for multiple years, so there’s lots of damage. A lot of the paint is chipping off the windows. There is – on the beadboard and wainscoting, a lot of the paint’s chipping off. And someone has gone in and put sheetrock mud to texture over the original plaster walls, so some of that’s chipping off. And we’ve got three young children, so we need to repaint this house and fix it but we’re really concerned about the lead-paint issue.
LESLIE: Yeah. Understandably so. And I mean your house is in the timeframe where you do need to be concerned about lead paint.
Now, we had an issue when we put central air conditioning in the house when my son was six months old – you know, when he was little, I didn’t think that – any concern. And they did a great job. They were very tidy; they contained all the dust. But something must have gotten on something and when we had gone for his next exam, he had elevated lead levels probably from some dust getting on a toy and then the toy going in his mouth, anything. Anyway, it turned out after we did the next blood work, his levels went back to normal, so we were really not concerned at that point. But it is a very scary issue.
Now, I’m not sure, nationwide, what the rules are – and maybe Tom can speak better on this – but in New York, when you are fairly certain that you’ve got lead paint or the timeframe sort of dates it that way, you have to work with a painter or a contractor who’s certified in sort of lead-paint containment, if you will. Because even if you have it on a window frame and you’re opening and closing that window, you’re creating little specks of lead dust that are getting into the air. And with small children, you do need to be concerned.
So you do need to make sure that, if you can, that this is done by a pro. There’s nothing that regulates when a homeowner does it themselves but knowing that you probably have lead paint and with small children in the home, I would just have a pro do it. And you want to make sure that things are taped off and really sealed up and cleaned very thoroughly. There are specific rules, I know, in New York State that allow for a contractor to be certified. And that’s something you really want to look for.
TOM: Yeah. And especially because the paint is flaking in deteriorated condition right now, that’s the highest risk for this, Lauren. So you’re wise to proceed very cautiously and make sure that the contractor that you’re working with is certified as a lead professional.
LAUREN: Alright. Thank you.
TOM: You’re welcome, Lauren. Good luck with that project. Thanks so much for calling us at 888-MONEY-PIT.
LESLIE: Well, it might sound nostalgic but they really don’t make wood like they used to. That’s why reclaimed wood is a perfect choice for dozens of projects around your house, from headboards to flooring.
TOM: Well, it really is better wood. If you look at it, the older wood has very tightly-spaced growth rings, straight grain and a very hard, heavy feel, which is why reusing wood like this in remodeling projects has become a very popular trend.
But just because it’s recycled doesn’t make it cheap. The demand and the process for reclaiming can keep the cost pretty high for some boards.
So, it seems like this is a kind of thing, Leslie, you’re not going to do a whole house with this but you’re going to be very selective on some of the projects that you use reclaimed wood for, right?
LESLIE: Yeah. And it really has to be something that’s like a focal point. Maybe you do one wall, maybe you make a headboard out of it. Maybe you use it for a tabletop and get a more modern trestle base or even a Lucite base, something where you’re sort of mixing the materials but also highlighting the beautiful, aged nature of that reclaimed lumber.
And it doesn’t have to be a large surface area. It could be a backsplash. It could be the wall behind a mirror in a bathroom – you know, more like a powder room – but something like that where you’re really showcasing the beauty of the wood, the graininess to it, all of that aged feature. And then it makes it stand out and then it’s really money well spent.
TOM: Now, some of the most common sources for finding reclaimed wood are industrial buildings and barns. But it can also be harvested from the bottoms of rivers and lakes. The grade characteristics are going to vary by the dealer. And most suppliers are going to sell grades of wood that reflect the degree of sort of patina and character you may be looking for.
So, if it’s something you’re into, it’s a great way to build green and also enjoy the richness and the durability older wood has to offer.
LESLIE: John in Pennsylvania is on the line and has a question about flooring. What can we do for you today?
JOHN: We’re about to become homeowners and we need to rip up some carpet. And we want to install hardwood flooring. We were curious how far you have to leave it away from your new floor – away from the wall.
TOM: Is it prefinished hardwood, John?
JOHN: Yeah, it’s all finished. Yep.
TOM: OK, well, that’s great. Now, I would recommend probably around ½-inch.
JOHN: OK.
TOM: You want to make it so that a piece of baseboard molding plus shoe molding will cover it. So, between baseboard and shoe molding, you’ve probably got about an inch to an inch-and-a-quarter of overlap, so to speak. So generally about a ½-inch will work.
Most of the flooring manufacturers will give you specific advice on what the gap should be but I’d say generally about a ½-inch is fine. And remember, that’s a ½-inch away from the drywall. Because even – you have space under the drywall, as well as another ½-inch. That should give you plenty of room for expansion and contraction.
JOHN: OK. And then the other question was: when we get the new floors delivered, they said you have to leave it a certain amount of time before we install it to get, I guess, acclimated to our weather?
TOM: Yeah, you want to acclimate it to the space that it’s going to be in. Because if it comes really cold, for example, it’s going to kind of shrink and then if it expands, it could buckle up. So you want to just put it in the room that you’re going to install it in and leave it there for a good couple of days to acclimate.
JOHN: OK, great.
TOM: Good luck with that project. It’s very exciting. This is your first house?
JOHN: Yeah, yeah. First house, yep.
TOM: Alright. Well, good luck. And call us anytime, Dan, if we can help.
JOHN: Appreciate it. Thank you.
LESLIE: Alright. Thanks so much for calling The Money Pit.
Remember, you can reach us anytime 24 hours a day, 7 days a week right here at 1-888-MONEY-PIT.
Hey, are you planning an end-of-the-summer party? Well, you can light up the night with tiki torches if you know how to do it safely. We’ll have tips, just ahead.
TOM: Where home solutions live, welcome back to The Money Pit Home Improvement Show. I’m Tom Kraeutler.
LESLIE: And I’m Leslie Segrete.
And you are tuned to The Money Pit presented by HomeAdvisor.com. You’ll never have to worry about overpaying for a job again. Just use their True Cost Guide to see what others have paid for similar projects. And then you can get matched with top-rated pros, read reviews, get quotes, book appointments. It’s all for free at HomeAdvisor.com.
TOM: And if you’ve got a question about a project you’d like to get done, now would be a great time to pick up the phone and call us at 1-888-MONEY-PIT. Or post your questions to The Money Pit’s Community page at MoneyPit.com.
LESLIE: Alright. That’s what Gabe did. Now, Gabe writes: “Have you ever heard of or used insulating paint additive that’s said to improve the heating and cooling of your home by painting the product on your walls and ceilings in your house, inside your attic? The paint additive contains ceramic microspheres that have reflective properties. I’m interested in finding out how well it works. It’s a NASA spinoff according to what I’ve read.”
TOM: Sounds like you’ve memorized the brochure, Gabe.
LESLIE: “It comes from space.”
TOM: Yeah, that kind of insulating paint has been kicking around for at least a decade or more, to my knowledge. But I’ve not seen any convincing data that says it works as promised. Sure, ceramics are a great insulator for space shuttles but it doesn’t mean it’s going to work well for walls and ceilings.
So, I think my suggestion would be to make sure all the basics of saving energy at home are covered, like draft-proofing and insulation, before investing in anything that’s potentially unproven. So many times we get questions like this where folks are taking on – thinking of taking on a project that maybe is a little bit off of center. And I often find that when you really look into it, there’s so many other things that you can do that would deliver the same benefit, using things that are tried and true, like adding more insulation which almost everybody needs.
LESLIE: I wonder what the 50th anniversary of the moon landing this year – if that’s bringing about all of these space products again.
TOM: Maybe. Maybe. You never know.
LESLIE: I mean truly, we haven’t heard about this product in a while and I feel like lately we’ve been getting a lot of questions about that: space additives and tested on the space shuttle. Well, hopefully, that nostalgia for the moon and space travel just encourages you to think big and dream about what you can do inside your own home.
TOM: Yeah. Not everything is what it’s cracked up to be. And you’ve got to believe, if this product was really that good, there – it’d be in the aisles of the home centers and the hardware stores. Everybody would be using it. So, to me, it just doesn’t sound like the best way to go.
LESLIE: Alright, though. But good luck on your project at home.
TOM: Well, are you planning an end-of-the-year summer backyard blowout? Well, if it includes some lighting, you could light up the night very easily with tiki torches. Leslie has details on how to do just that, in today’s edition of Leslie’s Last Word.
LESLIE: Yeah. If you want to set the mood, create ambiance, why not try doing it with some dramatic light? Now, in your backyard you can pick up oil-burning torches at almost any store that sells outdoor equipment. And you can use citronella oil to help keep those bugs away.
Of course, anytime we’re talking about an open flame, you’ve got to practice fire safety. You want to make sure that you have a bucket of water and a hose close by. Remember that when you snuff out the flame, you want to make sure that the torches are in a fireproof place. And also be sure to check SaferProducts.gov to make sure that the torch you’re using is considered safe and hasn’t been recalled.
Now, if you want to be super safe but still have some ambiance, LED technology has really brought us a wide array of very safe battery- and solar-powered torches, as well. Some of these will turn on automatically at dusk. They flicker like a real flame. It really makes it possible to light up the night without throwing caution to the wind. And I’ve even seen an LED tiki torch that flickers but is also a speaker.
So there’s a lot of great stuff out there where you can bring some ambiance, create a beautiful outdoor setting for these end-of-summer parties and just enjoy yourself without worrying.
TOM: This is The Money Pit Home Improvement Show. Coming up next time on the program, stainless steel is an always popular choice for kitchen sinks. But did you know that not all stainless steel is created equal? Well, coming up next time on the program, we’re going to tell you how to find stainless-steel sinks that can really stand up, on the very next edition of The Money Pit.
I’m Tom Kraeutler.
LESLIE: And I’m Leslie Segrete.
TOM: Remember, you can do it yourself …
LESLIE: But you don’t have to do it alone.
END HOUR 2 TEXT
(Copyright 2019 Squeaky Door Productions, Inc. No portion of this transcript or audio file may be reproduced in any format without the express written permission of Squeaky Door Productions, Inc.)


