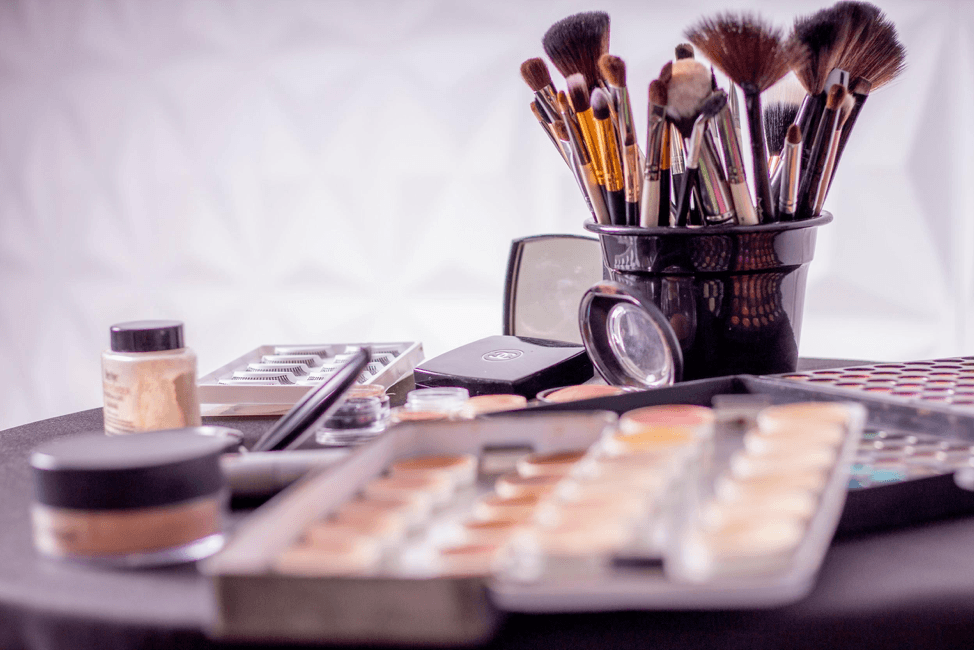
Did you ever wake up, hit snooze one too many times, and found yourself running around your room trying to find the things you need to get ready for the day – before you’ve even had your first cup of coffee? Do you find yourself running late, digging through a mound of makeup brushes, single earrings hoping to find a match, the bobby pins you took out the night before, etc. Not to mention the mess of cords and containers scattered around the room. The perfect solution to the morning craziness is to have a dressing table design that has everything you need, organized, and within arms reach, but too often, this area can become a “dumping ground” for all of the little items that have no home.
Table of Contents[Hide][Show]
Having an organized dressing table can save you from morning frustration, when time is tight and you can’t waste time looking for what you need…and it doesn’t need to cost a fortune! Here are 5 easy, cheap, and chic projects for a dressing table design to ditch the mess and have you feeling organized in no time!
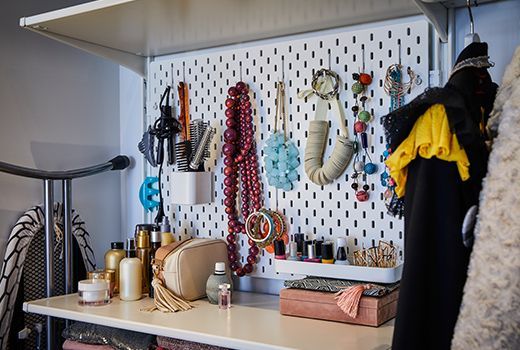
Hole in One: Create a Customizable Wall with Pegboard
Attach a large sheet of pegboard to the wall (make sure to attach it to 2 pieces of wood to create a space between the pegboard and the wall). You can keep it white, or spray paint to match your walls, or an accent color. Then add small shelves, hooks, and holders to organize everyday items you want within reach.
Estimated Cost:
- (2) pieces of 2X4 pegboard, $20;
- (2) 2×4 pieces to attach to wall $5;
- Pegboard accessories $10-$20
Total Cost: $45
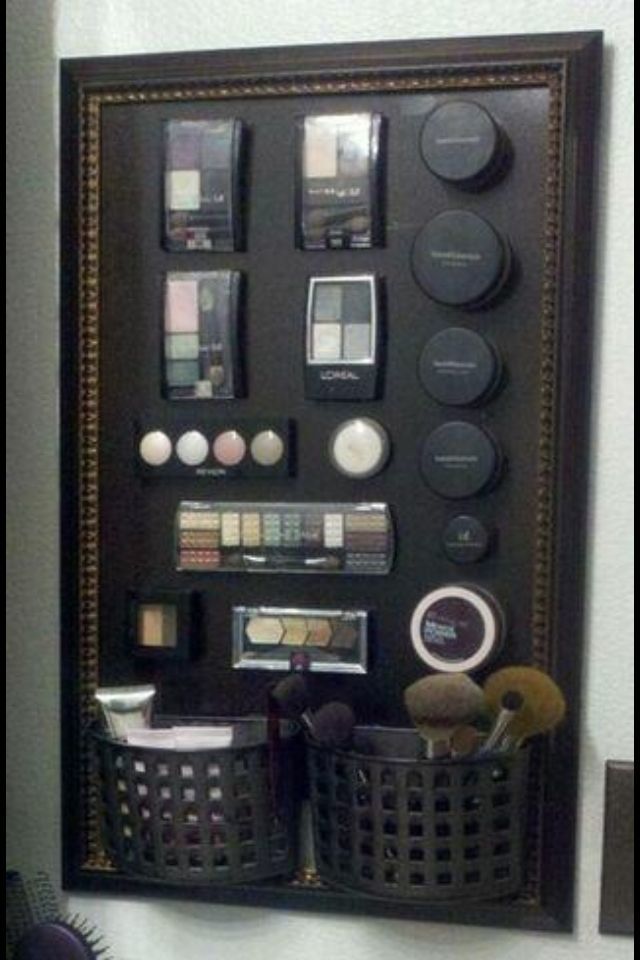
Make it Stick: Use a Magnetic Board to Organize the Everyday Items
Turn an old picture frame (thrift store!) into a storage solution by attaching it to a magnetic board. Attach super strong magnets to the back of your most commonly used items (brush, makeup, etc) or use dollar store containers and spray paint with copper or brass to unify the look of this dressing table design. Attach magnets and double your counter space.
Estimated Cost:
- (1) Picture Frame $5
- (1) Magnetic Board $10
- Magnets $10
Total Cost: $25
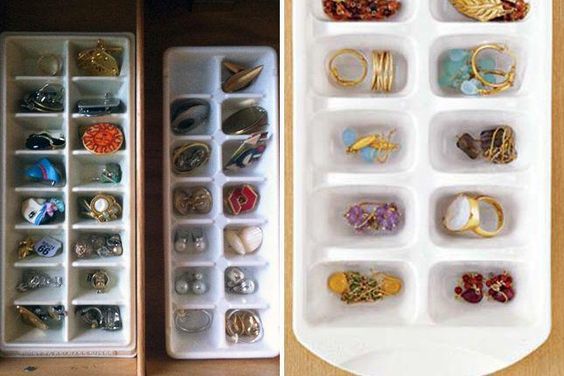
Stack It Up: Ice Cube Trays to Help Collect The Small Stuff
Use different sized ice cube trays inside your drawers to keep smaller items like individual eyeshadows, pins, earrings, rings, rubber bands and hair pins) organized. Bonus: They are super inexpensive and STACKABLE! Keep your most used items on top, and occasional items on the bottom.
Estimated Cost:
Total Cost: $10
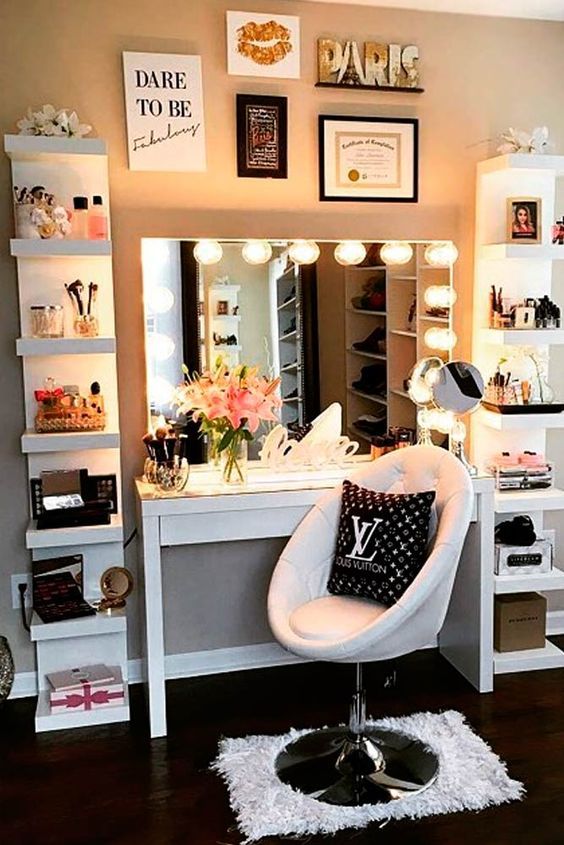
Going Up: Floating Shelves Help Optimize Vertical Space
Add short floating shelves or a narrow bookcase along both sides of your dressing table (tip: you can always hire a handyman to make sure they are sturdy, or if the shelves are too high and heavy). Add baskets, bins, or shoe boxes (tip: cover in chalkboard paper so you can write the contents on the outside) to organize your items
Estimated Cost:
- Varies based on shelves and accessories used $40-$200.
- Want an extra set of hands to help? The hourly cost of hiring a handyman averages $60-$90/hr.
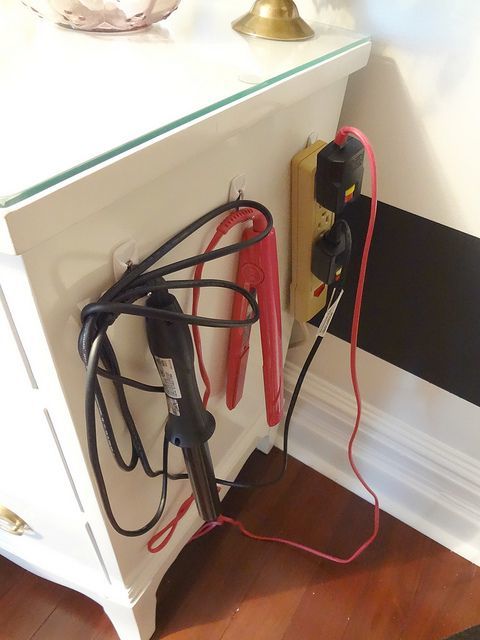
Cord Control: Clever Outlets and Hooks Keep Beauty Tools at Hand
The key to dressing table design organization is to use all of the available space, from deep drawers to the vertical space on either side and above the table. Another hidden space is on the side of the table itself! Hang an outlet strip with Velcro hanging strips so you never have to crawl around on the floor to plug in your hair dryer or straightening iron. Add sturdy hooks to hang your beauty tools, and keep them plugged in so you are ready to go at a moment’s notice.
It’s that simple! With a few clever ideas, some inexpensive hardware, and an extra set of hands you can create an organized dressing table design. Go vertical, keep clutter off of your tabletop, organize cords and tools for easy access, and accent with a few personal touches and you’re ready to face the day!


Leave a Reply