LESLIE: Well, if you’ve got cracks, holes and nail pops, which are showing your home’s age, your walls could probably use a little TLC.
TOM: And the good news is that’s something that you probably can do yourself, because drywall repair is a fairly easy DIY project, if you use the right materials. Joining us now with tips on how to do just that is This Old House general contractor, Tom Silva.
Hey, Tommy.
TOM SILVA: Hey, how are you? Nice to be here.
TOM: Now, listen, drywall repairs – got to be one of the most common home maintenance chores that we have to take on as homeowners. As durable as we like our walls to be, they really do take the dents and the dings pretty easily. Not to mention all of the cracks and the nail pops that open up from the movement of the walls in the house; just the sort of life that the house has all by itself.
But you can fix them and it’s not that hard to do. Can you give us some tips?
TOM SILVA: It’s not that hard to do. There are three most common types of repairs that are needed, like nail popping, holes – you take a picture off a wall or maybe a kid threw something at the wall, like a ball or something – and some cracks from the house moving.
TOM: Alright. Alright. Well let’s start by talking about the nail pops, because this is the one that I think fascinates most people. The nails that hold the drywall in place actually do move and they’ll back out of the hole that they were originally driven into.
TOM SILVA: Yeah. They can actually pop out of the wall. A screw can do the same thing. Lots of times, that nail will pop because it doesn’t hit the stud correctly or it just gets the sides and wings by it and it will pop out.
LESLIE: And you know that these are nail pops, generally, because you’re going to see them in a vertical line; they’re going to be exactly where that stud is. So that’s pretty much the signal that that’s what it is, right?
TOM SILVA: Exactly. So what I like to do is I actually pull the nails out but I put another nail right beside it. I make sure that it goes into the stud; I don’t want that nail to back out at all. I also want to make sure I use a ring-shank nail or a screw, alright?
TOM: OK.
TOM SILVA: And then you want to cover that hole with a spackle or a joint compound.
TOM: Alright. Now what about cracks? Because those are things – when people see them, they think, “Oh, my God.”
LESLIE: Yeah, they get nervous.
TOM: They’re nervous; they think their house is falling in around them but that kind of movement also can be fairly normal in a house.
TOM SILVA: Absolutely. Yet sometimes you get cracking in the corner; you’ll get it over the corner or the edges of doors, over the headers of windows and stuff like that. And that – just basic movement of the house, the temperature changes, the frost, the cold, the heat, the wind. All those kinds of things move your house.
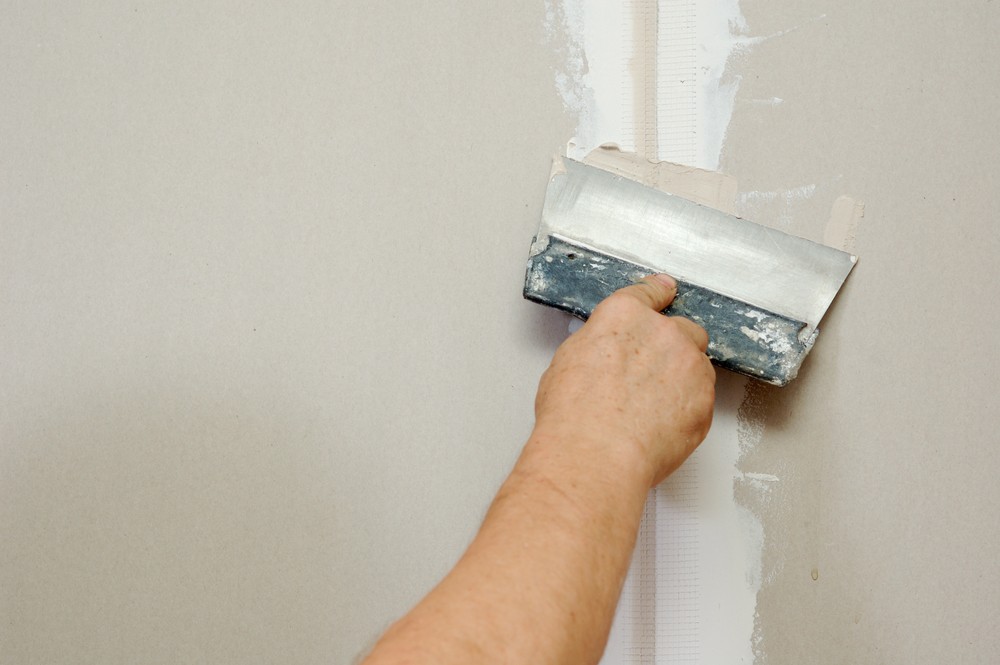
And to fix those, I like to scrape out the crack a little bit. I put some compound in it and tape over the crack with a good, heavy, fiberglass mesh tape and then a couple of layers of joint compound on top of that, sand it and then problem solved.
TOM: Now, the fiberglass tape is that perforated tape. Because one of the tricky parts of using the old paper tape is getting that even layer of plaster underneath, correct? But the fiberglass tape eliminates all that.
TOM SILVA: Right. A lot of people, when they use the paper tape, they put it on top of the joint compound but the joint compound may have set up a little bit. And it’s a little dry; you don’t get good adhesion, so the paper tape will bubble off.
LESLIE: Now what about when you’re dealing with a hole in the drywall? Does it matter the size of the hole, the method of repairing or is there really one plan of attack for everything?
TOM SILVA: I have a special – in dealing with a hole. I don’t – I’ve actually cut my patch and I make my patch fit the hole. So I cut a patch, I hold it on the wall, I scribe around it, I cut the hole and then my patch fits perfectly.
TOM: So you open up the wall to fit the patch.
TOM SILVA: Exactly, exactly. So I find an old, scrap piece of drywall around, maybe from an old window opening or I go to a lumber yard and maybe find a piece there or even an old job site. I basically put a couple of pieces of strapping in behind the wall, put my hand in the hole and just put it up against it and screw a screw right through it; right through the drywall, into the strapping. And then I slide my patch into place and I take an old screen wire out of an old screen or even some fiberglass tape, put it around the hole, mud it in and sand it and a couple of layers of joint compound and patch it. The hole is done.
TOM: We’re talking to Tom Silva, the general contractor from TV’s This Old House. Now, Tom, you mentioned before, spackle and joint compound. Is there a difference or are they interchangeable?
TOM SILVA: Well, you can use both but I think spackle is more for a smaller job.
TOM: OK.
TOM SILVA: And the joint compound comes in 5-gallon buckets. You can do a whole house with a bunch of 5-gallon buckets.
TOM: Plus, they make a great place to sit down to eat lunch on.
TOM SILVA: Yeah.
TOM: Tom Silva from TV’s This Old House, thanks so much for stopping by The Money Pit.
TOM SILVA: It is my pleasure.
TOM: For more tips and a step-by-step article on how to take care of the walls in your home, visit ThisOldHouse.com.
LESLIE: And you can always watch Tommy and the entire This Old House team, on This Old House and Ask This Old House, on your local PBS station.
TOM: And Ask This Old House is brought to you by Bostitch. Quality, durability and reliability, that’s Bostitch.


Leave a Reply