• Skip to main content
  • Skip to header left navigation
  • Skip to header right navigation
  • Skip to after header navigation
  • Skip to site footer
  • Start Here
  • Money Pit Podcast
  • Leave a Review
The Money Pit house logo

The Money Pit

Home Improvement Tips & Podcasts

  • Media Kit
  • Affiliates
  • Ask a Question
  • Spaces
    • Outdoor Living
    • Kitchens
    • Bathrooms
    • Garages & Sheds
    • Basements & Crawlspaces
    • Home Exteriors
  • Reno/Repair
    • Air Conditioning
    • Windows
    • Floors
    • Roofs & Gutters
    • Insulation
    • Lighting & Wiring
  • Popular Topics
    • Storage & Organization
    • Painting & Decorating
    • Cleaning
    • Pests & Wildlife
    • Buying or Selling a Home
  • Features
    • Green Home
    • Pet Friendly
    • Kid Spaces
    • DIY
    • Quick Tips
  • Podcasts
    • The Money Pit Home Improvement Podcast
    • Money Pit Minute Podcast
    • Your Calls, Our Answers Podcast
    • Top Products Podcast
    • ProFiles Podcast
Garden shed

How to Build a Backyard Shed Ramp By Hand

How to Build a Backyard Shed Ramp By Hand

Garages & Sheds
FacebookTweetPinLinkedInEmail
Garden shed
by Tom Kraeutler Leave a Comment

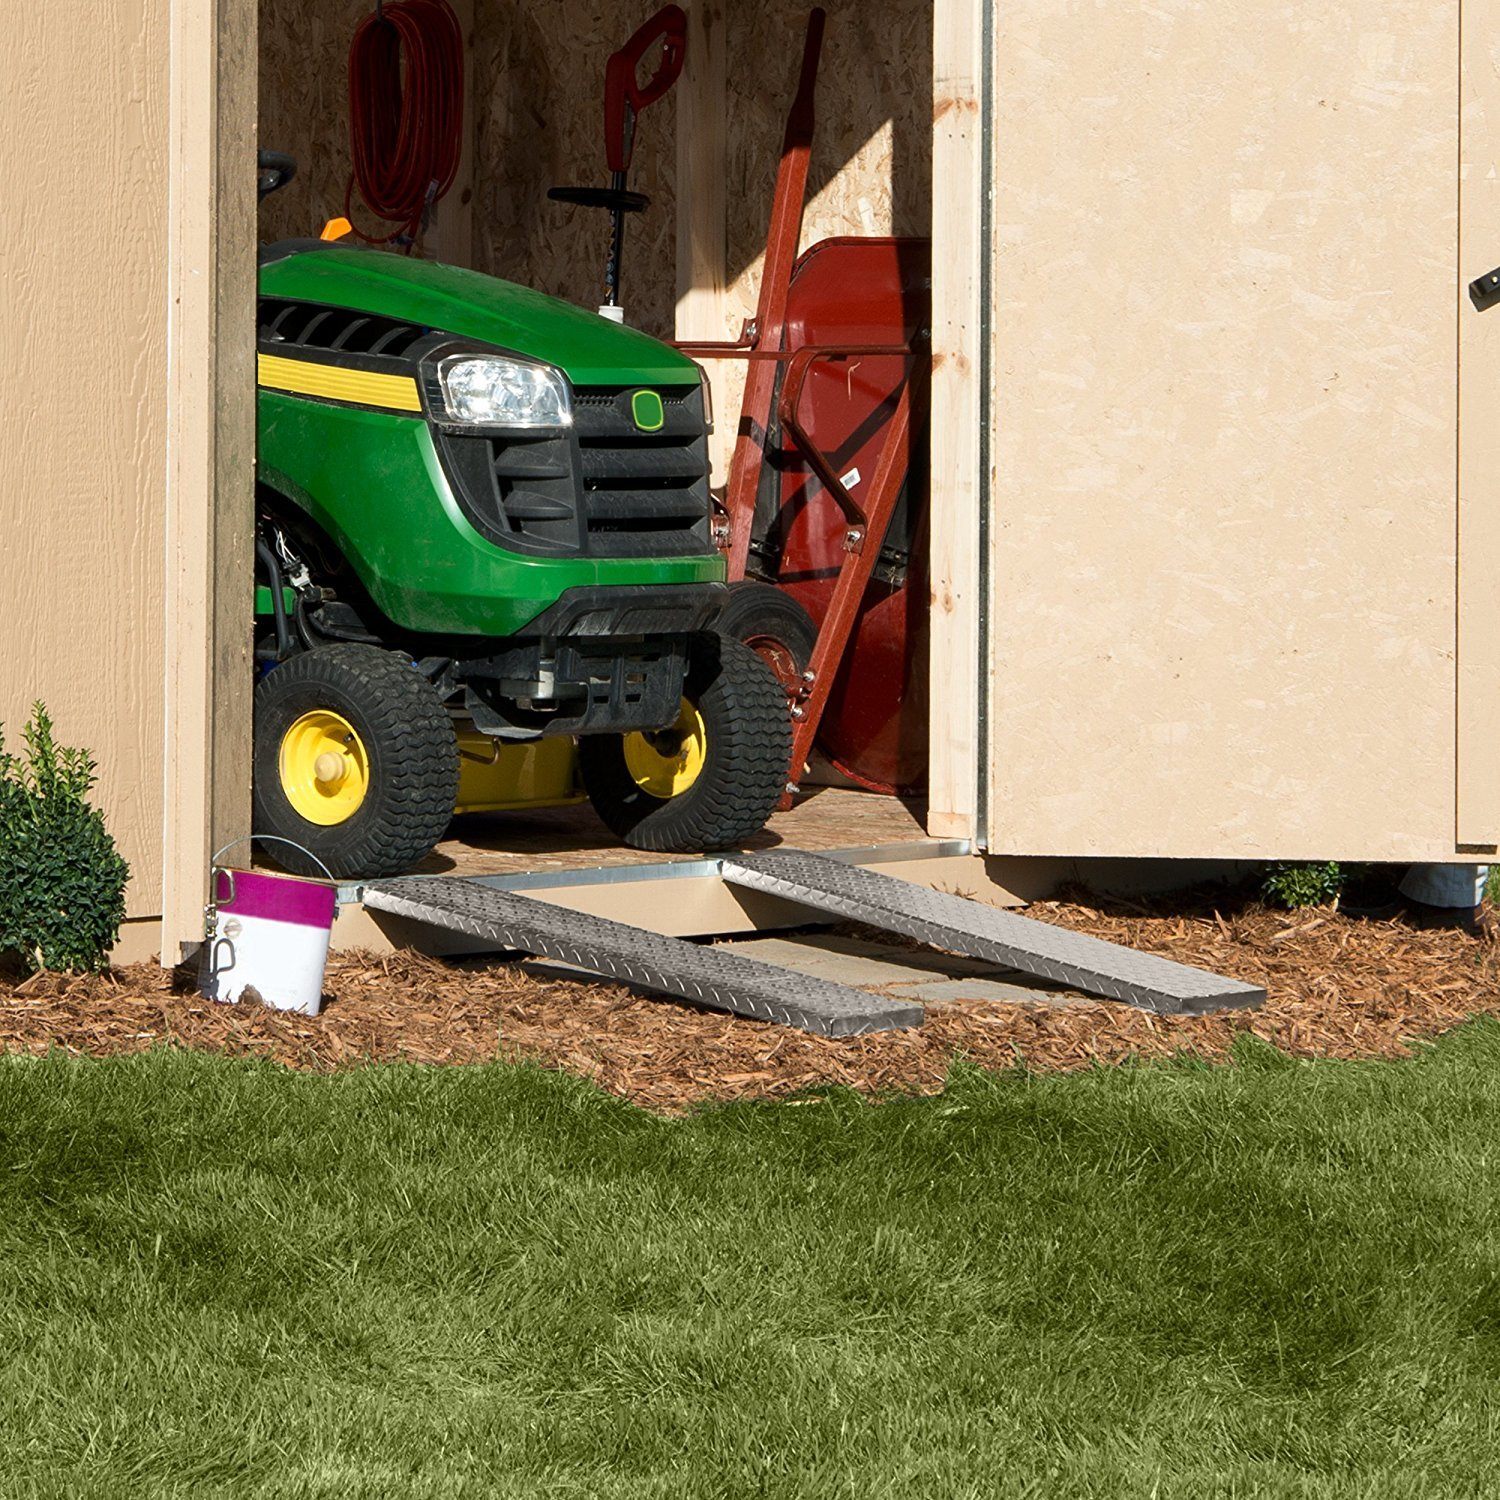
When you start building backyard structures like a shed, it’s easy to forget ease of access until it’s time to load up something heavy into your shed, especially after a long day of yard work. Adding a shed ramp can help prevent the possible backaches and make access easier.  Whether you’re using the shed for storage, as a workshop, or a playhouse for your kids, a safe rolling access can be incredibly helpful.

While you could buy a manufactured ramp, you’d probably need to set the ramp for each use. Instead, why not build your own shed tramp?  All you need is a flat supported plane that travels at a shallow angle from the ground to the top of your doorsill. With the right equipment, even a carpentry beginner can make a safe, attractive shed ramp in less than a single afternoon.

shed ramp

Getting Started

To make your ramp stable, it’s important to understand the physics of the ramp. This is more than just a piece of plywood laid over the gap between door and ground, the ramp needs to attach firmly to the shed just below the door frame and rest securely on the ground at the other end. Once stabilized, you can line up the supporting joists and lay the ramp boards. Make sure to get pressure treated boards to ensure that every step by a friend or family member and every rolling heavy thing is well-supported. Built correctly, your shed will be doubly accessible and safe to enter.

What You’ll Need:

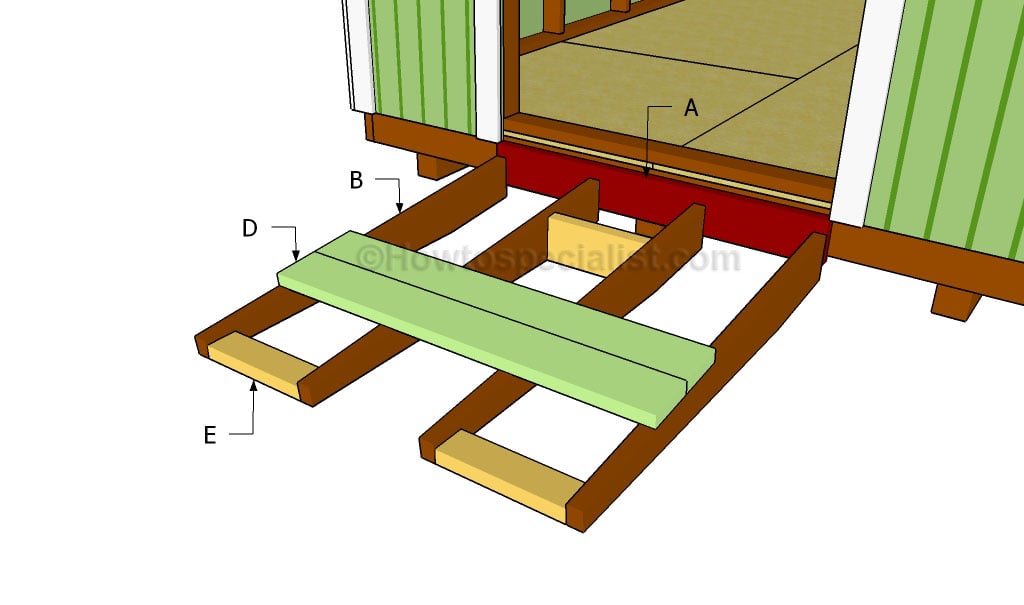
  • Supports (A) – doorway-end stabilizing board
  • Joists (B) – Supporting cross-boards that connect the Support and Blockings
  • Ramp Boards (D) – boards you walk on laid across the joists
  • Blockings (E) – ground-end stabilizing board

You will also need:

  • Safety Gear – Gloves and Safety Goggles
  • Carpentry Equipment – Metal Supports, Deck Screws, Chalk, Measuring Tape, Level, Pencil
  • Power Tools – Miter Saw or Jigsaw, Power Drill, and Drill Bits
shed ramp
Photo Credit: Woodworkingtalk.com

Building the Backyard Shed Ramp

With all your materials and tools gathered, you’re ready to start building. Fit the support board to the doorframe, you may need to cut it to the right size. Make sure it’s level and secure it with galvanized deck screws.

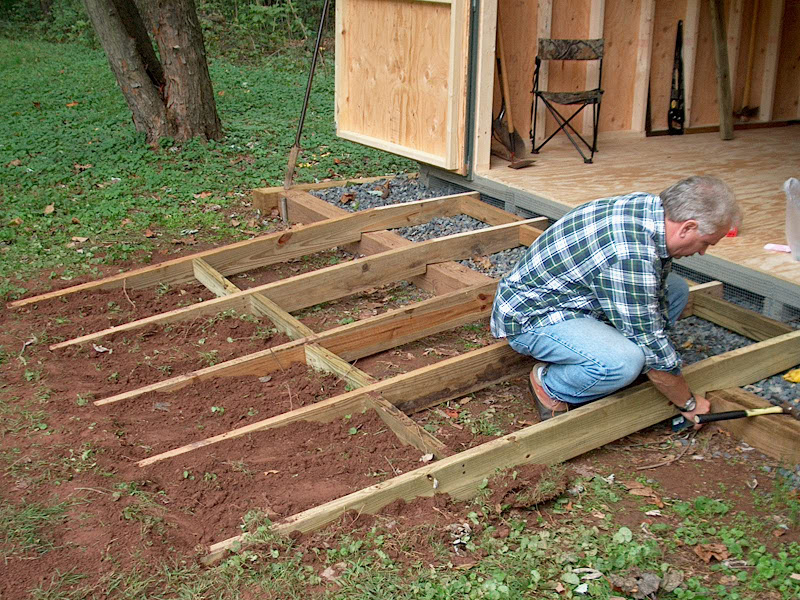
Decide on your ramp angle and cut the joist boards. They will need to both support at an angle and lie flat on the ground.
Line them up with the support and flatten them where the corner would ‘go into the ground’ in order to maintain the angled surface. Secure the joists to the Support board with the metal supports. This is the most important part because if the joists fall, so too will your ramp.

Cut and secure the blocking to between the ‘feet’ of your joists. This will stabilize them and prevent them from wiggling.
You will also want a blocking in the middle, 6 inches to a foot out from the support board to stabilize the center of your ramp.
Finally, you’re ready for the deck boards. Make sure they lay evenly and completely over the joists before securing.

Once you’ve screwed everything in, you should now be the proud owner of a brand new and perfectly safe shed ramp. With the structure complete, you have the choice to paint it, lay down a layer of thick traction tape, or leave the next step for another day. Practicing at-home carpentry is a great way to personalize your home and save on repair costs.

Garages & Sheds

Related Posts

Bike storage in garage

How To Build Outdoor Bike Storage |Video

How to build a window seat, windows

How to Build a Window Seat | Video

The Money Pit Tips & Tricks text logo with lightbulb

Building a Dry Stack Block Wall with QUIKWall | Video

The Money Pit Tips & Tricks text logo with lightbulb

How To Install A Fence | Video

12 Breezy Ideas for Outdoor Rooms

Outdoor Privacy Screening

Related Podcasts

The Money Pit Your Calls Our Answers Podcast Logo

How to Build a Rat-Proof Shed

The Money Pit Your Calls Our Answers Podcast Logo

Greenhouses, Sheds and Outbuildings: What to Consider Before Building

Choose a Shed with Both Style and Function

The Money Pit Your Calls Our Answers Podcast Logo

Proper Flooring for a Shed

Build a Fence

The Money Pit Your Calls Our Answers Podcast Logo

Choosing Construction Materials for a Shed

FacebookTweetPinLinkedInEmail

Reader Interactions

Leave a Reply Cancel reply

Your email address will not be published. Required fields are marked *

This site uses Akismet to reduce spam. Learn how your comment data is processed.

Sidebar

Trending Posts

Get Ready for the Game with The Money Pit’s $1,000 Tailgate Treasures Sweepstakes!

Attic flooring added to increase storage space

How to Floor Your Attic for Storage Without Wrecking Your Roof

Best Garage Floor: Tiles, Mat or Paint?

Garage Heater Dyna-Glo 30,000 BTU Natural Gas Blue Flame Vent Free Wall Heater, White

Best Heaters for a Garage: Forced Air, Infrared or Portable?

Stock your DIY liquor dispenser!

How To Make A Liquor Dispenser | Video

Ask Us Anything

Ask A Question

Favorite Posts

Attic flooring added to increase storage space

How to Floor Your Attic for Storage Without Wrecking Your Roof

How to Get Rid of Thousand-Leggers Without Getting Grossed Out

Best Garage Floor: Tiles, Mat or Paint?

Get Ready for the Game with The Money Pit’s $1,000 Tailgate Treasures Sweepstakes!

Popular Podcasts

Repair Crumbling Cinder Block

Electric Meter

Service Entry Cable and Electric Meter: Who is responsible for repair?

dirt to use around house foundation

Type of Dirt to Use Around House Foundation

What Smells Like Burning Rubber in My Home?

Newsletter

Get weekly updates with the latest tips and tricks to save money in your home.

As Us Anything

Ask A Question

Social Media

  • Facebook
  • Instagram
  • Twitter
  • YouTube
  • LinkedIn
  • About
  • Media Kit
  • Partners
  • Posts
  • Endorsement Policy
  • Terms & Conditions
  • Privacy Policy
  • Cookie Policy & Solution
  • Radio Stations

Copyright © 2001–2023 · The Money Pit · All Rights Reserved · Powered by Mai Theme

Ask A Question