Show Notes
- Adding a beautiful new granite top is a great way to add a little luxury to your kitchen, but granite or stone tops are expensive! We’ll share a less costly alternative that looks just as good.
- If you love the look of real hardwood but don’t have the budget to manage it, Engineered Hardwood may be a perfect solution. We’ll explain the options.
- When you take on a painting project, latex paint is the way to go most of the time – but not always. We explain when oil-based paint is the best choice and why – even though the clean-up is a little harder.
Table of Contents[Hide][Show]
Plus, answers to your home improvement questions about:
- Debra from Tennessee asks if using dry lock in the basement is the best way to stop leaks.
- Murray in Illinois needs advice replacing his natural gas water heater.
- Stacey from Minnesota wants to know if she can use mortar and limewash to fill in the gaps on her brick fireplace.
- Phillip in Rhode Island wants to know how to get red cedar shingles to age darker.
- Marty is asking why she isn’t getting hot water fast enough to her bathroom.
- Jan in South Dakota wants to know how to level a concrete floor.
- Vincent from Texas wants to know how to fix a collapsing chain link fence in an area that floods easily.
- Debbie in Delaware is looking for the best way to repair a popcorn ceiling that is not adhering properly.
- Jacob from Arizona needs help repairing a crack on the garage ceiling.
Podcast Transcript
Read Transcript
TOM: Coast to coast and floorboards to shingles, this is The Money Pit Home Improvement Show. I’m Tom Kraeutler.
LESLIE: And I’m Leslie Segrete.
TOM: Spring is here. And if you’re getting outside and getting ready to enjoy that beautiful weather, we can help you get those jobs done that you need to do just that.
Couple of ways to get in touch but the easiest thing to do is to go to MoneyPit.com and download The Money Pit VoxPop app. If you do, you can easily record your question, push a button to send it right to the studio and you’ll be at the top of the line. You’ll be first in line or one of the first folks that we respond to. We’ll respond directly and on this program with The Money Pit VoxPop app.
Coming up on today’s show, if you love the look of real hardwood but you don’t have the budget to manage it, engineered hardwood may be a perfect solution. So we’re going to explain the options, just ahead.
LESLIE: And adding a beautiful, new granite top is a great way to add a little luxury to your kitchen. But granite or stone tops are expensive, so we’re going to share a less costly alternative that looks just as good.
TOM: And when you take on a painting project, most of the time latex paint is the way to go but not always. I’ve been doing a lot of painting lately and I was thinking about it. A lot of folks always go for the latex. But for me, I had some really specific projects I wanted to do that I would always use oil for. So, we’re going to talk about the pros and the cons and which ones are best, in just a bit.
LESLIE: But first, pick up the phone, give us a call, let us know what you are working on. It is spring, you guys, so it’s time to start thinking about getting your outside in tip-top shape, turning your backyard space into the yard of your dreams. Heck, even if it’s your stoop, we’ve got ideas to make it that space that you’re going to want to hang out in as the weather gets warmer.
TOM: So get your questions to us ASAP. The way to do that is go to MoneyPit.com/Ask, download The Money Pit app and send those questions right to our studio.
LESLIE: Debra in Tennessee, you’ve got The Money Pit. How can we help you today?
DEBRA: I’m calling about DRYLOK-ing my basement. I have my concerns about – well, number one, the odor, because I have pets. And number two, where does that water go if you just trap it in the cinder block? So, I’m in a debate with my other half about yes, we should do it and no, we shouldn’t. We had 1 water incident in 15 years and that’s the only thing that’s happened since. But I still would rather be safe than sorry.
TOM: That’s a great question, Debra. So, first of all, DRYLOK is a product that has some odor. It doesn’t have a terrible odor. I’ve used it a lot over the last few months, on a project I was doing in my basement. So I think that if you open your basement windows and especially – one of the things I did is I stuck a room fan – I had an old fan. I stuck it up in one of the windows and just made sure it pulled some air out of that basement and it was OK. It wasn’t terrible. And I don’t – wouldn’t have any concerns about pets – using that product.
Now, you asked the question: “So what happens to the water? Am I keeping it out?” Listen, this is a point of misunderstanding. That DRYLOK is not keeping the waves of the ocean out of your basement. It’s not that kind of a thing. It’s stopping some of the evaporation that will come from the block in the wall getting damp. But it doesn’t stop a lot of water that wants to get in. If it’s going to get in, it’s going to get in.
And the way you stop it, though – especially since you mentioned that this has only happened once in 15 years. You’ve got a problem with drainage. I can tell you right now that if you look at your gutters, they’re either blocked, the downspouts are not extended out away, the soil around your house is sagging into the walls. All of this sort of thing causes those floods. So you don’t have to worry about sealing your house against the water. Your house will stay dry if you stop the water from getting there by improving your drainage.
I want you to go to MoneyPit.com. And on our home page, read the post about wet basements and how to prevent a wet basement. All the step-by-step information you need is in that post. So check it out and your problem will magically disappear.
LESLIE: Murray in Illinois is on the line and he needs some advice on buying a new water heater.
What can we help you with?
MURRAY: Well, my issue is I have a house full of females and myself and we are having an issue with keeping up with hot water.
LESLIE: OK.
MURRAY: I presently have a 40-gallon, natural-gas water heater and I was wondering if I could get you guys’ opinion. The bathroom they shower in is upstairs and we also have a washing machine up there.
And I was wondering what you guys thought of the instantaneous water heaters. I’ve seen some small ones that it said would put out 3.3 gallons per minute and I had no idea what an actual shower takes. And I just wondered what you guys thought about that supplement, maybe, to the hot-water heater.
TOM: OK. So, first of all, we are fans of tankless water-heating technology. And so, we do believe that if your water heater was failing, then that would be an appropriate thing to replace it with.
In your case, you’re talking about supplementing, which is a bit different because you really have to have your water-heating needs zoned into two separate loops if you want to supplement. Because then you have half on the tank water heater and half on the tankless.
The issue of your water heater being located a distance from the plumbing fixtures that you want to use most frequently is not going to be solved, regardless of what kind of water heater you have, because the water still has to travel the same distance. But if you’re concerned about running out of hot water, that’s not going to happen with a tankless; it just won’t. And you buy the tankless based on how many bathrooms you have in your house and there’ll be plenty of hot water to keep everybody in those bathrooms showered for as long as they want to stay in there.
MURRAY: So you’re saying just – it’s best just to replace the natural-gas one I have and get a whole-house tankless?
TOM: Yeah, exactly. How old is that one you have now?
MURRAY: It’s probably, I’m guessing, 5 or 6 years, maybe.
TOM: Yeah. So it’s still pretty new. They usually last about 10. So you’ve got a decision to make, you know? If you’re running out of hot water, then maybe it’s worth doing.
MURRAY: OK. I appreciate your help very much.
TOM: Alright, Murray. Good luck.
LESLIE: Stacy is on the line from Minnesota.
What’s going on at your money pit?
STACY: I have a question about using some mortar to fill in the spaces between the bricks on our fireplace. We purchased a 1968 rambler that needs a lot of work. And we’re thinking, if we fill in the space between the bricks on the fireplace and then paint it with a lime wash – if that will look nice.
LESLIE: Alright. So, I’m a little confused because I feel like maybe you’re trying to fill in the mortar so that it’s smooth and not really repoint it in the bricks. But do you want to still see the brick face and have a smooth line in between, that’s at the same level? I think it’s going to be weird.
But if you’re talking about that lime wash which is kind of pickling, that only works on wood. Because the lime wash kind of sits in the wood grain and then gives that white, chalky finish in the wood graining and then the smooth parts of the wood just kind of take on a milky wash. I don’t think you’re going to get the same effect on a brick, because it’s not going to absorb in the right way. It’s going to kind of just suck into a lot of places and then you’ll get a very big, different look between whatever you’re filling in that mortar and the brick.
I think if you’re trying to go for a fully smooth finish that’s something completely different, I think you can also explore the idea of tiling or adding a different stone over the brick, just for a completely different look. But I think this sort of finish effect that you’re trying to get is going to be a little odd.
TOM: Probably stucco it too, right? I mean if you wanted to do that, you could cover the whole thing with stucco. But now you’ll have just a different surface to deal with.
I like the idea of the stone. There’s a lot of faux stone out there that looks absolutely beautiful around a fireplace.
LESLIE: Time to talk to Phillip in Rhode Island about a roofing question.
What can we do for you?
PHILLIP: Well, in Rhode Island, in my neighborhood in Jamestown, there’s a lot of beautiful, red cedar-shingled houses. And I just put brand-new, red-cedar shingles on my house, on my roof. I noticed some of the houses age beautifully. Like when I – what I mean in beautifully is they age darker red and sometimes little bits of black or streaks of black and red and deep, deep red. And some of them don’t age that way. It’s like – and I’m just wondering if you guys know anything about how to get them to age the way I want them to. I don’t want them to age light; I want them to age darker red.
TOM: Yeah, we don’t always get to choose how we age, right? And that applies to our shingles, as well.
So when you choose red cedar, that gets darker over time and it will turn to a very dark gray, typically, as it’s exposed to sunlight. I guess it’s possible that you could apply a stain to the cedar shingles, even though they’re roofing shingles, but most people don’t do that.
So, what we typically get calls about, when it comes to cedar, is how to not to have – how to prevent them from getting darker. And one way to do that is to replace the vent across the ridge of the roof. Or if you don’t have a vent there, you can essentially do the same thing with a strip of copper.
If you were to overlay the peak of the roof with, say, a 12-inch-wide strip of copper – so half goes on one side and half goes on the other – what happens is as rainwater strikes that, it releases some of the copper. And that acts as a mild mildicide and helps to keep the roof shingles clean and prevents algae growth.
PHILLIP: Oh. But it still – then they wouldn’t age dark; they’d stay lighter.
TOM: It would be less likely to get as dark and they certainly wouldn’t grow an algae. Perhaps you may have noticed that sometimes when you look at houses, especially around chimneys that have metal flashing, you’ll see bright streaks at the bottom of the chimney. That’s for the same reason. What happens is that metal flashing releases some of its copper and then cleans that area under the chimney. That’s why it gets streaky there. But if you do it across the whole peak of the roof, then it will sort of clean evenly.
PHILLIP: It’ll clean even. But I’m looking for that aged look: the kind of the darker-shingle aged look, the darker color. And I guess it’s just up to Mother Nature is what you’re saying.
TOM: It really is.
PHILLIP: Yeah.
TOM: It really is.
PHILLIP: I appreciate it. Thanks very much, you guys.
TOM: You’re welcome. Good luck with that project. Thanks so much for calling us at 888-MONEY-PIT.
LESLIE: Well, if you’re looking for a budget-friendly floor option but don’t have the budget for a solid-hardwood floor, engineered hardwood is an excellent option. We share the options, in today’s Smart Spending Tip presented by the Bank of America Customized Cash Rewards Credit Card.
TOM: Now, first up, engineered-hardwood flooring is made with real hardwood. It’s got a real hardwood top layer, which is then attached to a structured wood core. Now, once it’s installed, the engineered hardwood looks identical to solid hardwood. But because there’s less hardwood needed, engineered-hardwood floors cost a lot less to buy.
LESLIE: Now, another big benefit for engineered hardwood is that the core structure makes the floor dimensionally stable. And that’s going to give you a lot more options when it comes to installation. It’s a lot less likely to be impacted by humidity and temperature change, so you can use it in a wide variety of climates, including below-grade spaces where dampness can ruin solid-hardwood flooring.
TOM: Yep. And there’s also a lot of options when it comes to installation. Engineered hardwood is available as a tongue-and-groove flooring that can be nailed down or glued down or even edge-glued together to form a floating floor. And if you’re looking for an even easier installation, it also comes as a quick-click floor, meaning the boards just lock together with no adhesive or no clamping required, which is really perfect for a DIY floating-floor application.
LESLIE: Now, before installing your engineered flooring, it’s a good idea to let the floor acclimate to the room that it’s planned for. So, pick up the flooring a few days in advance and leave it in the house so that it has time to get used to the conditions in the home: the temperature, the humidity, everything.
Now, if you’re doing the installing yourself, you just want to be sure to follow the instructions that are provided by the manufacturer. The whole process is pretty easy and you’re going to be amazed with the results.
TOM: And that’s today’s Smart Spending Tip presented by the Bank of America Customized Cash Rewards Credit Card. Earn three-percent cash back on online shopping. Apply at BankOfAmerica.com/MoreRewarding.
LESLIE: Heading out to Cape May where we’ve got Marty on the line with a question about a tankless water heater.
What’s going on?
MARTY: My question is – I have a tankless water heater, which is on the second floor of my home. And that’s the reason – that was one of the major reasons we got a tankless one so that it didn’t – there was no leakage problem and destroyed the whole house. However, it takes almost 5 minutes for hot water to get from the time I turn it on in the sink in the kitchen, which is on the first floor, to have hot water. Is there anything I can do? Is there something wrong with the way it’s hooked up or set up or this particular hot-water heater? Why is it that I do not get hot water faster than 5 minutes?
TOM: Ah, yeah. This is a common misunderstanding, Marty, when it comes to the difference between a tank water heater and a tankless water heater. So, while tankless water heaters heat water continuously, it doesn’t necessarily speed up the time it takes that hot water to come out of your faucet. Because it’s not a matter of the water heater, in this case. It’s the physical distance from the water heater – whether it’s a tank or a tankless – and the faucet itself. So, I think sometimes folks think because they go tankless and it’s instant hot water and all of that – yes, it’s instantly heating the water but it still has to run through the pipes.
Now, there are systems – Watts makes a system that’s a recirculator, that basically will keep some hot water running through the pipes all the time so that you don’t have to wait for it so much. And it’s on a timer so that it runs kind of when you need it – so, first thing in the morning and that kind of stuff – because it does cost a little bit more to operate using this sort of thing.
But when you get a tankless water heater, you get energy efficiency and you get an unlimited supply of hot water. But you still have to wait those first few minutes for it to get from the water heater itself, no matter what kind you have, to the faucet which, in your case, sounds like the kitchen.
LESLIE: Now we’ve got Jan in South Dakota on the line who needs some help with leveling a basement floor. Not a terribly difficult project but a big one.
How can we help you?
JAN: We’re planning to remodel the lower level of a townhouse. And what we’d like to do is retile the traffic areas, which is the hallway and also a bathroom and utility room. But there’s a bedroom with a closet on an outside wall and a utility room in the – in sort of the center of the rooms that has an unlevel floor.
So my question is: is there a way to relevel the concrete floor before we resurface it?
TOM: Yeah. I mean there’s a product called a “leveling compound” – a “floor-leveling compound” – that, essentially, you can mix up and pour on the floor and trowel out and use it to level floors. And so that’s really your only option. But how out of level is this floor? Is it really visually bothersome? Because I would suspect that it’s a big project for you to level it and it might be easier just to sort of adjust things around it.
JAN: OK. Like relevel the appliances and …?
TOM: Yeah, exactly. It’s just a – it’s kind of a pain in the neck to level the entire floor.
JAN: Is it expensive?
TOM: To have it professionally done, I would say yes. To do it yourself, no. But then again, it’s not the kind of thing that you could just pick up and do. It does require some skills to get it done right.
JAN: You would just get a long board to use as a trowel?
TOM: There are products that are self-leveling products and they’re usually good for more minor leveling jobs, say, up to being 1 inch out of level. So if you choose a floor-leveling compound that’s designed for self-leveling, essentially, what you do is you mix it up, say, like in a 5-gallon bucket and then you pour it out and it will seek its own level. But you have to keep going back, mixing more, pouring it, mixing more, pouring it. And then you can kind of trowel it out as it starts to level out. And then, at one point, it will meet, you know, the original floor.
So, that’s an option for you is to use a self-leveling compound.
JAN: That sounds great.
LESLIE: Vincent in Texas is putting up a fence and needs some help with the project.
What can we do for you?
VINCENT: Yeah. I’m putting up a chain-link in front of my house. Where my house is, it’s in the dip of the street. But the street goes up on each end.
TOM: OK.
VINCENT: And I’m about four blocks from the lake. And we had a lot of rain and that water levels up. And when I’m about 14 inches down, I’m hitting water.
TOM: OK.
VINCENT: Is there a special cement or how should I do that when setting the post?
TOM: OK. So what you want to do is – because it’s chain-link, you’re going to want to dig down about 3 feet. And try to do that with a post-hole digger even if you hit water. And then the way you deal with this is you mix up concrete, like a QUIKRETE product.
It’s a basic masic (ph) concrete mix. Mix it up in a wheelbarrow to the right consistency and then shovel it into the hole and let it displace the water that’s in the hole. Does that make sense? So as you put the concrete in, the water will kind of work its way right out. And what will be left will be the concrete. It will dry nice and rock-solid and you’ll be good to go.
VINCENT: OK. Thank you. You saved me a lot of worry.
TOM: Alright. Don’t worry about it. That’s the way to handle that. Mix it out of the hole and then drop it in the hole and the water will displace.
Good luck. Thanks so much for calling us at 888-MONEY-PIT.
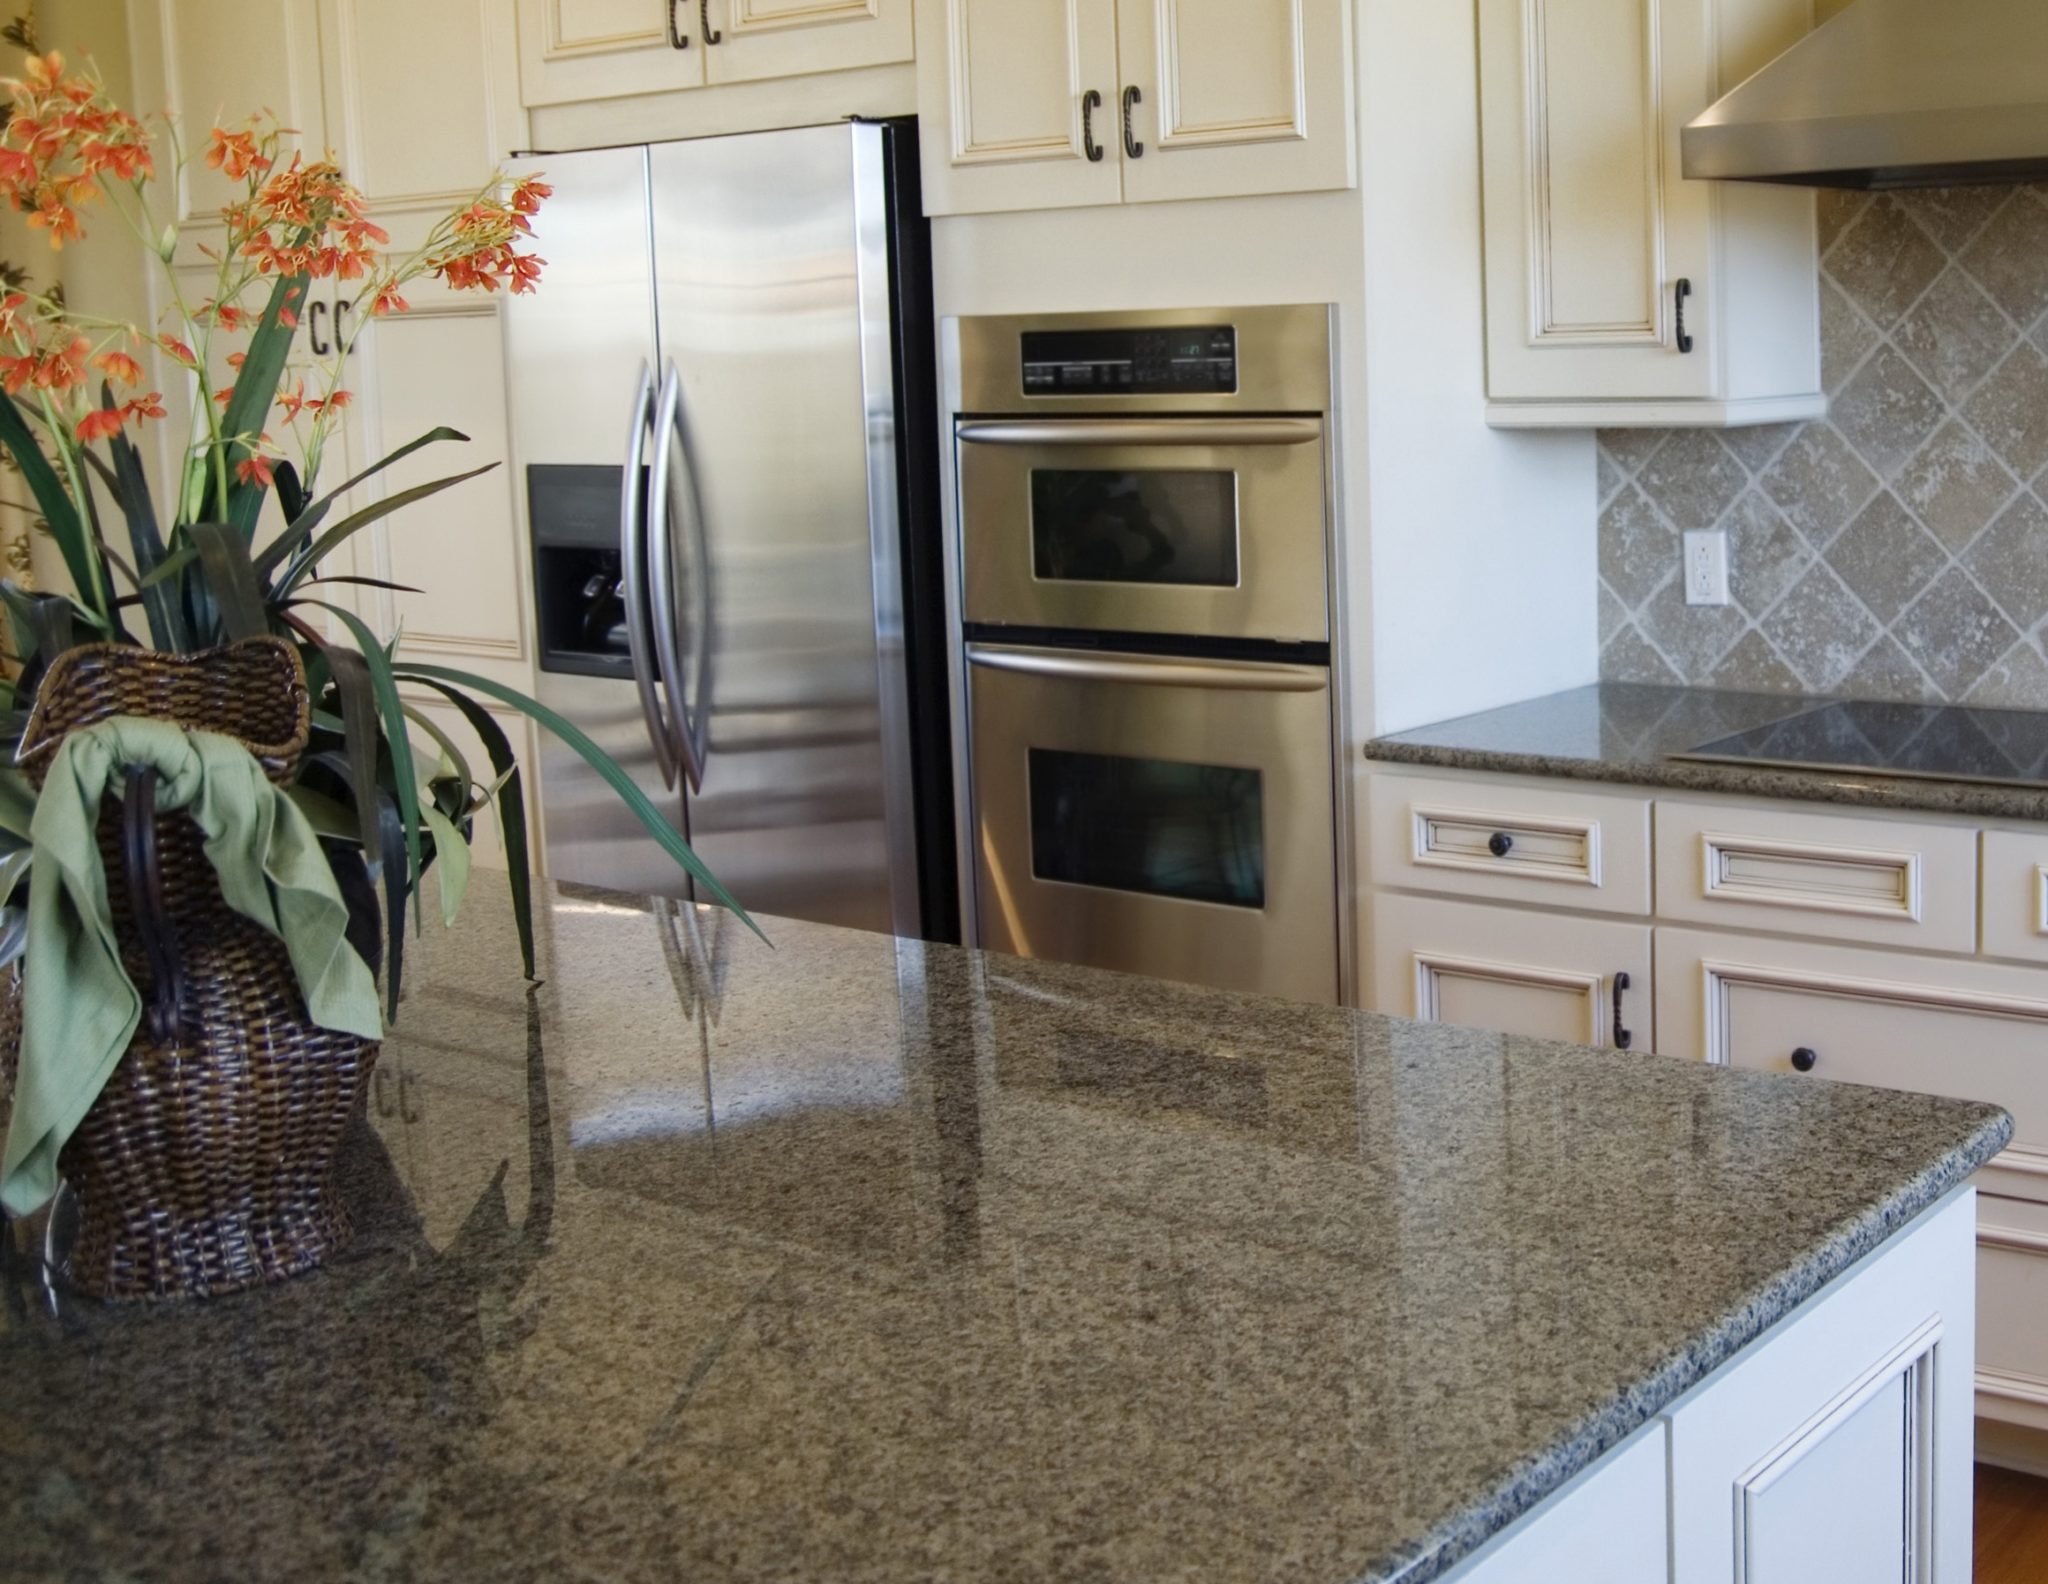
LESLIE: Well, if you’d like to step up your kitchen, adding a beautiful, new granite countertop is a great way to add a little luxury to the space. But installing granite and even other stone tops truly is not a do-it-yourself project and can be really expensive. But now there’s a great, new alternative from Daich Coatings called the new LuxROCK Solid Surface Granite Countertop Kit.
TOM: Yeah. LuxROCK is real stone. It spreads over your existing countertops and it transforms them into new, smooth stone surfaces that look and perform just like real granite.
Now, the project is as easy to do as painting but instead of using paint, you’re actually applying a premium, real stone surface over your existing countertop.
LESLIE: Yeah. And everything you need is included in the kit. And it even includes a prime coat, stone coat, clear epoxy and the clear-coat finish. And you can use it on any flat surface and the result you see is luxurious. It looks like a new stone surface and it’s going to look and perform just like real granite. And you can get that entire process done in a single weekend.
TOM: Yep. With LuxROCK, you can create an authentic, beautiful and durable countertop but without the price tag of granite or traditional stone slabs. It comes in five different finishes and it’s available at Home Depot, Lowe’s and DaichCoatings.com. That’s D-a-i-c-h-Coatings.com.
LESLIE: Now we’ve got Debbie from Delaware on the line who’s got a question about some smoke smell and some paint and popcorn ceiling.
What’s going on?
DEBBIE: When I bought the house I’m in – it has a popcorn ceiling and the ceiling was just – you know, you can lift a picture even on the walls. You could see the nicotine stain on the wall. Anyways, it was painted over by contractors but I’m not sure what’s happening in the kitchen, especially. From the sides, where it meets the vertical walls, it’s pulling away.
TOM: OK. Wow.
DEBBIE: And I didn’t know what would be more economical or wiser, to actually have that – a professional come and scrape that ceiling off or would the labor be so intense that is – maybe to put a thin layer, if it’s possible, like a sheetrock up there or possibly maybe a wood treatment. I live in a beachy area and I think I’ve seen some homes that do have wood in the ceiling? Sort of maybe a whitewash type of thing? I’m not sure.
TOM: Well, here’s the thing: if you’ve got a section of popcorn ceiling that’s not adhering properly, it’s separating, you obviously have to scrape the rest of that off. There’s no – not necessarily the entire ceiling but you have to get rid of the loose stuff, because you’re not going to be able to reseal it
Now, once you do that, there is a type of popcorn-repair product that comes in an aerosol can. And you would have to, of course, mask off the cabinets and everything that’s in that area but you can spray it and restore the sort of the gap where you took off the old sort of loose popcorn.
Now, it’s going to be a different color. So then that would have to be followed by painting of the popcorn ceiling, which is not a pleasant project but it can be done. You need a very thick roller. It’s going to have slits in it. It’s a special kind of roller. It has slices in it.
DEBBIE: OK.
TOM: And it uses a lot of paint. And then you sort of just start to work that room, one side to the other. And you can repaint that ceiling.
Most people don’t really like popcorn ceiling anymore but if you’re kind of stuck with it …
DEBBIE: No, I don’t. I really don’t like it, no.
TOM: You could remove it. That’s another job. You can scrape it off. And then what you have to do is prime the ceiling. And then once you prime it, you can paint it but I would recommend that you use a flat paint. Don’t use a ceiling paint; use a flat paint. It’s really important because even though you do a good job scraping off the old popcorn, you’re going to find that the ceiling is still a little uneven underneath that old popcorn, the drywall. And if you paint it with anything that’s got any kind of a sheen, it’ll show. And you’ll see that – the bumps and sort of the warts in the wall.
But if you scrape it off and prime it, then paint it with a flat paint, it comes out pretty good.
DEBBIE: Thank you so much. I really appreciate you reaching out to me.
TOM: Yeah, you’re very welcome. Good luck with that project. Thanks so much for calling us.
DEBBIE: Thanks a lot. Take care. Bye-bye.
LESLIE: Jacob in Arkansas is on the line with a crack in the garage.
Tell us what’s going on.
JACOB: My wife and I have recently bought a new house and there’s a crack above the garage. It’s more cosmetic where it gets no – none of the support. But it goes through the brick and the mortar and so I was wondering if there’s a certain kind of putty or way I can fill this in so the water doesn’t get inside of it.
TOM: Yeah. And that’s exactly what you want to do. Now, mind you, the brick is also going to be porous, so it will still get wet. But if you want to stop water from getting in there, most importantly freezing and making the crack worse, what I would recommend you do is to seal that crack with a clear silicone caulk.
Now, when you buy the silicone, Jacob, you can buy it in a large tube or a small tube. If it’s just that one crack, I would just buy a small tube. But here’s the trick: when you cut the tip of that tube, you want to cut it so you have a very small hole there that the caulk won’t kind of come out in a big glob. You can always make it larger. But of course, once you cut it, you can’t make it any smaller. So then get up on a ladder, get real close to that.
And sometimes, with silicone, it’s pretty thick, especially if it’s cold. You may have to really squeeze it to get it to come out. But it doesn’t clean up with soap and water, so just try to kind of lay it on there nice and even. That’ll stop the water from falling into the crack and you should be good to go.
Well, guys, I’ve been doing a lot of painting lately and I’ve been using both latex paint that cleans up with water and oil-based paint that cleans up with paint thinner. And the reason is that there are some projects that just come out better when you use an oil-based finish.
So I thought this might be a good topic, Les, for you and I to kick around. So where do you fall on this? I mean with all the decorating projects that you do, I would imagine, most of the time, you use latex. But are there situations where you wouldn’t?
LESLIE: For sure. You’re right: latex is usually my 100 percent-of-the-time go-to because I’m doing walls or smaller pieces of furnishing, things that aren’t going to be super-aggressively dinged up or used as heavily. So, latex usually is my go-to. Obviously, whatever finish depends on where it’s going and what the application is.
But there are times when oil-based paints – like a kitchen cabinet or some sort of metal object, things that just really call for an oil-base just because you need that adhesion, you need that durability. I also – I love the shine of an oil-base for a certain look. You know what I’m saying?
TOM: I find that the finish looks a whole lot better. The fact that it takes longer to dry is actually a good thing because you get virtually no brush strokes whatsoever. I was painting some metal shelving and – so it had a little bit of rust on it but not a lot. And I used some Rust-Oleum oil-based paint on that. And I’ve got to tell you, you can feel the difference when you apply oil-based paint. It has sort of a traction to it, like you said. A stickiness to it. When you’re brushing this on, you know it’s grabbing that finish. And if I was using even latex paint that was “rated for metal,” there is no way that that stuff would stick like the oil-based paint does.
I was also refinishing floors in the last month. And that’s another situation. You know, when latex-based urethanes came out, I figured, “Hey, let me give it a try.” Oh, that was a huge mistake. I’m telling you, in 6 months, I was staring at raw wood on the floor where it wore right through. So I would never use a latex urethane.
And then lastly, primers. Now, we’ve been painting our basement walls and we have an old, brick house. And there’s a lot of history there, over a hundred years. And I noticed after I used DRYLOK, which I thought was going to take care of all of this, that I was seeing water stains – old water stains but sort of that rust color – come right through the DRYLOK. And I was kind of annoyed by that. I had to try a second coat; it didn’t do anything.
So, then, I got the very best latex primer. New, high-tech stuff. It was supposed to do everything from block walls to kitchen cabinets. I put that on, nothing. It came right through. You know what finally fixed it? Oil-based, basic B-I-N 1-2-3 primer. Put that on, one shot, gone forever. So there are situations like that where you just have to use the oil. And you shouldn’t really freak out over the cleaning on it, because it’s just not that hard once you get used to it.
LESLIE: Well, yeah. And you have to make sure that you’re cleaning the brushes in the right way and that you’re using the right brushes for the right product. There definitely is one product for an oil-based cleanup and one product for a latex. Same with their brushes. So you’ve got to make sure so that you’re extending the life of everything.
TOM: What I do is I – when we have soup in my house, I always save the soup cans because you don’t get tin cans too often anymore.
LESLIE: Right. True. That’s very true.
TOM: They happen to be the perfect width for soaking a brush. And I just put some paint thinner on the brush, let it soak for a bit, then I squeeze all of that paint thinner and old paint out of it. And then I stick it in another container filled with 100-percent Simple Green. Not diluted, even though it’s a concentrate. Just Simple Green. Leave it overnight, rinse it out and it is absolutely perfect. It’s fresh, it’s flexible, it works great. And you don’t end up throwing the brush away which, unfortunately, is what happens when people don’t really clean them well.
And by the way, here’s another little trick of the trade if you’re working with oil-based paint or rollers. I did this when I was working on the floor, because I had to do another coat the next morning and I didn’t want to have to put a new roller on. I wrapped it up with some wax paper and I stuck it in the refrigerator in a bag.
LESLIE: Oh, that’s interesting. Because I usually will do Saran Wrap or a plastic bag, from before you could get them at the grocery store but for latex paints. But I didn’t realize you could do something similar. And why the refrigerator?
TOM: Because it stops it from evaporating. It’s cool, it’s damp. It doesn’t dry out. And it was perfect. The next day, I unwrapped it, put it back onto the painting pole, got the roller going again and it was perfect. I didn’t lose a half-a-second. Otherwise, I would’ve had to spend quite a bit of time cleaning that out and then, course, setting up and doing it again. So, this way, it was done in one step, really.
LESLIE: That’s great. I even put the roller pans in plastic bags, too.
TOM: Oh, to save those for the next day. Yeah, why not?
LESLIE: If I’m coming back to it, I might as well.
TOM: Exactly.
It looks like we’ve got some folks that have sent questions in via The Money Pit app. Leslie, who’s first?
LESLIE: The Dales family has written in. I love it when a family gets together on a home improvement project. And they say, “We have a guest fireplace in our family room that is controlled by a mechanical thermostat on the wall. Lately, that thermostat has failed to turn the fireplace on. I’ve made sure that the thermostat is clean and adjusted properly but what else could be causing this?”
This is always tricky. I feel like it depends on where this thermostat is and how it’s going to function, right?
TOM: Oh, it absolutely depends on where the thermostat is and where other heat sources are around it. Very often, we’ll hear about a house thermostat that is in view, so to speak. It’s visually connected. There’s no walls or anything between it and a fireplace. And when the fireplace is on, the house thermostat thinks it’s 90 degrees in the house and really it’s 60 degrees in the house, so it never really comes on. So you – the positioning of that thermostat is really important.
The other thing that you could do is try to run the heat of that thermostat so – run it all the way up into the 80s, way higher than you normally would have it. And see if, by turning it up, it has the gas fireplace actually come on. Because that would mean that it needs to be recalibrated. And that’s something that you could do yourself, probably. But another way to test that is to put another thermostat or another thermometer, I should say, next to the thermostat and see if it syncs up with whatever that temperature is.
And so, if it looks like it needs to be recalibrated, most of these thermostats can be recalibrated using a simple calibration screw. It’s like a small screw that’s located on a coil inside the unit. I mean different thermostats have different techniques, so you might want to just sort of Google the instruction manual for your particular thermostat before doing it. And if none of that works, you could try replacing the thermostat or just contact your service company, because it could be a problem with the control circuit in the fireplace itself.
But let’s get that done now so that by the time those chilly evenings start up again, you’ll be good to go with a warm fire.
LESLIE: Alright. Next up, we’ve got Suzanne who writes in saying, “When we put water in the bathtub to recaulk, how long do you leave that water in there for?”
TOM: Oh, that’s a good question. So we should probably explain because she didn’t really mention the top half of that, which is we suggest, if you’re going to caulk your bathtub, is to get rid of all the old caulk and then fill that tub up with water. And the reason is because it gets heavy. It kind of does the same thing it does when you stand in it: it sort of stretches and sags down. And while it’s heavy, then you recaulk and you let that caulk dry.
So the answer to your question, Suzanne, is as long as it takes for the caulk to dry, which is usually overnight.
Then you let the water out. That tub will come back up and compress and that means that it’s going to last a lot longer because now when you get in and out of that tub, you’re not sort of stretching that tub wall down and causing that caulk to pull away from the tile above.
So the answer is you leave that tub filled with water until the caulk dries. Then you can drain it and you’re good to go.
LESLIE: Alright, Suzanne. I hope that helps. Remember, eventually, you do have to drain it. Don’t go swimming in that bathtub. Get new water when it’s time to actually use it. But it’s a good trick of the trade.
TOM: This is The Money Pit Home Improvement Show, on air and online at MoneyPit.com. Hey, guys, thanks so much for spending a little part of your day with us. We hope we’ve given you some good ideas on tackling projects around your money pit. If you’ve got questions, remember, you can reach us pretty much 24/7 when you send in your questions with The Money Pit app. Just go to MoneyPit.com/Ask. That’s MoneyPit.com/Ask. We try to get those – to those questions first before any other questions that are sent in, because it goes right into our production studio.
So, we hope that we’ve been able to help you with those projects. It’s spring, so we know there’s a lot more to get done. You can count on us to help you do anything that you’d like to accomplish to make your home the dream that you want it to be.
I’m Tom Kraeutler.
LESLIE: And I’m Leslie Segrete.
TOM: Remember, you can do it yourself …
LESLIE: But you don’t have to do it alone.
(Copyright 2022 Squeaky Door Productions, Inc. No portion of this transcript or audio file may be reproduced in any format without the express written permission of Squeaky Door Productions, Inc.)


Leave a Reply