In this episode…
As we move closer to spring, we move closer to spring storms which can bring on MOLD! But is getting rid of mold a DIY project or one that requires the specialized skills of a Pro? The answer is – it depends. We’ll share DIY tips to help clear the air, just ahead. Plus:
And with all the concerns now about viruses it’s a good time to think about the products we to disinfect our homes, because all disinfectants are not created equal. We’ll share tips on a product that is hospital grade and earth friendly.
And if you are planning some for some early Spring plants, mulch is a great insulator – but put on too much, and you’ll suffocate the growth. We’ll walk you through the best practices, in a little bit.
Plus, answers to your home improvement questions, should you purchase a service contract for your water heater, how to remove wall paneling, repairing a burn in countertop, building raised beds, choosing an efficient AC unit, clearing drains of clogs.
Read Transcript
TOM: Coast to coast and floorboards to shingles, this is The Money Pit Home Improvement Show. I’m Tom Kraeutler.
LESLIE: And I’m Leslie Segrete.
TOM: And we’re so glad you’re here. What are you working on this weekend? If it’s your house, your home, your apartment, your condo, you are in the right place because that’s what we do. We’re here to help you get those projects done right the very first time out of the gate. So, think about what you’d like to work on and call us, right now, at 1-888-MONEY-PIT.
Coming up on today’s show, as we move closer to spring we also move closer to spring storms, which can bring on mold. But is getting rid of that mold a project that’s DIY or do you need a pro? The answer is: it depends. We’re going to share some DIY tips to help you clear the air, let you know what you can tackle, what you can’t tackle without making yourself unsafe, in just a bit.
LESLIE: And with all the concerns about viruses right now, it’s a good time to think about the products that we’re using to disinfect our homes, because all disinfectants are not created equal. We’re going to share some tips on a product that you can mix yourself, that’s hospital-grade and Earth-friendly.
TOM: And are you planning for some early spring plants? Mulch is a great insulator. You’re going to need it. But if you put on too much you’ll suffocate that growth. We’re going to walk you through the best practices, in just a bit.
LESLIE: Plus, we’re going to fill your garden shed with some new tools this hour, because we’re giving away two great tools from Centurion. We’ve got their Premium Bypass Pruner and Anvil Lopper. They’re both so durable that they’ll be super useful this spring and for many springs to come.
TOM: Those tools are worth over 50 bucks but they’re going out to one listener drawn at random. Make that you. Call us with your home improvement question now at 888-MONEY-PIT. That’s 888-666-3974. Or you can post your question at MoneyPit.com.
So let’s get to it. Leslie, who’s first?
LESLIE: Joe in Georgia, you’ve got The Money Pit. How can we help you today with tankless questioning? What’s going on?
JOE: Based on the high capital cost and the fact that natural-gas prices seem to be at an all-time low, what is the return on investment or payback period and does the federal government still offer tax credits? Second part of that question, is the annual maintenance contract that the installers offer really needed?
TOM: OK. Well, first of all, the tax credits are less and less today. I believe there are some still, some small tax credits.
I do like tankless water heaters for a number of reasons, though. First of all, they last a lot longer than a standard, tanked water heater. Secondly, they’re really energy-efficient and you never run out of hot water. Very important to me since I’ve got two teenagers in my house. If I’m the third one to get in the shower, forget it; it’s not going to happen. So I like the fact that they never run out of hot water.
And I think if you compare the cost of tankless against not a standard, inefficient, tank water heater but a high-efficiency, tanked water heater, you will find that the difference is not that far apart.
The contractor’s service contract? Look, you need to have this thing serviced like anything else. I don’t think it needs a big, expensive contract. What it’s typically going to need is a yearly service. And so I would have to probably judge that against what this contract covered. If the contract covered all of my gas appliances in the house and I felt like it was reasonable, I might do that only for the reason that we know that these gas appliances need service, because they burn dirty and they eventually have to be cleaned. But I will say that these newer, more efficient ones need a lot less maintenance than the older, inefficient ones ever did.
JOE: OK. I guess what I’m hearing out there on the installers is these are stand-alone service (audio gap) and if you compare that to a traditional hot-water heater, you typically don’t see any service required. And I think the capital is maybe 10x difference. It may be $800 for a – maybe 900 for a hot-water heater and you’re looking, I think, upwards of $4,000, I should say.
TOM: Yeah, that sounds a little crazy. I’m not seeing that. What I’m seeing is if you bought a high-efficiency, tank water heater, it might be 1,500 bucks. And if you bought a tankless water heater, it might be two grand or something of that nature. I’m sure you’re going to run into contractors that are really driving the prices up and trying to charge you crazy money for service contracts and things like that. You just might not be talking to the right guys, Joe.
JOE: You endorse any particular manufacturer?
TOM: Yeah, there’s a bunch of good ones out there. Rinnai makes a good one. Rheem – R-h-e-e-m – makes a good one. I’d take a look at those. We’re talking about gas, right?
JOE: Yeah, natural gas.
TOM: Yeah, I would take a look at Rinnai and Rheem.
JOE: OK. Excellent.
TOM: Two good brands. OK, Joe?
Good luck with that project. Thanks so much for calling us at 888-MONEY-PIT.
LESLIE: Heading to Minnesota where Beth is doing some work in the bathroom. And you want some toilet help. What’s going on?
BETH: Toilet kept running. The water kept running into it, so I decided to install a new fill valve and flapper. And I measured everything and I followed the instructions and I did solve the original problem. But now I developed a new one. When I flush it, the water goes into the bowl OK, except now anything in the bowl goes to the top of the bowl, almost to the rim. And then when the tank itself is filled, then the bowl goes down slowly and it flushes but then it only leaves a little water in the bowl.
So I called the manufacturer and talked to them. He said, “Well, try plunging it because it might be a clog.” So I did that. I tried hot water and bleach to see if I could get that if it is a clog. And nothing has worked. And I don’t know what to do. I give up.
LESLIE: I mean that’s what happens, typically, in a clog is it’ll fill to the top and then the tank will fill and then it’ll – the suction force will just bring everything down.
TOM: Yeah. And the one’s with the trickiest to diagnose is when you have a partial clog where you have some water that’s getting past but not a lot. So I wonder if something is lodged in either the trap of the toilet or the line beyond that. And really, the next step is to have a plumber come out and do a drain-cleaning on that.
I’ll tell you a funny story about how this happened when my kids were younger. We had a toilet that was clogged in a downstairs bathroom and I – outside this bathroom, we had a willow tree. And I knew that the willow-tree roots used to get into the plumbing line, so I immediately assumed that that was what it was. And I went outside and dug up my yard and found the pipe cleanout, which was a couple of feet below the surface. And I snaked one way and snaked the other way and I couldn’t find any clog.
So, I thought, “Well, maybe it’s between the pipe break and the toilet.” So I decided to pull the toilet off. And don’t you know that when I did that, I turned it over and noticed something blue in the bottom of the toilet. And of course, you’re not supposed to have anything blue in a ceramic toilet. It turned out to be a little toy telephone that one of my kids had dropped down there that was letting just enough water through to trick us.
And so you never know what’s going to be in there. And if you have a partial obstruction like that, that could explain for what’s happening.
BETH: OK. Well, the only thing I can do then is to get a plumber?
TOM: Yep. You don’t want a carpenter, that’s for sure.
Beth, thanks so much for calling us at 888-MONEY-PIT.
LESLIE: Jay in North Carolina is dealing with a supreme oopsie on a countertop. What happened?
JAY: Well, I don’t know. I purchased the property about a year ago and actually, I have my son living there. He’s graduating from a college in the Raleigh area and he’s living in that – in the apartment – and it’s wonderful. The only problem is there’s a burn hole on the laminate countertop.
TOM: Now, you know, Jay, there’s a story behind that but of course, your son hasn’t – yeah, your son hasn’t coughed it up yet, I’m sure.
JAY: No, well, no, no. This was before he moved in but hey, it’s OK.
TOM: Alright.
JAY: My point is it’s right out in the middle of the thing, so it’s this big burn hole. And I was just wondering, is there a way I can cut it out and then put another patch of laminate over it? It’s in butcher-block style.
TOM: Well, the good news is that you could do a built-in countertop and – a built-in cutting board or a built-in piece of marble. And if you do it in something that’s complementary – look, it may be a little bit weird to have a cutting board on the finished side of the countertop like that but it’ll certainly look like it was always intended to be there and you’ll get away with it.
The other thing that you could do is you could relaminate the countertop. You can’t fix the burned surface because the plastic’s been damaged, so that’s not something that’s possible. You can’t cut in a new piece of laminate because it’ll be patchy and it’ll look lousy. What you could do is you could put a new piece of laminate across the entire surface. So you’re keeping the structure of the countertop but you’re gluing a new piece of laminate on top of that.
Installing a laminate is not that difficult if you have some basic DIY skills. You would scuff up the original surface, you would apply contact cement to both the new laminate and the old laminate. You would lay it down and you would press it from the middle on out to get out any air bubbles and rub it all out. And then with a router and a special laminate-trimming bit, you would trim the laminate edge very clean to the existing edge of the top and you’d have a brand-new laminate surface when you were all done.
It’s best if you can take the old top off temporarily to do this so that you don’t have to work around walls and that sort of thing. But it’s not hard to do and that’s one way to have to – to get it repaired without having to physically replace the whole thing. Does that make sense?
JAY: Excellent idea. Thank you so much. Appreciate your help.
TOM: Thanks so much for calling us at 888-MONEY-PIT.
Well, now that it is almost spring, I’m sure that you might appreciate having a couple of extra spring gardening tools in your shed or your gardening bucket or your garage or your house or your apartment. Whether you’re a container gardener or a big, go-all-the-way gardener, you could probably use these tools we’re giving away this hour from Centurion Brands.
We have got the large-to-small grip Premium Bypass Pruner, which is pretty cool because it adjusts, basically, to the size of your grip. There’s a switch and it flips and it’s just really neat. And it handles branches up to 1-inch thick. It’s perfect for a whole bunch of different cutting and pruning jobs. It’s got high-carbon blades to stay sharp longer and they’re Teflon coated. Don’t you hate when you clip something and the blades gets stuck and the thing doesn’t open again? That’s not going to happen with this new tool from Centurion Brands: the small-grip Premium Bypass Pruner.
They’re also giving us an Anvil Lopper to give away, so that package is worth 50 bucks. Going to go out to you if you pick up the phone and call us and we draw your name at the end of the show. The number is 1-888-MONEY-PIT. Give us a call with your home improvement question. We’ll toss your name in The Money Pit hard hat and might be sending that gardening-tool package to you.
LESLIE: Carol in Arkansas is on the line with a septic-system question. How can we help you today?
CAROL: OK. I have a septic system and we’ve had a lot of rain here. Oh, probably the last maybe three months or so it’s been a lot of rain. And I’m in the kind of the rice land of Arkansas. It’s very wet ground. OK.
So, anyway, I was having trouble. When I would flush the commode, it – now, it never ran over, which I’m very grateful for. But the water wasn’t going down, OK? And I mean it would go down eventually but maybe take 20 minutes or more.
TOM: OK. Does everything else in your house drain normally? Is it only the commode that you’re having a problem with?
CAROL: It’s, well, the commode and the sink in the bathroom.
TOM: But do we know that it’s the septic system? There could be an obstruction in the drain and that’s the first thing I’d look at.
CAROL: OK. I did have some fellows out and – a reputable company – and they did pump out 120 gallons.
TOM: Well, that’s – but you’re always going to have 120 gallons. That septic tank fills up with water, it overflows into the field. So, pumping out 120 gallons doesn’t really tell me anything. What I want you to do is to have the lines checked, because I suspect there’s nothing wrong with your septic, that you may have an obstruction.
Let me tell you a story about a guy who had a toilet that was having a slow-drain problem. This guy was having a party and was doing this big cleanup for – before all the relatives showed up the next day. And so the toilet backed up and so he figured out that he thought it was a root problem.
And so he got up early the next morning and dug this huge hole in his ground to get down to this pipe and then snaked it one way, snaked it the other way. Couldn’t find any roots in the way. Went back into the bathroom, decided that the obstruction had to be between the hole that he had dug in his ground and the bottom of the toilet. And so he took the toilet tank off of the floor and looked down into it and tried to snake that out and couldn’t find a problem. But in the process of taking the toilet off the floor, he happened to look into the bottom of the toilet and noticed that there was something blue there.
Now, there’s nothing that’s really supposed to be blue that’s in a toilet. It turns out that his darling son had dropped a toy phone down the toilet and that’s what was slowing the whole thing down. So, this guy had dug up his whole yard, took his toilet apart, all to try to find out what was causing this problem and hurried to get it done before all the relatives showed up. And it turned out to be a toy that was stuck in the toilet itself.
So, I’d say that guy was a real idiot and that guy was me.
CAROL: Oh, OK.
LESLIE: I’m like, “I’ve heard this story before.” I’m like, “Why do I think this was you, Tom?”
TOM: I was completely wrong on why I thought that – I figured I was smarter than the average homeowner and knew that it – thought it was the willow tree that had clogged the pipes. It had nothing to do with that.
CAROL: Alright.
TOM: It was just a simple toy that was stuck in the crux of the toilet that I couldn’t see. And we finally got that off, put the whole thing back together, threw the dirt back in the hole and then headed off to get ready for the party. So you never know why your toilet is clogging.
CAROL: Well, that’s true.
TOM: And I wouldn’t always think it’s the most expensive possible thing, which is your septic system. Have the lines checked.
CAROL: OK.
TOM: Who knows? And maybe you’ll find something that got stuck in there.
CAROL: Alright. Thank you so much.
TOM: You’re welcome. Thanks so much for calling us at 888-MONEY-PIT.
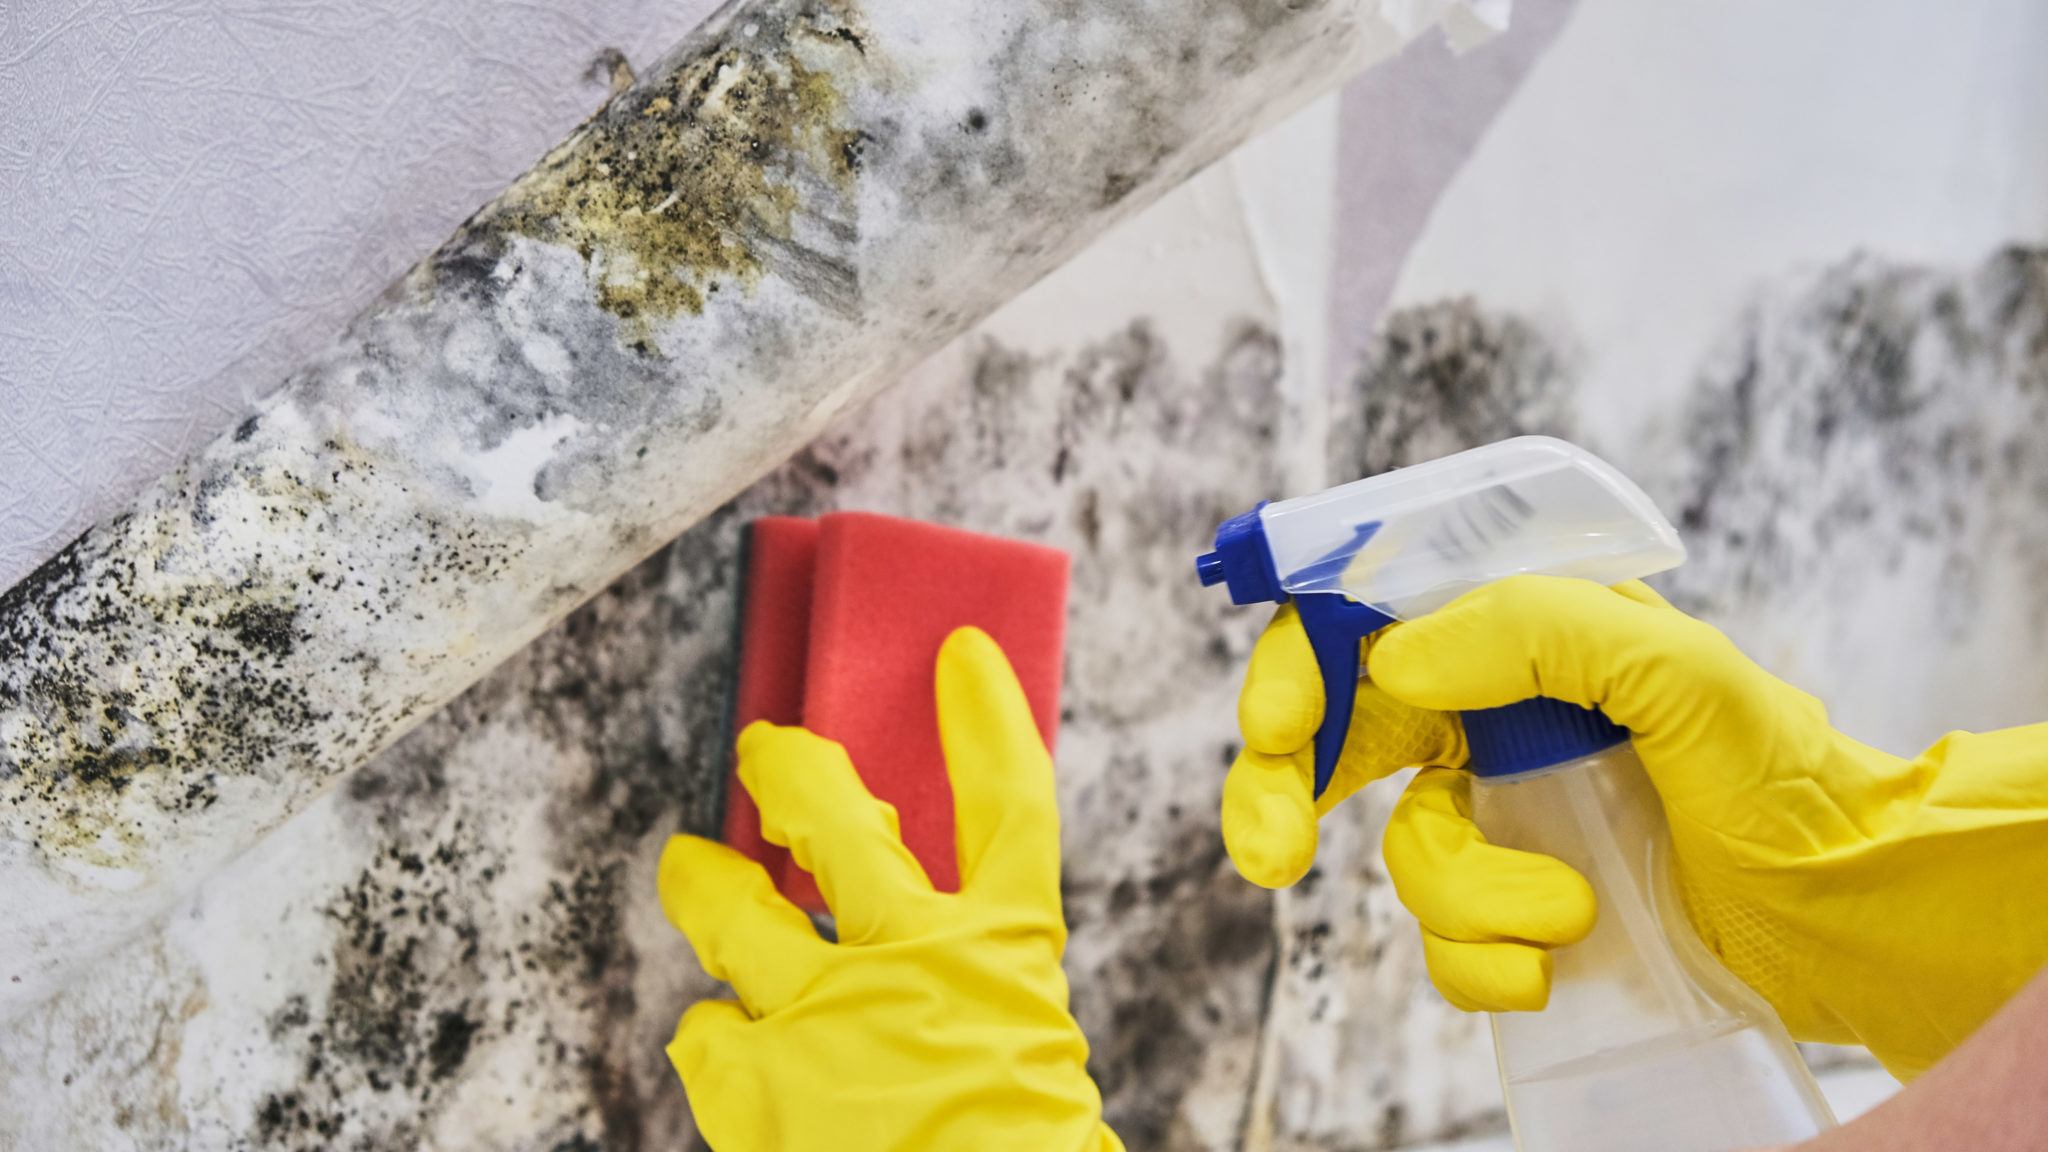
LESLIE: Well, finding mold in your home can be pretty scary. But while many molds are generally harmless, some can contain mycotoxins and can be harmful, which is why it’s smart to identify the source of the mold problem and take those steps to remove it. We’re going to tell you how, in today’s Pro Project presented by HomeAdvisor.com.
TOM: First, you need to consider this: is removing mold a DIY project or one that requires the specialized skills of a pro? The answer is: it depends. But generally, if the area is small enough, mold removal can very well be a project you can do yourself. So, here’s what you need to know to get started.
Before you think about whether to fight the mold battle yourself, it’s important to understand that enemy. Mold does tend to thrive in moist and damp environments. But those mold spores? They can spread very quickly and easily through the air.
Now, there are a number of ways to treat or go about mold removal but it’s important to know that the EPA recommends hiring a pro if the affected area is more than 10 square feet. So, roughly three by three, maybe a bit more but maybe a bit bigger in size.
LESLIE: Now, if you are a DIY-er who wants to clean up a moldy problem, here are some tips that you should follow.
Remember, you’ve got to always wear proper safety equipment, including eye protection, masks and non-porous gloves. Removing mold in non-porous materials, such as tiles, glass or countertops – this is what you’re going to use, alright, guys? You want bleach and water. So, mix at a ratio of 1 cup bleach to 1 gallon of water. Apply with a spray bottle or a sponge. You want to let it dry. Do not rinse it off unless it’s an often-used surface or it’s a spot that your kids or pets have access to.
Now, if you’re trying to remove mold from a porous material, you want to use Borax for that. And you need to mix 1 cup Borax to 1 gallon of water. Apply with a spray bottle or a sponge, scrub clean, wipe away any excess moisture or mold particles and then allow it to dry.
TOM: Now, after you’re done cleaning your mold, be sure to prevent future mold. Check out our post, “10 Tips on Having a Mold-Free Home”. It’s online, right now, at MoneyPit.com.
LESLIE: And that’s today’s Pro Project presented by HomeAdvisor.com. With HomeAdvisor, you can get matched with top-rated home service pros in your area and book appointments online, all for free.
TOM: No matter the type of job, HomeAdvisor makes it fast and easy to hire the best local pros.
LESLIE: Jeff in Nebraska is working on a vegetable garden. How can we help you?
JEFF: I want to make a raised garden bed and use wood logs. But I don’t know what kind of – what the best wood is to use, so I’m not having to – so it doesn’t get eaten away and I have to reuse or redo it every couple of years.
LESLIE: So when you’re saying wood logs, you want something that looks more natural?
JEFF: Yeah. What I want to do is raise the bed up and use it kind of as a border.
LESLIE: Right, I’ve got that. But you want something more decorative rather than just pressure-treated lumber: boards that really do serve the purpose of containing the wood and raising the
bed?
JEFF: Something a little decorative.
TOM: First of all, you want treated wood. Because if you have untreated wood, it’s going to rot. In terms of your options on treated wood, the most common option would be to use a pressure-treated tie.
Now, ties are available in either 4×4 or 6×6 and they look pretty rustic. And when you put them down, they’re going to be kind of greenish and they’ll look unnatural. But give it a few months, it’ll start to gray out and blend in.
LESLIE: Mm-hmm. And dry out, even.
TOM: And dry out, yeah, and blend in with the surrounding area. That’s going to be the easiest, most cost-effective way to go. And you can pick up those ties at home centers. And they’re really not very expensive, because they’re designed to be decorative and sit in the ground. They’re not – it’s not the same kind of pressure-treated lumber you might use if you’re building a retaining wall or something of that nature. It’s basically just designed to be a border surround for a garden or a pool or something like that.
JEFF: OK. When I put it down, am I going to have to – say, if I’ve got two or three stacked up, am I going to have to drill through them and spike something into the ground?
TOM: Good question. Now, if you’re going to have two or three of them stacked up, you’re going to – what you’re going to want to do is obviously alternate the joints so that you have one long one go across two smaller ones, you know what I mean?
JEFF: Yeah.
TOM: And then once it’s all done, you can predrill and put in some long – they have 12-inch spikes that you drill through those. So you get a long drill bit, predrill it and then put a couple of spikes and that will hold it all together nice and neat. But you will also find that the weight of them – the sheer weight and the strength of them – is pretty sturdy by itself. But if you want to really tack it together, you can do that with long spikes. Or you could toe-nail it on an angle with Number 12 common nails towards the base, just to kind of keep everything in place.
JEFF: OK. So, if I just nail them together and then add the dirt up against them, they shouldn’t go anywhere?
TOM: That’s right. They’re pretty sturdy.
JEFF: OK. Well, that answers all my questions. Thank you very much.
TOM: You’re very welcome. Thanks so much for calling us at 888-MONEY-PIT.
LESLIE: Well, with all the concerns about viruses these days, it’s important to keep in mind ways to reduce viruses and other germs that can land on surfaces in your home. Now, two terms we often hear about when it comes to this are disinfectants and sanitizers but they mean different things. Now, disinfectants are antimicrobial agents designed to inactivate or destroy microorganisms on those solid surfaces. Basically, they’re going to kill whatever they come across. Sanitizers, on the other hand, are products that both clean and disinfect.
TOM: Well, that’s right. And that’s why, in our house, we use the JAWS Disinfectant Cleaner, because it does it all. It cleans, it deodorizes all those surfaces on floors and walls and stainless steel: countertops, appliances, you name it. Even doorknobs. That’s one spot in the house which, if you think about it, is probably one of the germiest because everybody’s touching it. And it can get pretty grimy.
But most importantly, we use it because it’s a hospital-grade disinfectant, and it’s going to work against a broad spectrum of bacteria and viruses. And it’s going to inhibit the growth of mold and mildew, too.
LESLIE: Mm-hmm. And you know what? The product is also environmentally friendly. JAWS stands for Just Add Water, because it’s sold as a concentrate.
Now, when you buy the product you’re going to get a solid-plastic bottle and a refill pod. You just fill the bottler with water and then insert the pod, which releases the concentrate. It’s a great way to avoid having to buy heavy bottles of cleaners. And it’s a lot easier on the environment because you’re not throwing away a ton of plastic bottles.
TOM: Check out JAWS Disinfectant Cleaner and the full line of JAWS products at JAWSCleans.com. And if you want to save some money, just use the promo code MONEYPIT at checkout for a big 25-percent discount. That’s JAWSCleans.com, promo code MONEYPIT.
LESLIE: Anastasia in Colorado is on the line with a bathtub question. What’s going on?
ANASTASIA: Well, I have a tub drain. Trying to get that out – the drain out because it’s – I can’t put a plug in it now. So, what I’ve tried is the drain-remover tool or it’s a plug wrench. And then I also tried that flaring tool to get it out. And neither one of them works, because the little crosshairs in the bottom aren’t still in there, because it’s from 1960 tub.
TOM: Oh. So you have nothing to grab onto, is that what you’re saying?
ANASTASIA: Yeah. So, I’ve tried to get WD-40 in there, underneath the tray, but I can’t reach under there. And then I could crawl under the house but I don’t want to do that. So I was trying to think of a better way of getting it out.
TOM: If I understand it correctly, this normally would unscrew but what you’re driving – what you’re trying to grab onto is either stripped or completely gone.
ANASTASIA: Correct.
TOM: I have only two suggestions for you. Number one is to hire a plumber, which is probably – you didn’t need me to tell you that. But I will say that the plumbers deal with this kind of thing all the time. And secondly, if I was a plumber and I was faced with this and there was absolutely no other way to get this off, I would probably drill it off and chisel it away, which you could do with a cold chisel.
And it’s not a pleasant process and it’s time-consuming and kind of a pain in the neck but when all else fails and you’ve just got nothing to grab onto, that’s a way to get it done.
ANASTASIA: Alright. That’s what I thought but I thought you might have a little trick up your sleeve.
TOM: But that’s a trick but it’s a lot of hard work. Anastasia, thanks so much for calling us at 888-MONEY-PIT.
Well, now that it’s warming up, it’s feeling a bit more like spring, Leslie. And we’re going to head outside and tackle some gardening. We’ve got a great set of tools to give away, don’t we?
LESLIE: That’s right. We’ve got, up for grabs, from Centurion Brands the large-to-small grip Premium Bypass Pruner. It’s great because depending on your comfort level when you’re using tools around the yard – you know, I might like something that has a smaller grip. Tom likes something that feels larger in the hand. This, with the flip of a switch, will allow you to have that comfort while still tackling those projects around the garden.
It’s got a high-carbon blade so it stays sharper longer. And the blades are also Teflon-coated, so smooth cuts on those branches without sticking. And we’re adding in an Anvil Lopper. So you’ve got two premium tools to help you with all your spring – even your summer and fall – yard work.
TOM: This package of Centurion products is worth over 50 bucks. Going out to one listener drawn at random. Make that you. Post your question to MoneyPit.com or call us, right now, at 1-888-MONEY-PIT.
LESLIE: Now we’ve got Frank in North Carolina on the line who’s dealing with a flooring project. Tell us what you’re working on.
FRANK: Yeah. I had some flood damage to a building and I had ¾-inch waferboard in it and I replaced it with ¾-inch plywood. I wanted to put down wood-plank flooring and I’m wondering if I need to put down underlayment before I put down the wood plank or just use adhesives and nails on it.
TOM: You want to put down prefinished or raw wood-plank flooring?
FRANK: Raw.
TOM: So you want to put down unfinished wood flooring? Well, typically, all you do is lay down rosin paper. You know what that is?
FRANK: Rosin paper, OK.
LESLIE: It’s like that pink roll of paper that you find in – it’s usually in the flooring or the roofing section, somewhere in the home center.
TOM: Yeah, just because it gives you a clean surface to start on. And then you’ll nail right through that. You don’t glue the flooring down; you nail it down with a – you can rent a nail gun – a flooring gun – so you get the nails in. Because the nails have to be driven at an angle into the tongue of the floor. So, you rent a nail gun and go from there.
FRANK: OK. Thank you so much.
TOM: You’re welcome. Good luck with that project. Thanks so much for calling us at 888-MONEY-PIT.
LESLIE: Well, if you’re getting ready to plant some new trees or bushes this spring, adding mulch can both protect its roots and prevent weed growth.
TOM: Yep. But there can be too much of a good thing when it comes to mulch, at least once applied the wrong way. So, here’s a few things to think about.
First, you want to avoid creating what we call a “mulch volcano”: layers of mulch that build up into a volcano-looking dome that totally covers the tree’s root flare. Now, there’s another word to understand: root flare. That’s when the trunk of the tree sort of swells outward and transitions into the root system. You don’t want to cover that because when mulch is piled above that root flare, the primary root system can be suffocated. And over time, that lack of oxygen to those roots can really cause bark to fall off and eventually kill the tree.
LESLIE: Now, this can also happen when you apply mulch year after year and you just sort of let it build up.
Well, if you’ve already got a mulch volcano at home, here’s what you need to do to fix it. You need to remove the mulch until that root flare is visible at the ground level. Then you’ve got to check for secondary roots that have grown upwards over the root flare and into that mulch volcano. If you find it, it does indicate that the primary-root system is suffocating and that can kill the tree over time. Now, you need to cut away those secondary roots that have grown over the tree flare.
TOM: So, if you want to apply mulch the right way, don’t just dump a wheelbarrow full of mulch. Use your hands so you can gauge the depth. Don’t put on more than about 2 inches of mulch total. And whatever you do, don’t cover that root flare. See? Now you learned a new word and how not to apply too much mulch.
888-666-3974. Just another piece of useless knowledge, courtesy of The Money Pit.
LESLIE: Diane in Arizona needs some help with air conditioning and being in Arizona, you’re going to need some air conditioning. How can we help you?
DIANE: I had a settlement with the insurance company, because we had a storm here and I got – my air conditioner got damaged and it was 10 years old. And it’s a central air. I have electric for air conditioning and for heat, we have gas. And when – I do not have a computer, so I hear about different units like York, Goodman, Trane, a Lennox. I don’t know which ones are good, which ones are bad, which ones last longer.
TOM: First of all, are you only replacing the outside condensing unit or are you also replacing the furnace and the air handler or any of the inside parts?
DIANE: Everything.
TOM: Everything. OK. Because it’s important for maximum efficiency that what you put outside matches what you put inside the house. Because they have to work together or you don’t get the same efficiency.
I think that Trane is a very good brand to start with – T-r-a-n-e. Good-quality product. Lots of great options and very energy-efficient.
It’s going to be real important, Diane, that you choose one that is ENERGY STAR-rated. I’m sure they all are with Trane but even if you go to a different brand, if you compare ENERGY STAR-rated units against other ENERGY STAR-rated units, at least you have a basis for comparison. At least you know that you’re getting the same level of energy efficiency.
But Trane is a good place to start and now is a great time to get this project done before it gets too hot.
DIANE: That’s wonderful to know, because there’s a lot out there.
TOM: Alright. Good luck with that project. Thanks so much for calling us at 888-MONEY-PIT.
Julie in Chicago wrote us on The Money Pit Facebook page. And she says, “Should you leave the washing machine door or lid open when the machine is not in use?”
Leslie, what do you do about that? You always close it?
LESLIE: I mean I always close it. I’ve always just been in the habit of closing it just because I feel like I’m going to be the first person to walk into something, you know, knock something over or the dog is going to get in it. But, having boys – boys get into everything.
TOM: Yeah.
LESLIE: Boys want to lock each other in everything. So if I leave that washing-machine door open, that is just an invitation for the big brother to lock the small brother in there. And maybe it’s a joke, but …
TOM: It’s not a cave.
LESLIE: It’s like – so, for me, with kids in the house, I’m always closing everything.
TOM: Yeah, I agree, too. We’ve always closed it. But I will say, especially with the high-efficiency machines – and maybe if you don’t have the kid problem, leaving them open helps them dry out quicker. Because one issue with those high-efficiency machines is they tend to grow some mold or moss or algae around the seal.
LESLIE: Oh, I’ve heard this.
TOM: And it kind of stinks. It can really smell, right? So if you let them dry out quicker, that’s probably less likely to happen. Maybe it’s a bit better for the machine.
But safety first. If you’ve got kids of your own or perhaps you have kids that visit, always a good idea to shut that lid, Julie. So hope that helps you out.
LESLIE: Alright, next up Andrew wrote on Facebook: “My shower keeps dripping often when we shower or when we do the laundry. The laundry is on the other side of the wall. The house is six years old. Our water bill doesn’t seem to be going up but do you have any suggestions on how to fix this?”
TOM: Yeah, Andrew, that is usually caused by what’s called the “diverter valve.” And that’s the valve that basically diverts the water once you’ve set that temperature between hot and cold for your shower. It diverts it up to the faucet – the showerhead, I should say. So, that diverter – or it could be the shower valve itself – is causing the problem.
It’s more of an annoyance at this point. It’s not really wasting all that much water, as you’ve discovered, but the repair would probably require you to contact a plumber and have that valve replaced. So, of course, that’s not inexpensive to begin with. You’re probably looking at a least $200 or $300 trip by the time you pay for even a basic part and the labor itself.
So, not to worry too much about it. Just kind of, like I said, an annoyance. If you can deal with it, then do. If not, you’re looking at a small expense to have it replaced.
Alright, next up, Stephanie writes: “Is there an online store or any local stores that will accept a photo of your rooms and give suggestions on remodeling the rooms?”
So, I think she’s asking about decorating and remodeling. Ask anybody and they’ll give you remodeling advice. Hey, we made a whole show out of that.
LESLIE: You want to ask the right people, though, Stephanie.
TOM: Right. Yeah, exactly.
LESLIE: You know, I think for photo submissions, something like that, the most that I’m familiar with – there’s a couple of websites. One is Modsy and the other is Decorist.
Now Modsy, you submit a photo and they will then 3D-render your actual room with new paint colors, new furnishings, new decorative items to be like, “Hey, this is what the room could look like from an interior-design styling standpoint and the cost of these items.” Decorist does the same. You could be like, “Hey, I like this room. How can I make my room look similar to that?”
I’m not familiar with a design service online that offers – send me a photo and I’ll say, “Knock down this wall.” But definitely a start if you’re looking for some new decorating advice. Check out those two sites.
TOM: This is The Money Pit Home Improvement Show. We are so glad you’re here. Thanks so much for spending this part of your day with us. We hope we’ve been able to help you out with some tips and ideas on projects to tackle around your house and things you need to get done or want to get done just to improve your space.
Remember, if you’ve got questions, we welcome those, 24/7, at 888-MONEY-PIT. If we’re not in the studio, we will call you back the next time we are. You can also post your questions to MoneyPit.com.
I’m Tom Kraeutler.
LESLIE: And I’m Leslie Segrete.
TOM: Remember, you can do it yourself …
LESLIE: But you don’t have to do it alone.
(Copyright 2020 Squeaky Door Productions, Inc. No portion of this transcript or audio file may be reproduced in any format without the express written permission of Squeaky Door Productions, Inc.)


Leave a Reply