Baseboards are more than just functional. While they cover the joint between the wall and the floor, they also add visual appeal and polish to your home. With plenty of styles and finishes to choose from, you’re sure to find one to match the look and feel of your home. Installing baseboard, also known as molding, may seem like a job for a pro, but with the right tools and materials, you can install baseboard in a standard 10 by 12 bedroom in just one to three hours.
Here’s what you’ll need for this intermediate-level project:
TOOLS
- Miter Saw
- Coping Saw
- Drill
- Stud Finder
- Hammer
- Nail Set, or a Finishing Nail Gun and Compressor
You’ll also need enough materials for the space you’ll be installing the baseboard.
MATERIALS
- Baseboard
- Shoe Molding
- Wood Putty
- 3D and 6D Finishing Nails
- Wood Shims (if installing baseboard before carpet)
When taking on this DIY task, be sure to equip yourself with the proper safety gear. Throughout the video, we’ll alert you regarding when you should and should not use the safety gear.
STEP ONE
Make a plan. Before making any cuts or laying any baseboard, make a rough sketch of your room, marking the measurements of your cuts in your room’s inside and outside corners. A plan will help you make the right cuts and complete the project correctly. If you’re installing baseboard before carpet, make sure you know the carpet’s thickness and leave room underneath the baseboard so it will fit.
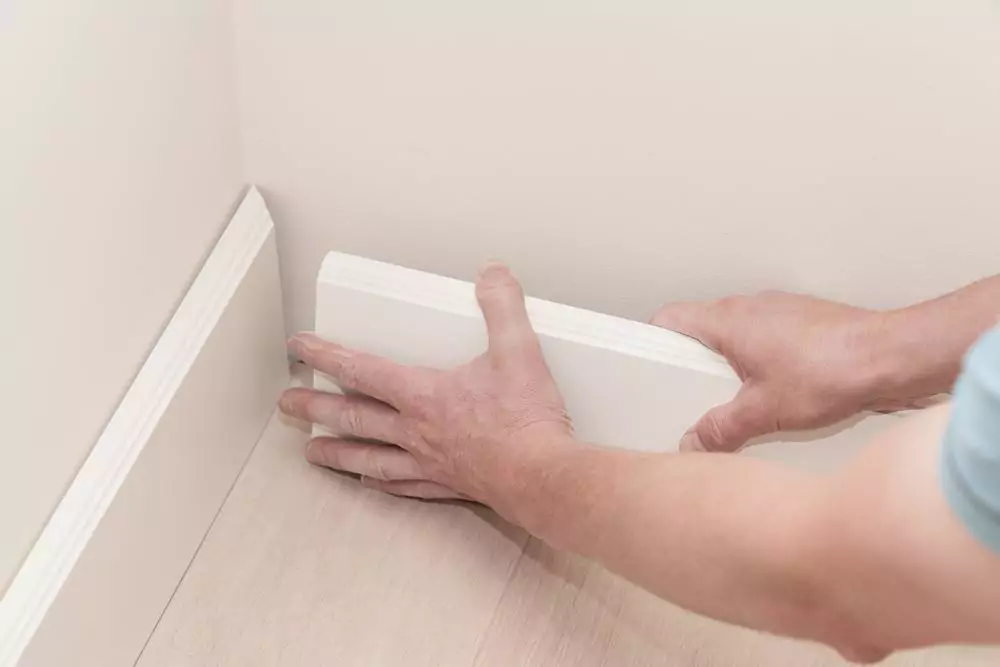
STEP TWO
Inside corner. Start by firmly pushing a piece of baseboard into the corner of the room. Use your stud finder to locate your wall studs and mark them on the wall for nailing locations. Drill pilot holes into your baseboard, securing it with 6D finishing nails in each stud. Use a nail set to tap the nail just below the surface of the baseboard, and fill the holes with wood putty. You can use a nail gun and compressor to make this project quicker and easier.
STEP THREE
Create an inside joint. Cut your adjacent baseboard at a 45-degree angle, exposing the face of the profile. Cut out the outline on the baseboard using a coping saw. Angle the saw so that you are cutting away more from the back side of the baseboard. Test the fit, and recut or trim if necessary.
STEP FOUR
Mark the corner. Mark the bottom of the baseboard where it meets the outside wall corner. Cut the end at a 45-degree angle using a miter saw. Fasten with a 4D finish nail in each corner.
STEP FIVE
Scarf joint. For longer areas, join two pieces of baseboard together by cutting them with parallel 45-degree angles. This helps hide baseboard seams and creates a more secure connection.
STEP SIX
Add shoe molding. If you’re installing baseboard on a hardwood floor or any other hard-surfaced flooring, you may find that the floor is not totally flat. Adding shoe molding allows you to hide any gaps and gives your molding a polished look. Make miter joints at the inside and outside corners of the shoe molding and fasten it. For longer areas, join two pieces of shoe molding together by cutting them at parallel 45-degree angles. Fill the holes with wood putty just as you did earlier for the baseboard.
STEP SEVEN
Finish installing baseboard. Continue laying your baseboard and shoe molding until the entire room is complete.
Congratulations. You’ve successfully installed baseboard, and you did it yourself.
Looking for great tools to help get your project done? Shop Stanley, Black & Decker and DeWALT for everything you need!


Leave a Reply